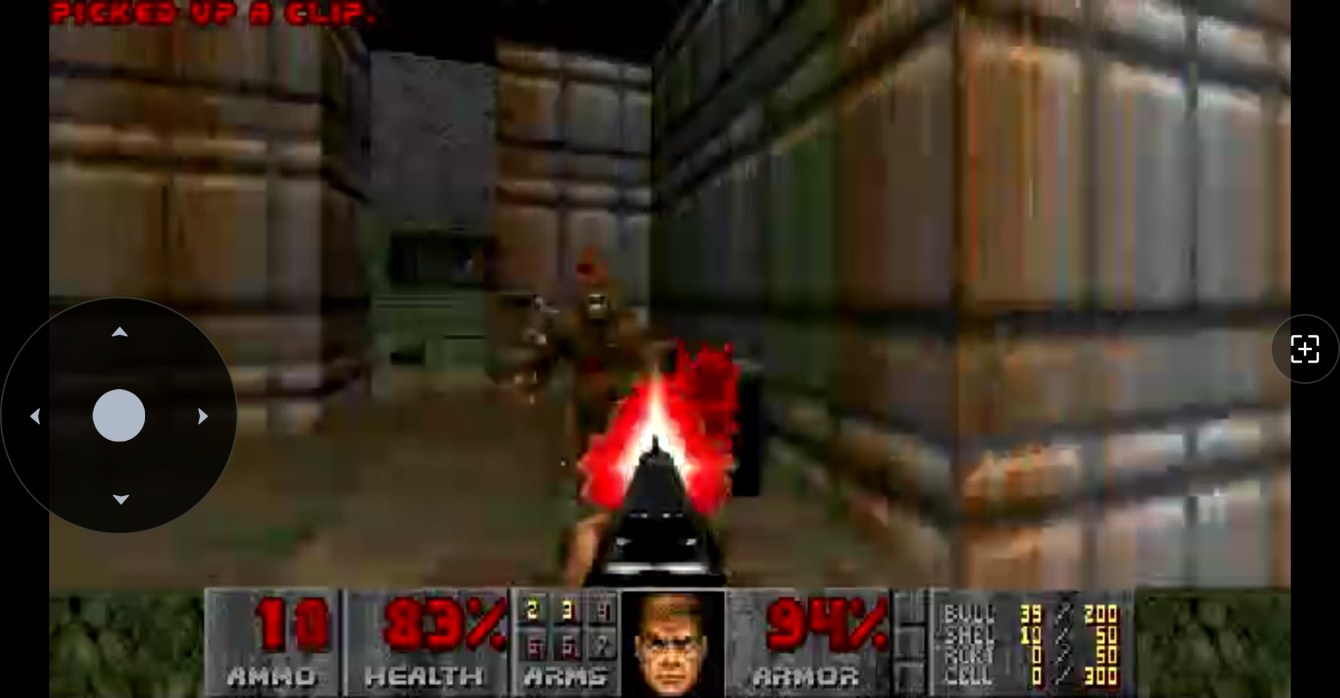
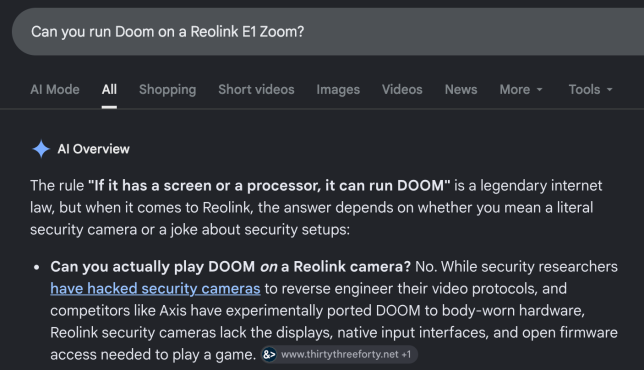
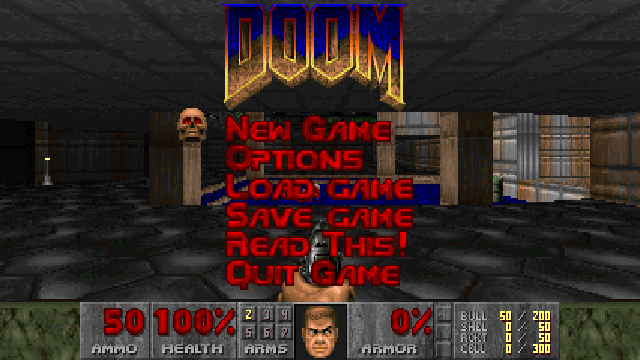
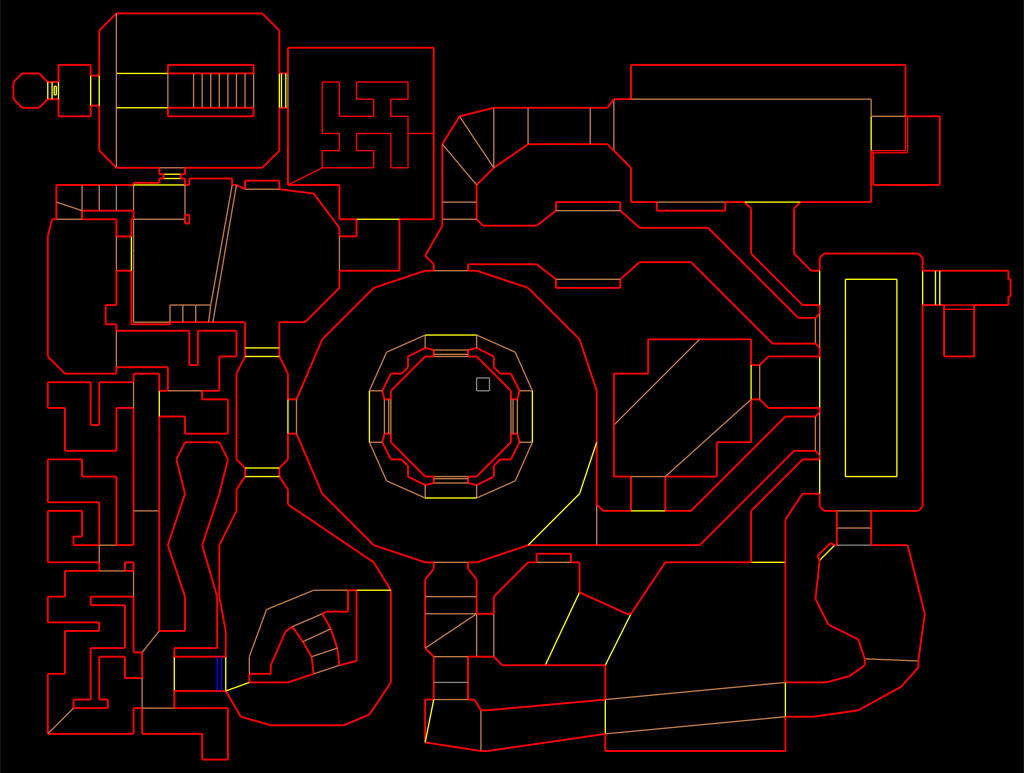
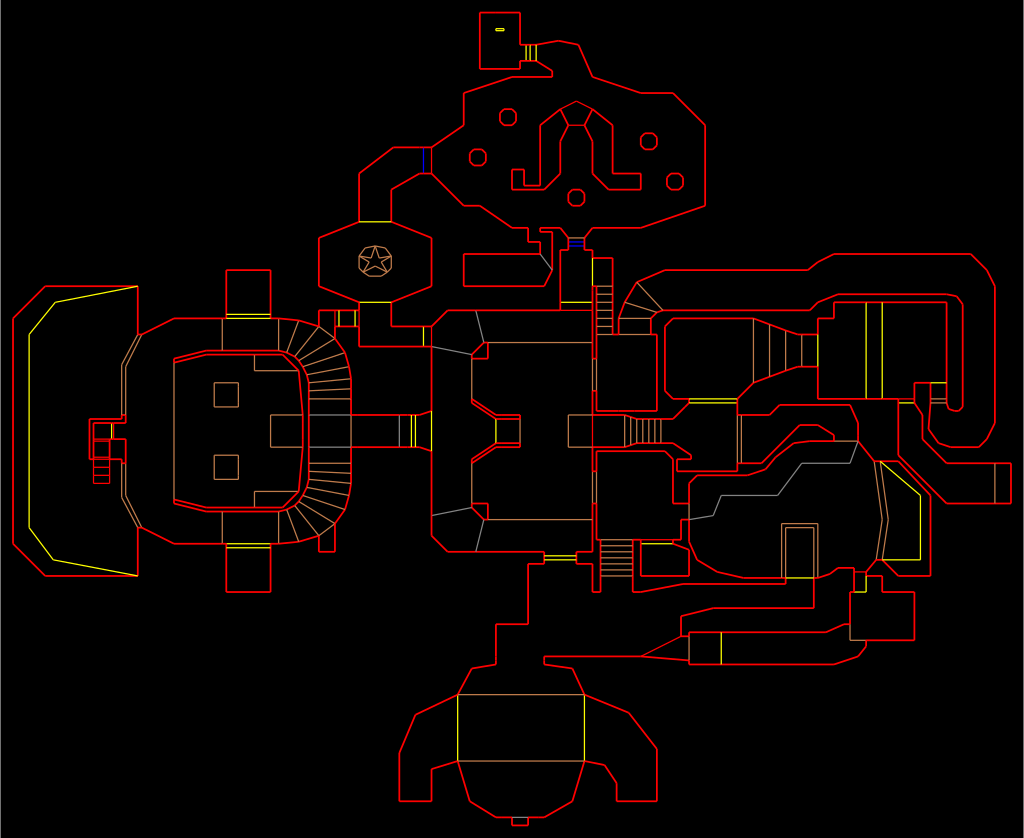
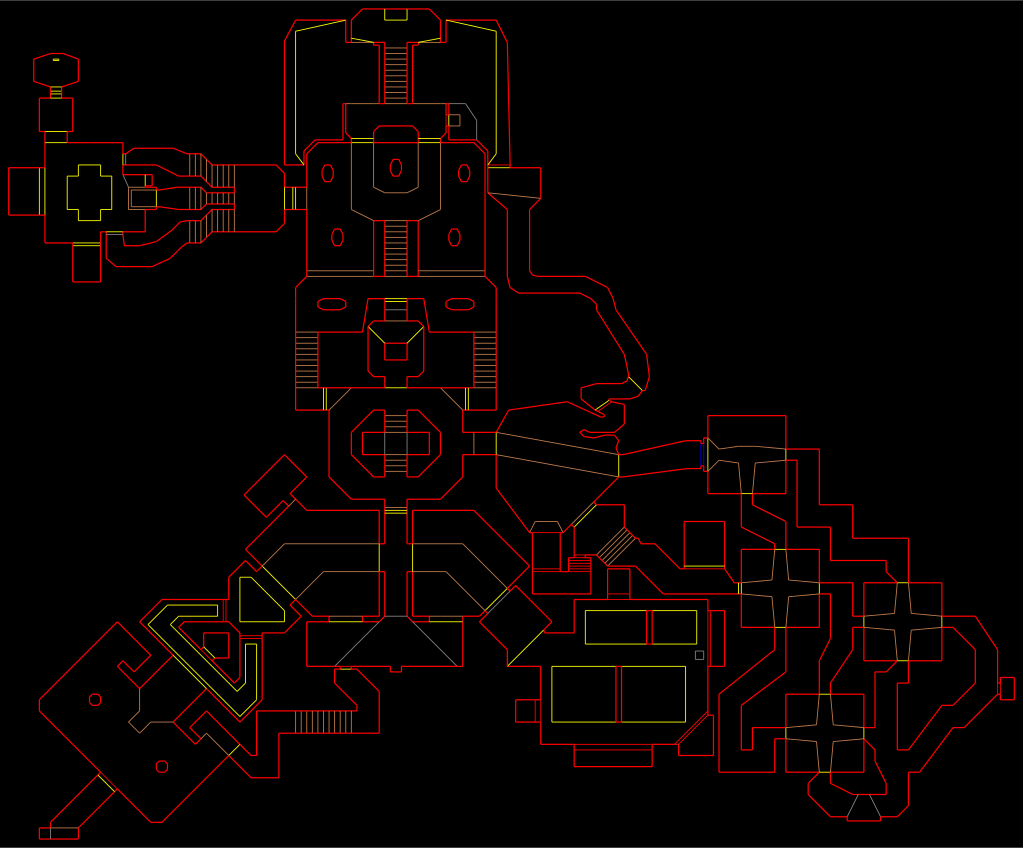
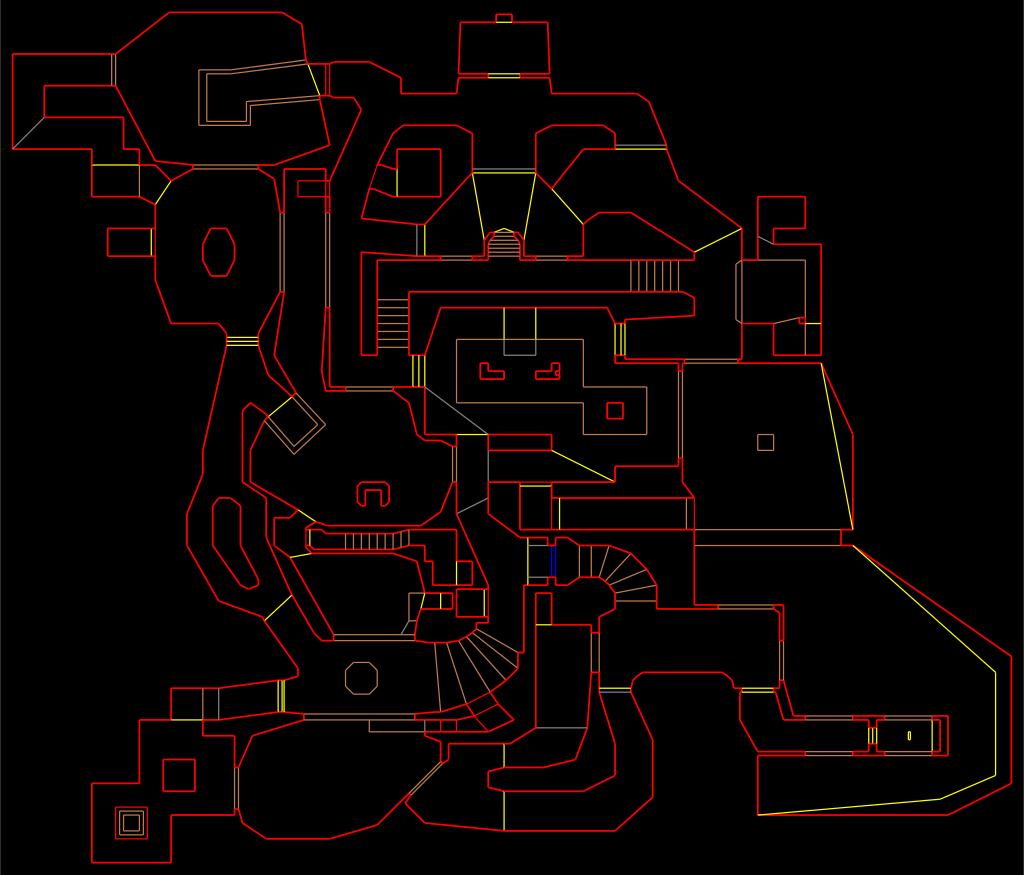
Doom’s first episode is E1, the first level is E1M1, and the camera is an E1, so the jokes wrote themselves. And I guess so did the code.
Confidently wrong AI garbo, as usual.
I had four requirements:
Video
Controls
Audio
DEMONS
I also made up a few rules to keep myself honest, because otherwise I’d have cheated immediately. Doom had to show up in the normal Reolink app as the camera’s normal video stream, which means no running Doom on my machine and pointing the camera at it, and no sneaking in a second video server. The camera had to use its own video and audio encoders, and when I was done it had to go back to being a camera without me pulling the power cable.
Easy peasy pinky squeezy
I say “I built” throughout this post pretty generously. I spent a lot of time working with my AI slop buddies, and they did most of the typing. My main contributions were coming up with bad ideas, testing them on the camera, and repeatedly saying things like “no, not like that” and “okay, but can we cut out the over-engineering?”
It was a healthy working relationship.
E1M1: Hangar
The camera is a Reolink E1 Zoom E340, and it has two little ARM cores, around 130 MB of RAM, a pile of video hardware, and an SD card (a whole computer, basically). That’s a lot more computer than Doom originally needed, but the original Doom computer also wasn’t busy being a security camera at the same time.
Doom needed a 386 with 4 MB of RAM (but anyone who was there knew that would have sucked), we have 32x the RAM. The camera processor is 24x faster: 6.65 BogoMips on a 386 compared to our 24 the processor tells us we have (2,091 BogoMips adjusted for dumbflation)
I’m not covering how I got root on the camera. This story starts after that part already works, and if you want to repeat it, figuring that out is on you.
I used Woof 15.3.0 as the Doom source port, because it already does widescreen and modern resolutions, and gutting a desktop port turned out to be easier than building a tiny embedded one up. Out went everything that assumes you have a monitor, replaced with a small camera-shaped layer instead.
For the actual game I used the official Doom v1.9 shareware WAD, so it’s real E1M1, real sounds, real music, real demons. Accept no substitutes.
E1M2: Nuclear Plant
The camera already runs several video encoders, and the Reolink app’s Fluent mode uses a 640×360 stream, so the least bad way to do this was to shove Doom into that pipeline before it reaches the encoder.
Woof renders its frame into shared memory, and a small worker loaded inside Reolink’s own camera process picks that frame up, converts it into the overlay format the camera already understands, and slaps it over the whole video frame.
Then the camera just does camera stuff. Beep boop. Its own hardware encodes the frame, its own buffers carry it, and whatever Reolink normally does to get video to your phone happens exactly as usual.
There’s no special Doom video URL anywhere. I open the Kitchen camera in the Reolink app and my kitchen has been replaced by Phobos.
Perfect.
E1M3: Toxin Refinery
My first working video was technically Doom, but it was a 4:3 image sitting in the middle of the camera feed with black bars around it.
No no, this will not do. The whole camera needed to be Doom.
So the final setup renders a real 426×200 widescreen view and scales it over the entire camera frame. It isn’t a stretched 320×200 image either, so you actually get the wider field of view and the status bar sits where it should.
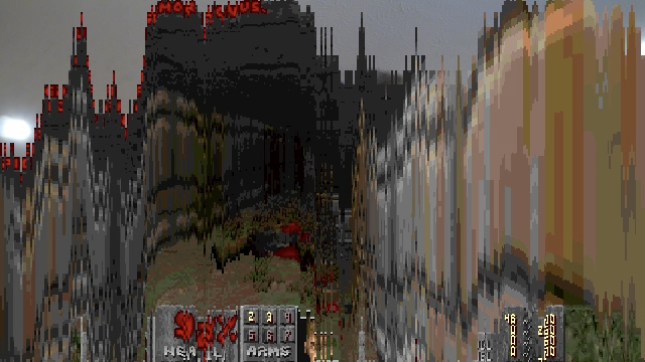
Then I got this:
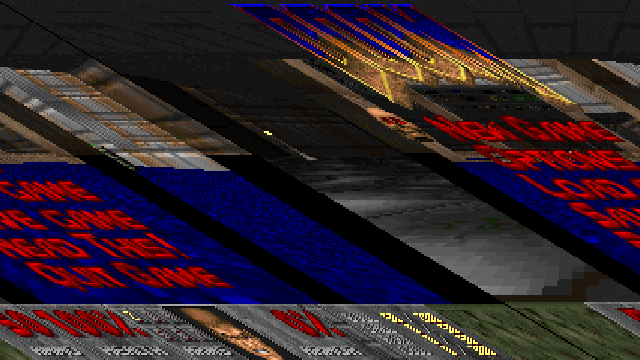
Every row was shifted a little farther sideways than the one above it, and it looked like the camera was falling into a very low-budget dimensional portal.
The image was 426 pixels wide, but each row was aligned to four bytes, so the actual row pitch was 428 bytes. I was advancing 426, which meant every row started two bytes too early.
Changed 426 to 428. Fixed.
The demons were fine. The stride was wrong.
E1M4: Command Control
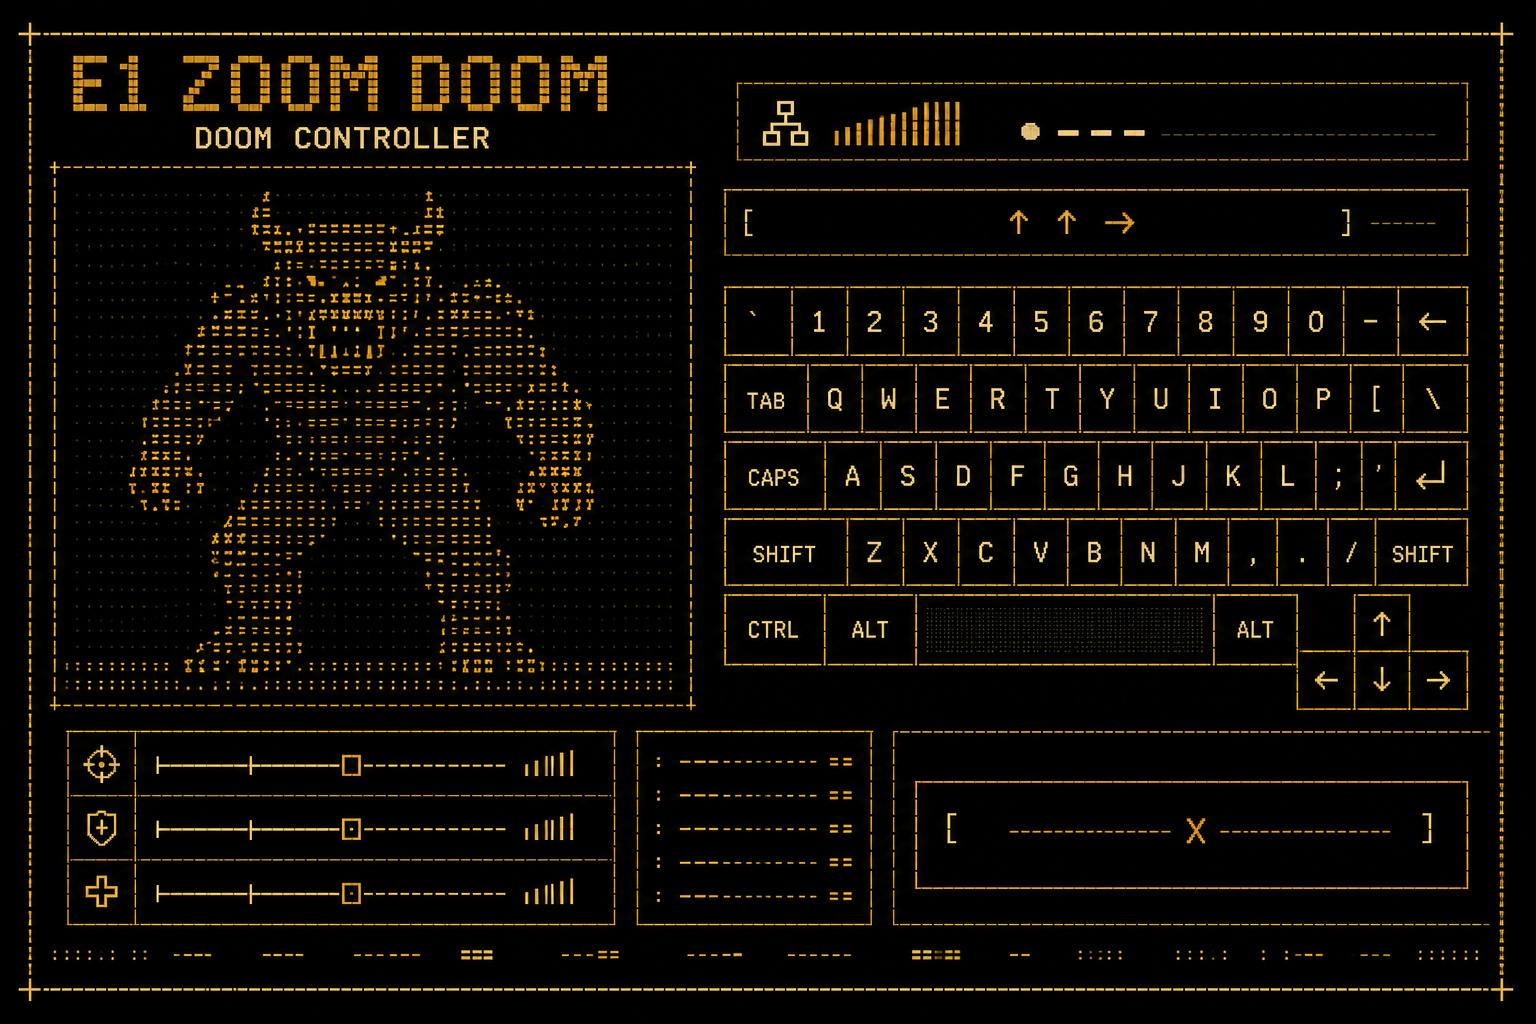
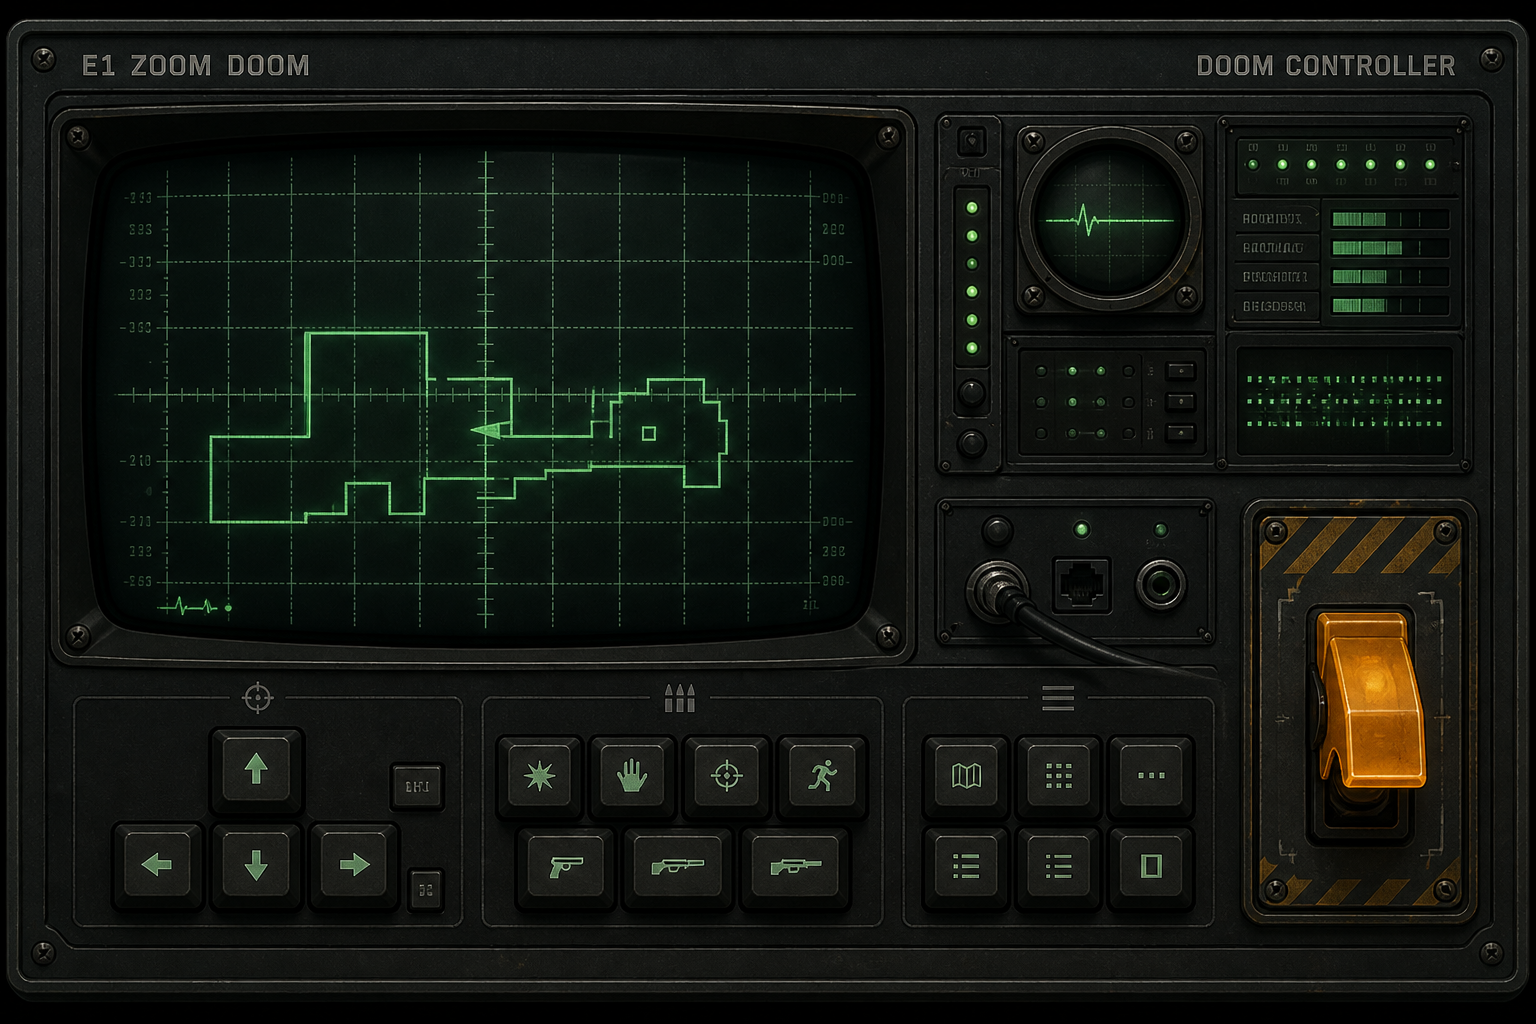
The E1 Zoom has a pan/tilt/zoom control pad in the app, which is obviously a Doom controller. Up, Down, Left, Right, Zoom to fire, maybe Focus to open doors. This was going to be great!
Except the Zoom button doesn’t send anything useful, it just opens another zoom menu, and Focus and presets are buried behind more menus too.
So I had… four buttons.
I hooked the camera’s own command handler, so when Doom is running, direction presses get intercepted before they reach the motors and turned into key presses instead. The motors are, I think, grateful.
The extremely good control scheme is:
Up/Down: move forward and backward
Left/Right: turn
Double-tap Up: Fire + Use + Enter, all at once
Hold Down for three seconds: return to the camera
Yes, double-tap Up may fire your gun while opening a door, but nobody is speedrunning this over a security camera stream (please don’t try).
To start Doom from the app, I also added a secret code:
Up, Up, Down, Down, Left, Right, Left, Right
Why not go for the full nerd points.
There was one extremely Reolink complication. A normal short tap in the iPhone app doesn’t send the direction you tapped, it sends a directionless stop, and only held buttons send real directions. So the code still works for playing, but the listener watching for my secret code is really just seeing eight timed stop events. On screen I enter Up, Up, Down, Down, Left, Right, Left, Right, and inside the camera it’s technically “tap eight arrows.” I have decided this still counts.
E1M5: Phobos Lab
Four buttons proved the point, but playing Doom that way is terrible, and I still needed menus, weapons, run, fire, use, Escape, and everything else.
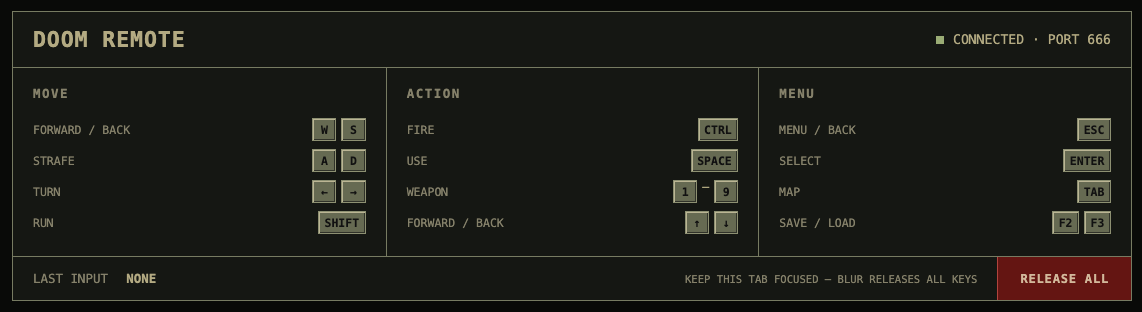
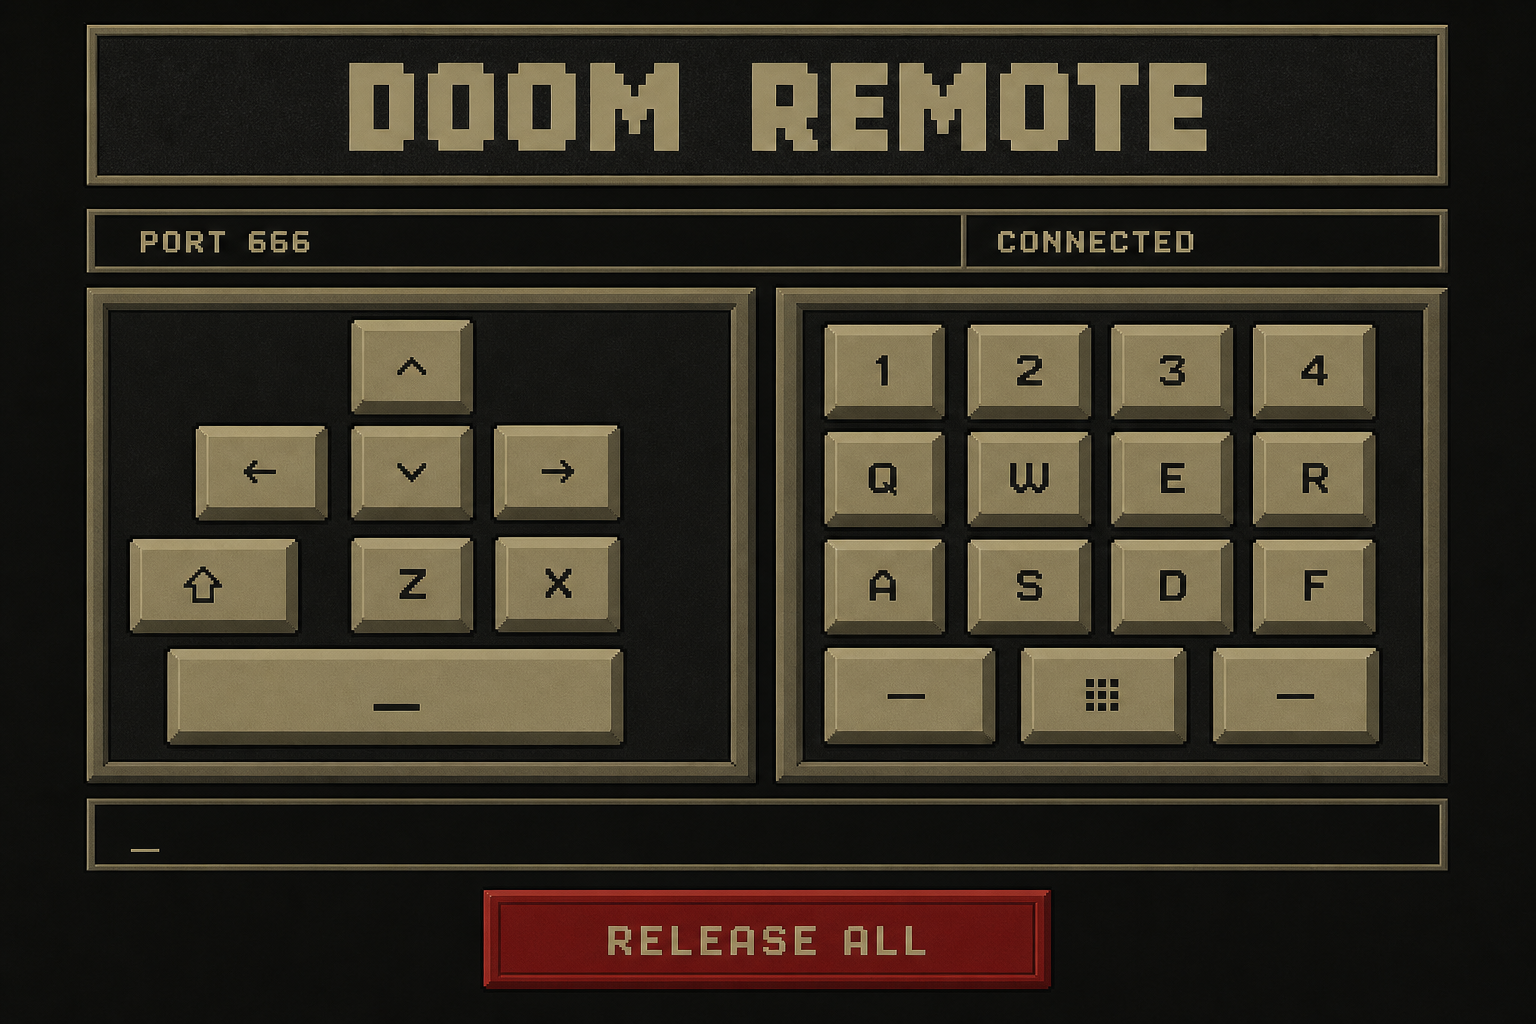
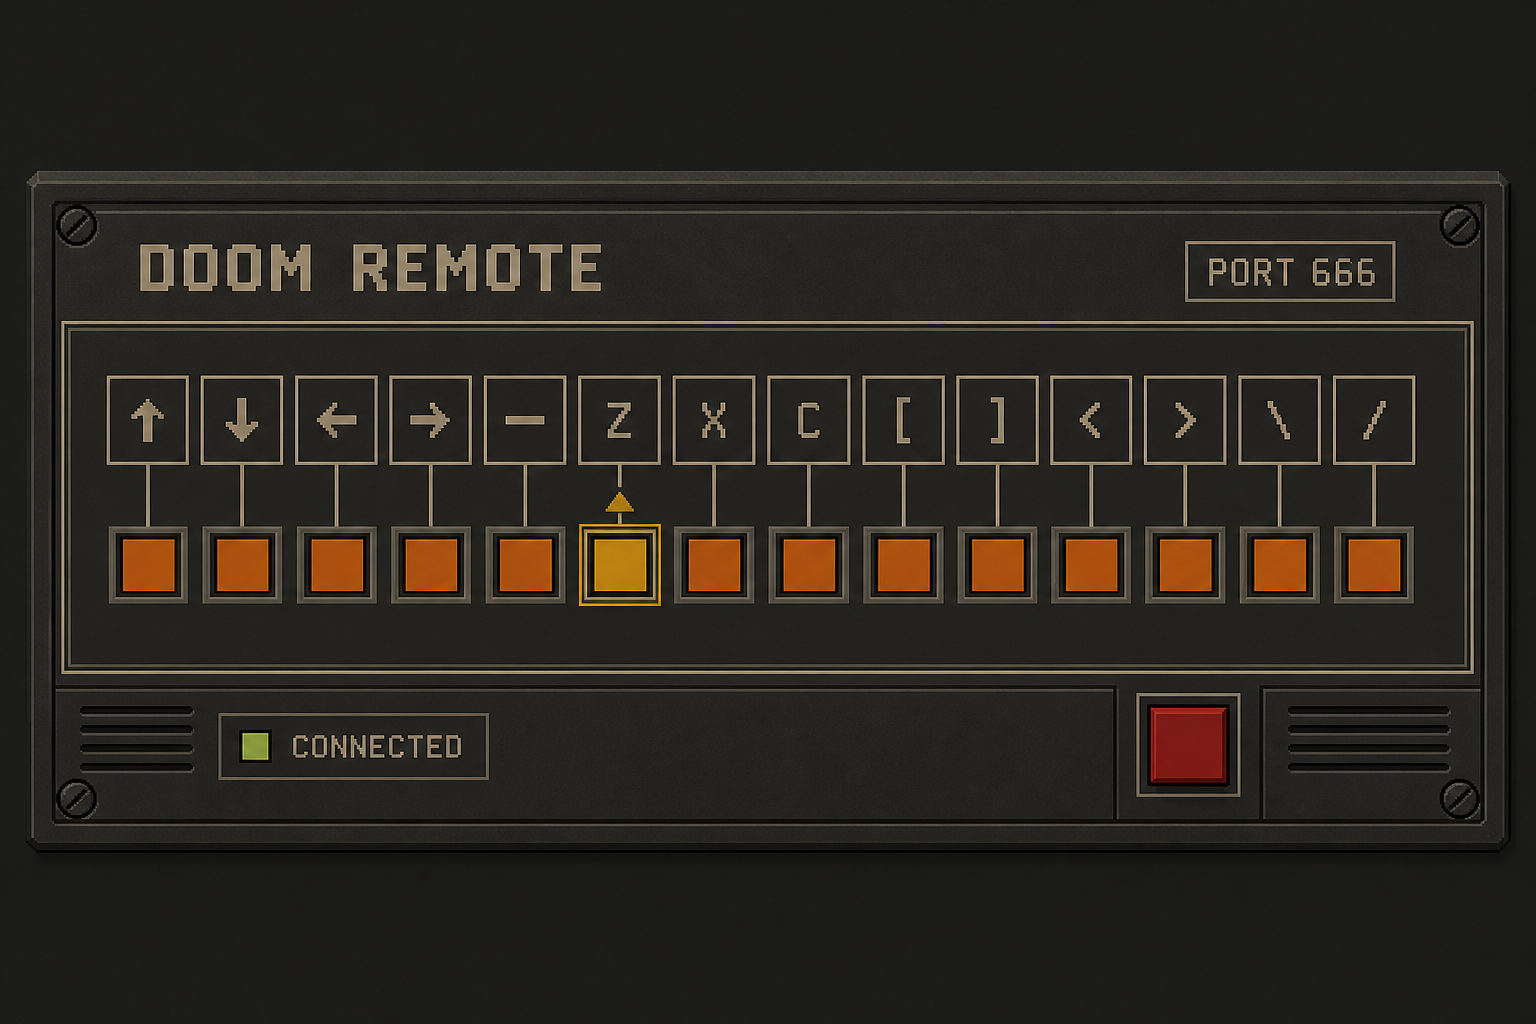
So I built a tiny web server with a keyboard controller on it. On port 666, obviously.
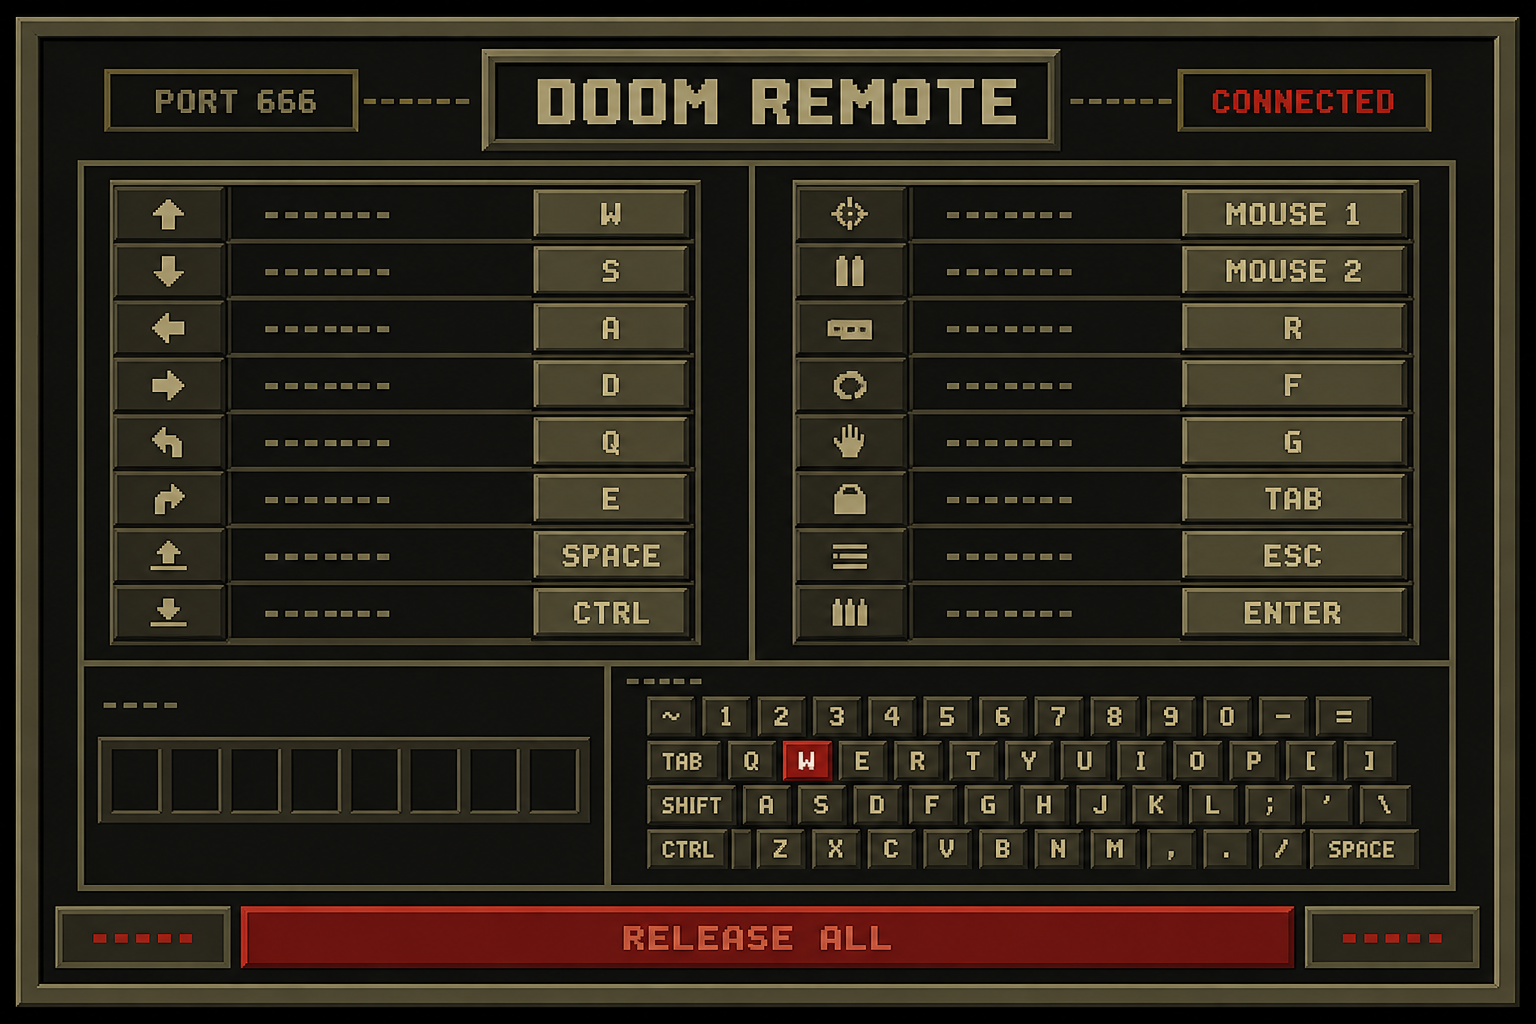
The page doesn’t carry any video, since I keep the Reolink app open for that. It just captures real key presses and forwards them to Doom, so you get the normal Doom controls, plus buttons to start Doom, return to the camera, and release any stuck keys. I slopped the whole page up to look like a little 1995 deathmatch setup utility.
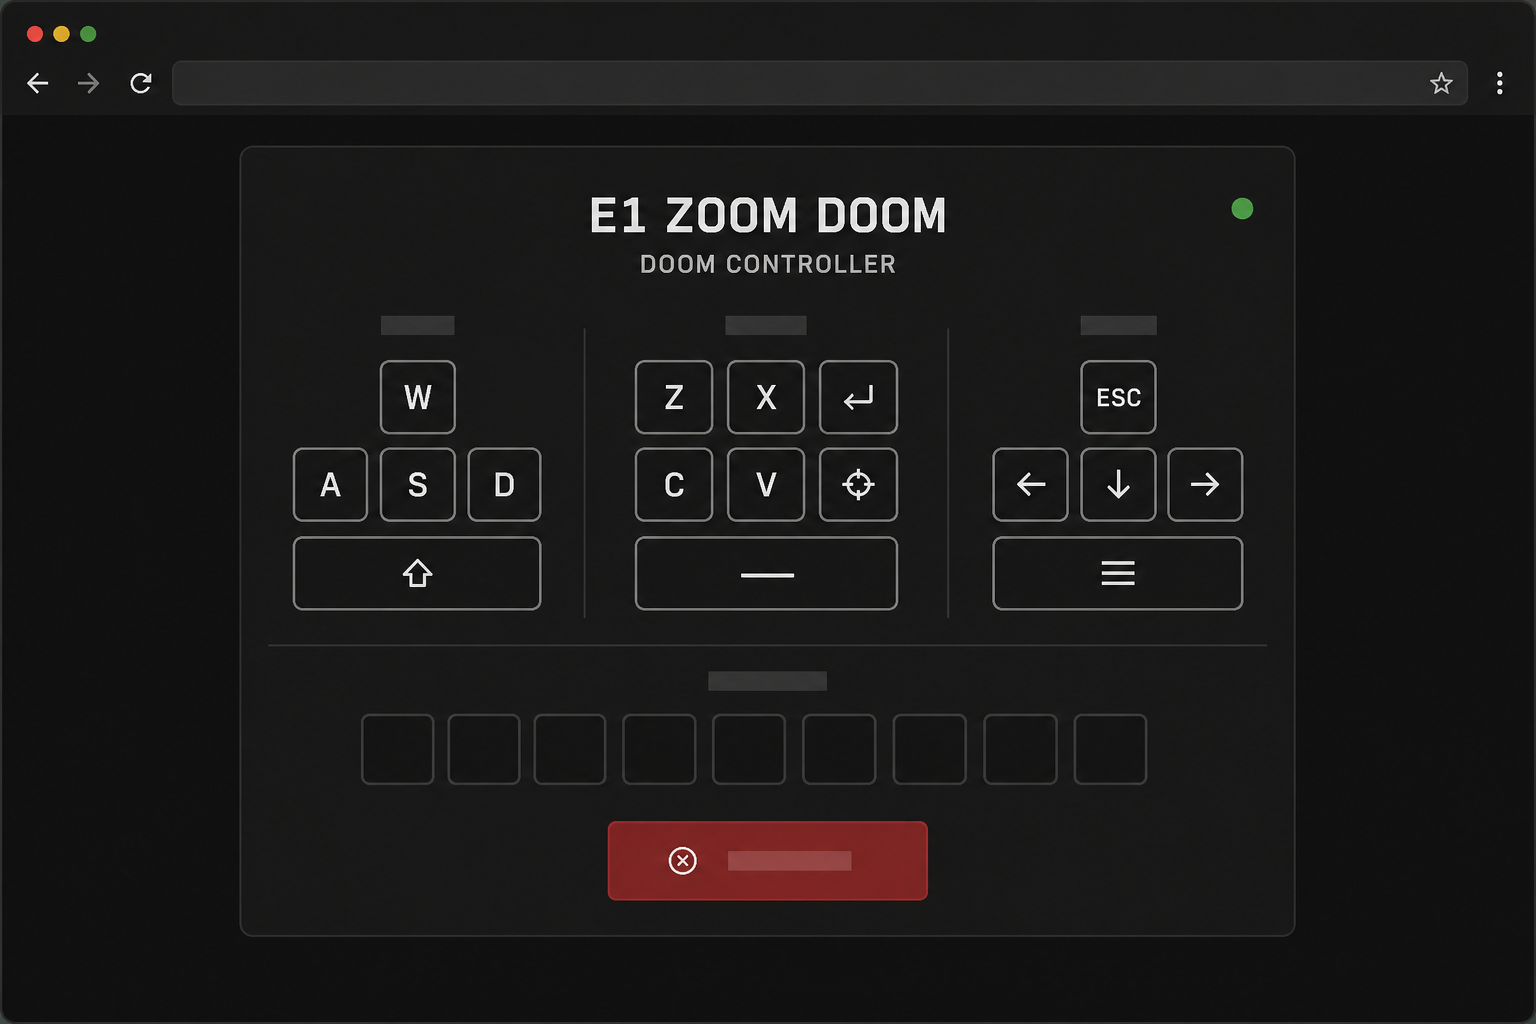
Here are the mockups that I didn’t ship because they were just too much.
Browsers love to lose a key-up event when you switch tabs, so the page releases everything you’re holding the moment it loses focus, and there’s a heartbeat running underneath that. If the heartbeat stops, Doom lets go of everything instead of running face-first into a wall forever.
This is an unauthenticated toy server running as root on my LAN. It is not an enterprise deployment of Doom port 666. Please be serious.
E1M6: Central Processing
Video and controls worked, so now I needed sound.
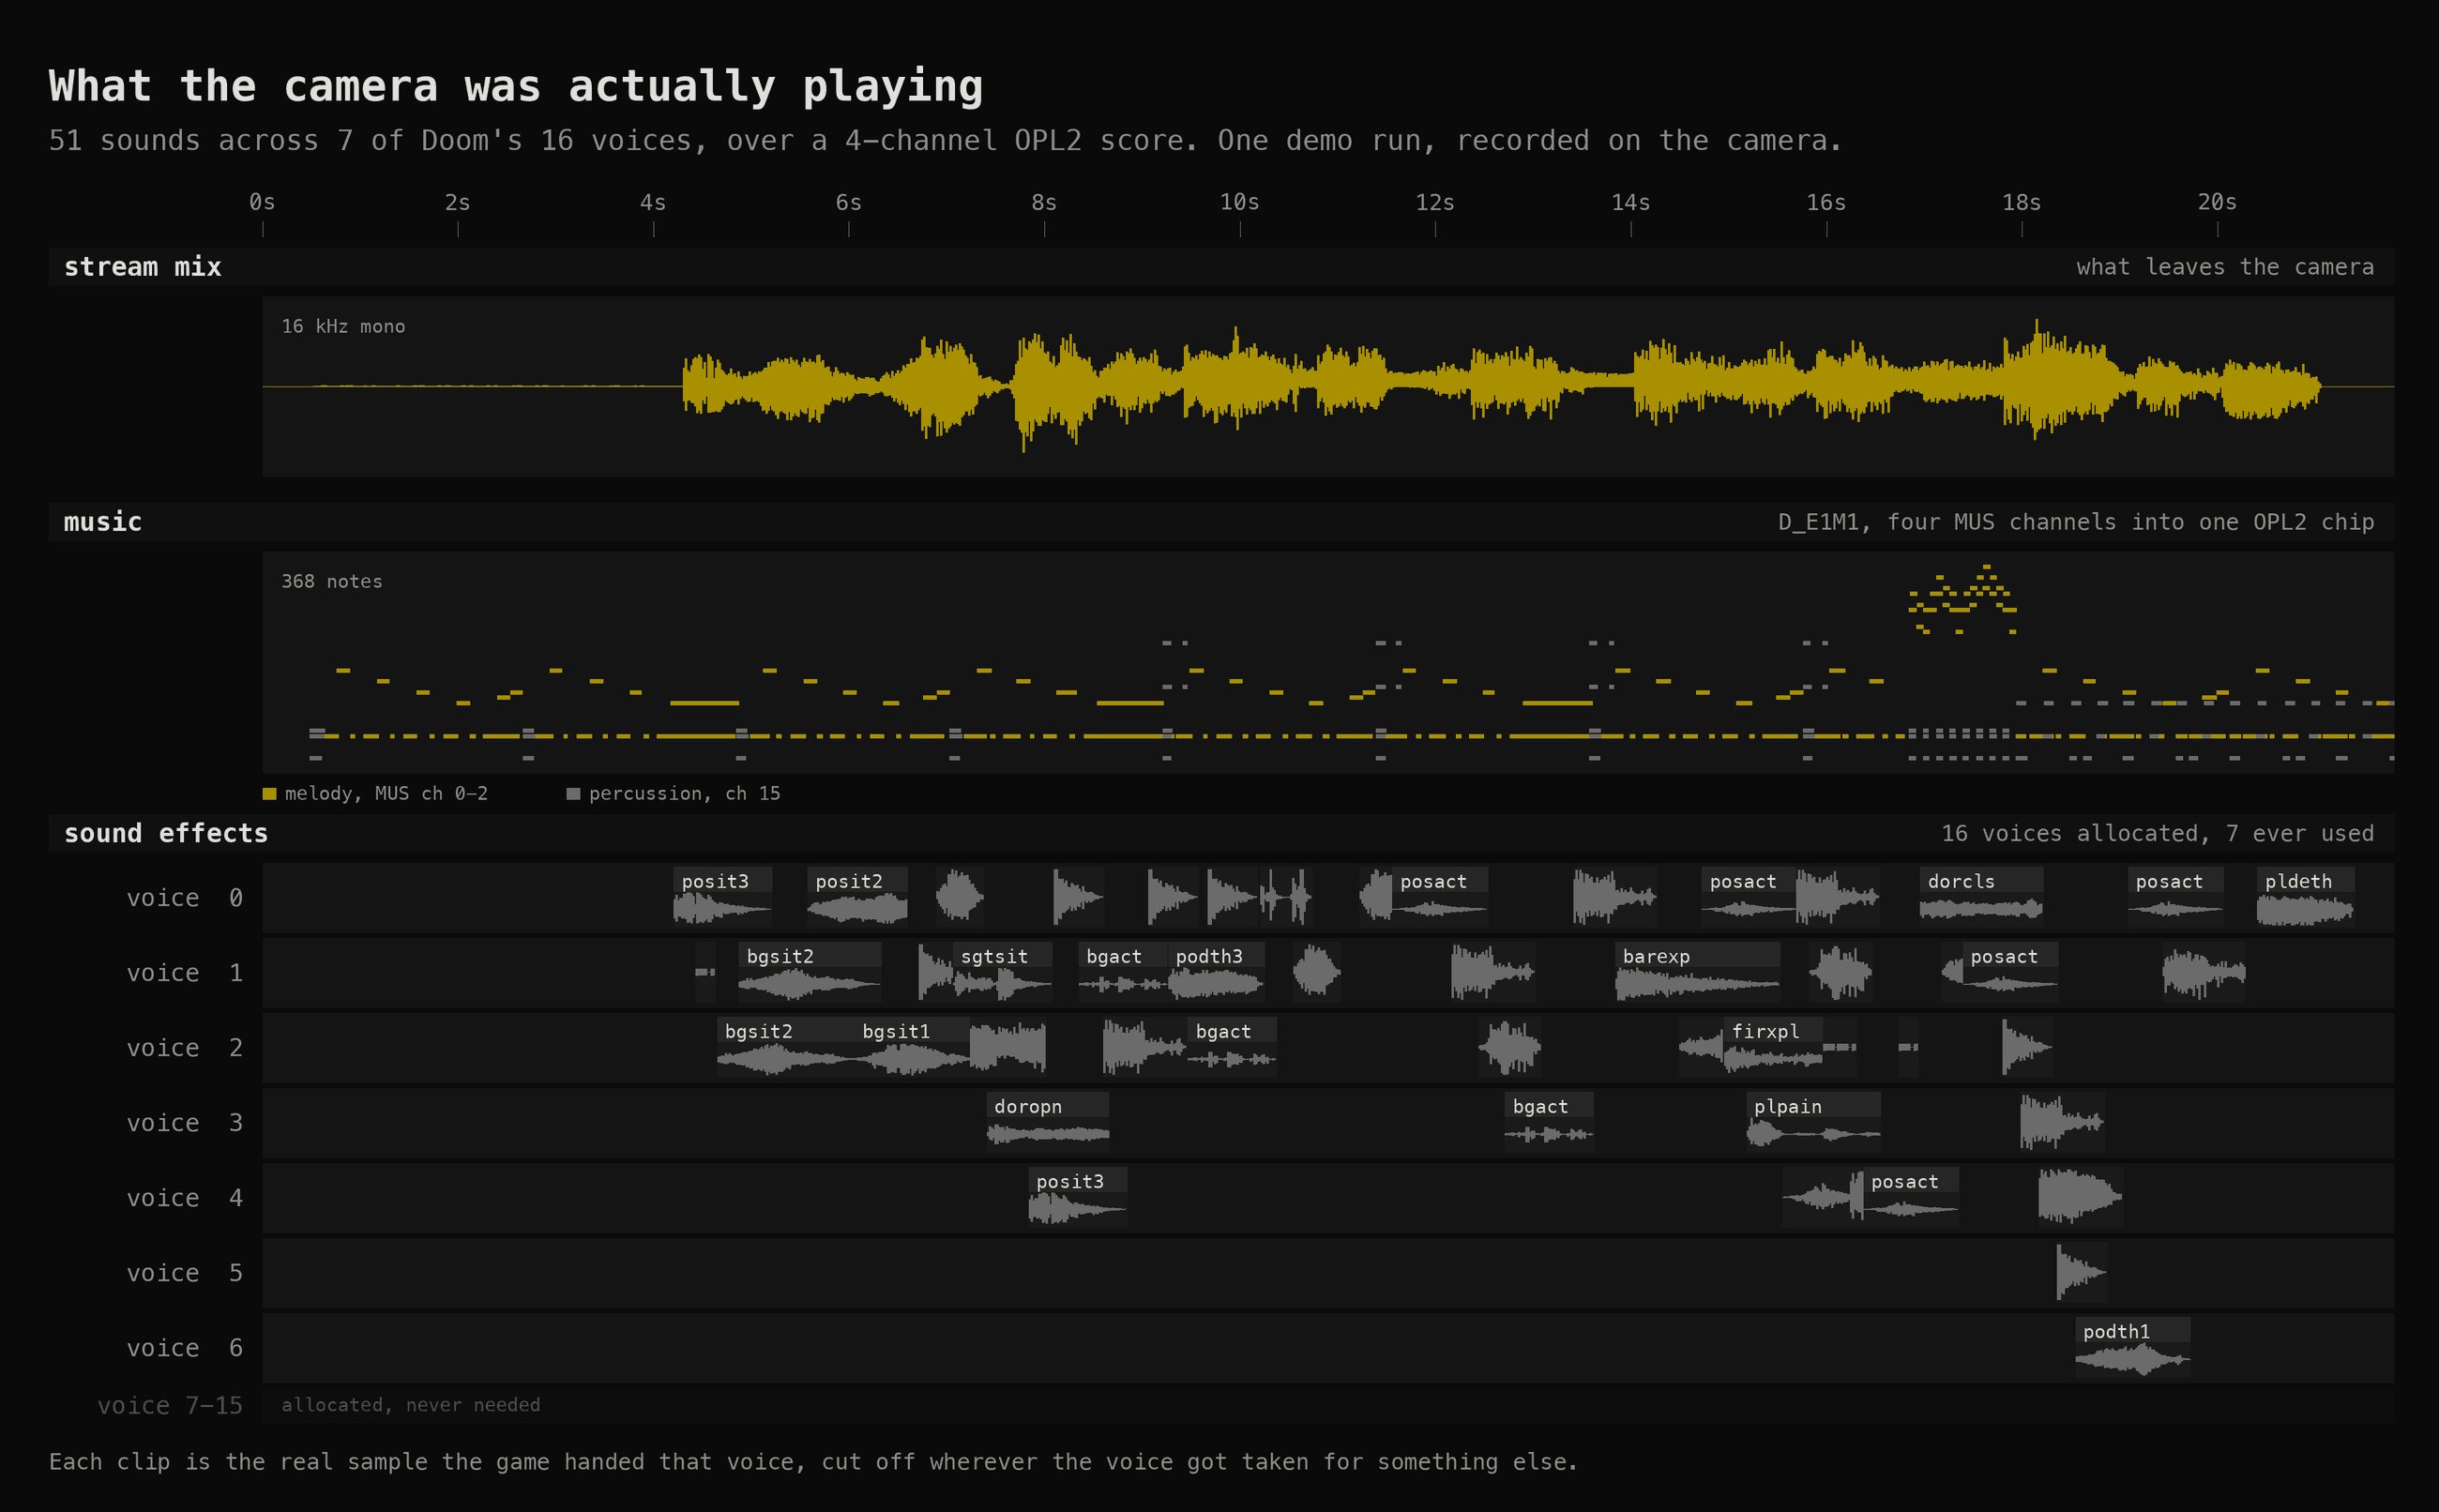
The camera microphone already hands off little blocks of raw audio to the camera’s audio encoder, so I added another small hook right before that handoff. When Doom isn’t running the hook does nothing at all and the microphone works normally, and when Doom is running it swaps the microphone audio for Doom audio. The camera’s own encoder and audio stream do the rest.
For sound effects I wrote (“wrote”) a 16-voice mixer for Doom’s original sound lumps, handling volume, pitch, and resampling. Music runs on a stripped-down emulator of the sound chip Doom’s music was written for in the first place, borrowed from the rp2040-doom project, which uses a lot less CPU than the fancier version I started with.
Now accepting preorders for my mixtape.
If Doom audio ever runs dry I output silence, because the alternative is accidentally cutting back to the kitchen microphone, and nobody needs hot-mic jump scares in E1M1.
I spent a while convinced none of this worked, because I still couldn’t hear anything in the app. Turns out the Reolink Home Hub mutes camera audio until you enter listening mode, and opening the control pad can mute it again, all while the camera is happily sending perfectly good Doom audio the entire time.
I tapped the speaker button. Audio worked.
Good debugging session.
E1M7: Computer Station
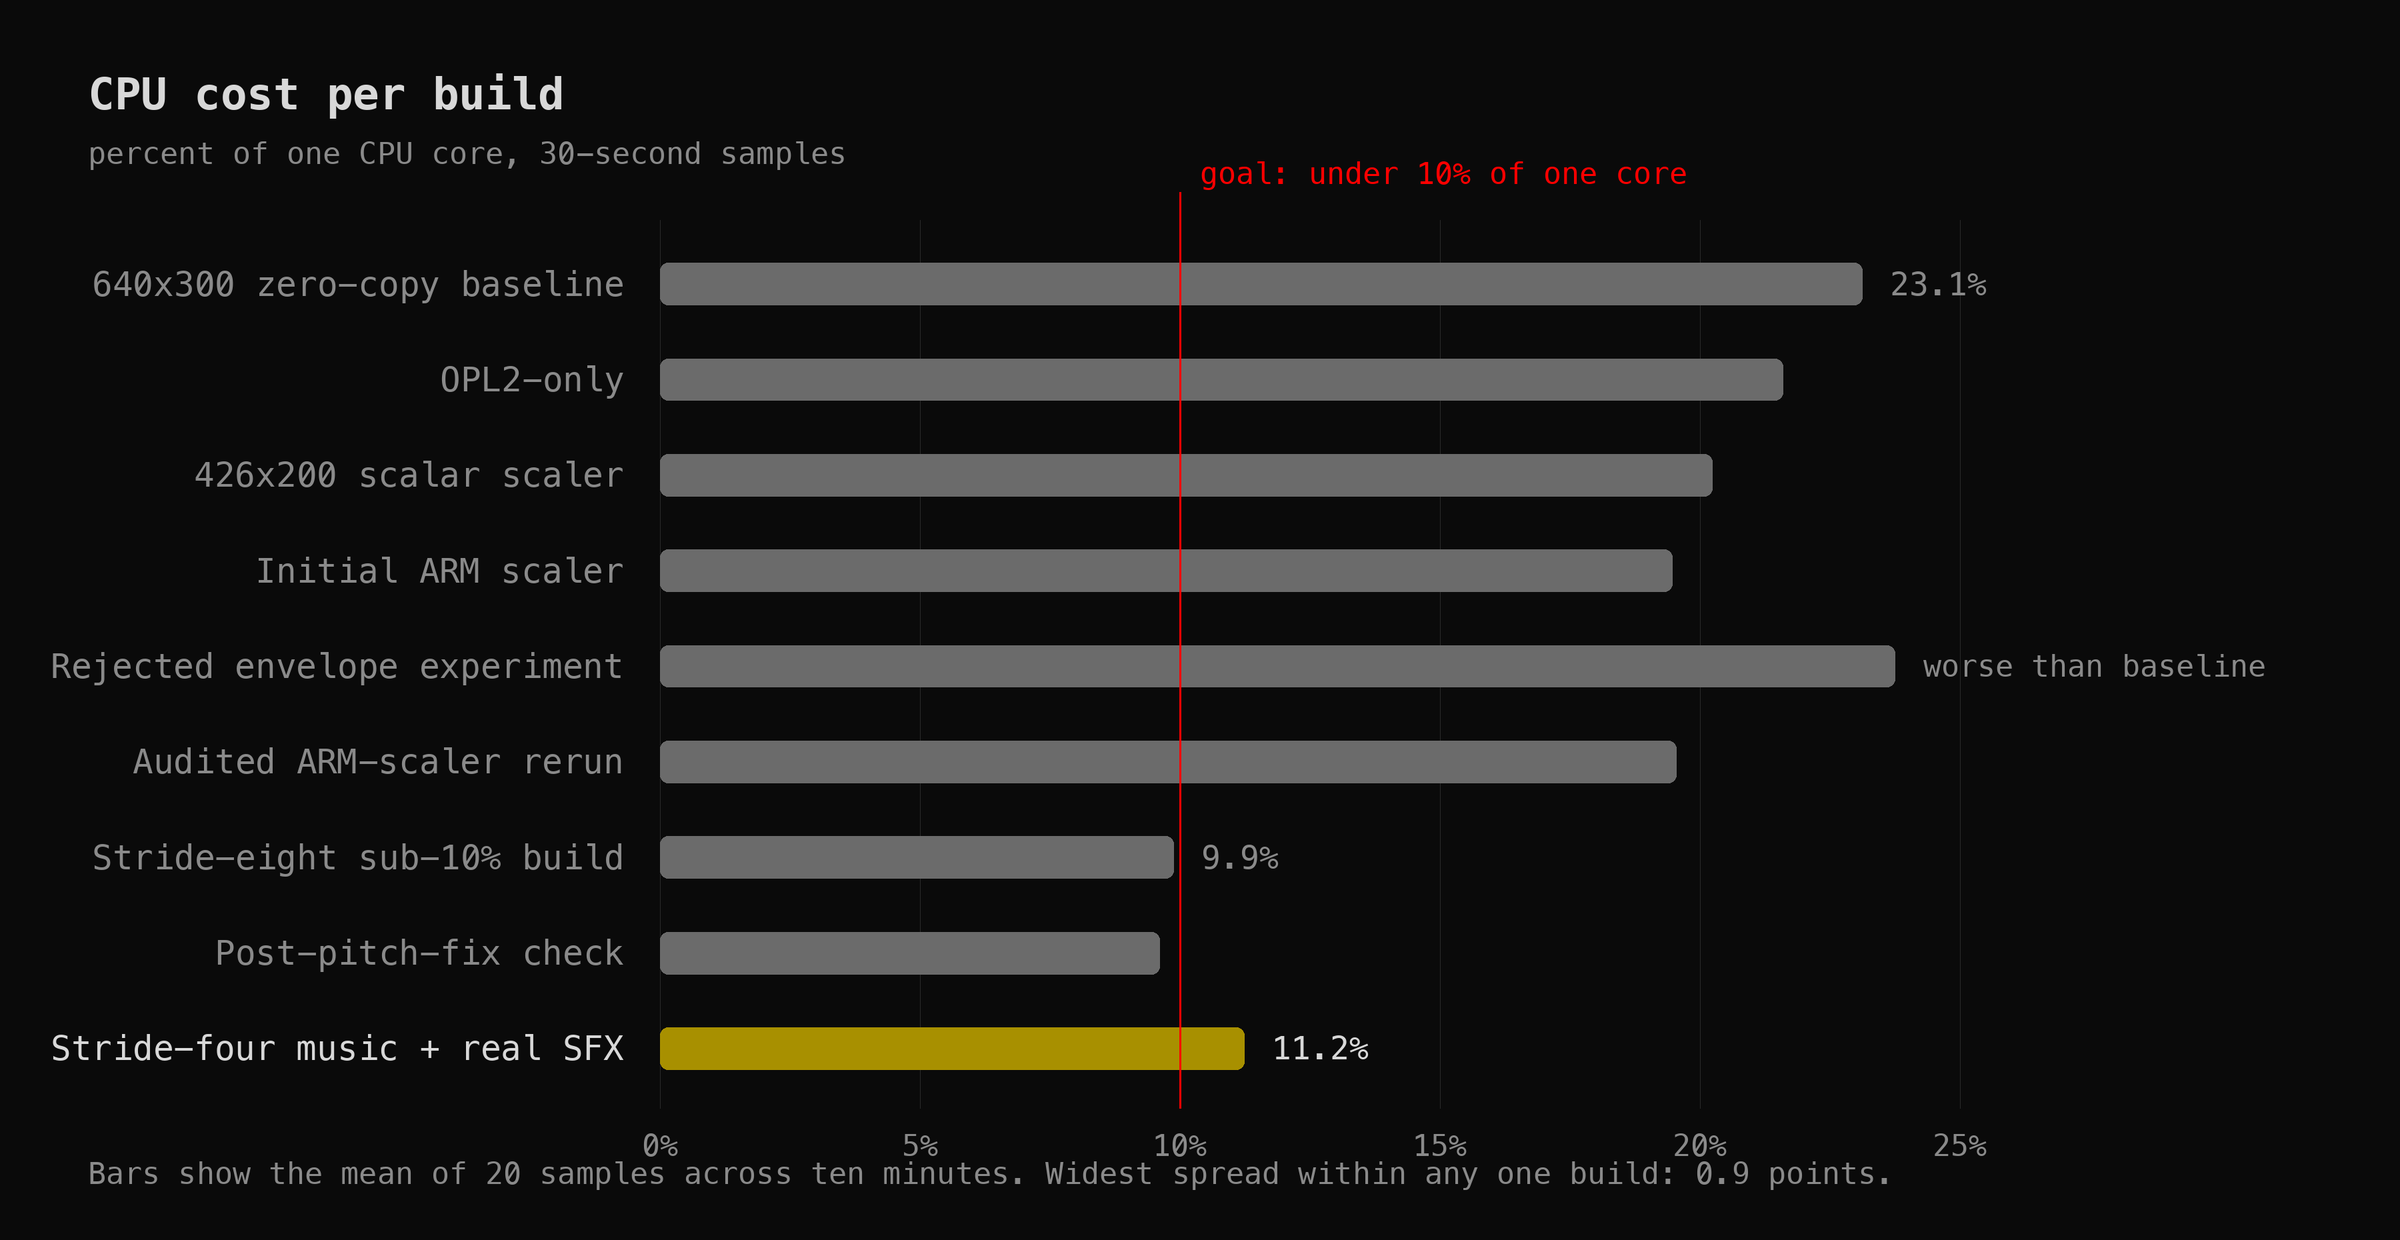
At this point the camera could run Doom, so naturally I decided it was using too much CPU. Why? No idea. It ran fine. But the camera still had to do its actual job at the same time, and I wanted Doom under 10% of one core with nothing dropped.
The biggest fix was embarrassingly obvious. Doom was rendering around 28 frames a second, but the camera stream was only configured for 10, so most of those frames were being thrown away. I had been very carefully optimizing frames that nobody would ever see! Now the runtime reads the camera’s configured frame rate and Doom only renders what the stream can actually use.
I kept asking whether fancy vector instructions would make it faster, but palette conversion is mostly random lookups and this chip doesn’t have a useful gather instruction, so boring regular ARM instructions won. Slightly disappointing, but… faster is faster.
The fastest build I got hit 9.87% of one core, or under 5% of the whole camera, so technically I hit the goal (technically). Then I turned the real sound-effect channels back on and raised the music quality, because it sounded better, and the build I actually kept sits at 11.23% instead. Slightly worse benchmark. Noticeably better Doom. Worth it!
The last bar is slower on purpose. That’s why it’s yellow, like a school bus.
I could probably keep optimizing this forever, but I had already spent an afternoon profiling a once-per-second “is Doom still changing?” check on a security camera running Doom, and at some point you have to stop and think about choices you’ve made in life.
E1M8: Phobos Anomaly
Then the camera froze and rebooted. Sigh.
It happened while I had the controller page open, so keyboard traffic was the obvious suspect. I hammered it for almost two minutes, opening menus, moving, firing, using things, and cycling keys far longer than the original failure had taken, and everything was completely fine (of course it was).
Well then…
The useful clue came from a log on the SD card, where some of the camera’s important threads were showing up stopped during cleanup. I had a tool that double-checked I’d restored the camera’s original instructions correctly, and although it only ever read memory, it did that by freezing all twenty-odd threads in the camera process, peeking, and starting them again. Cleanup ran it several times.
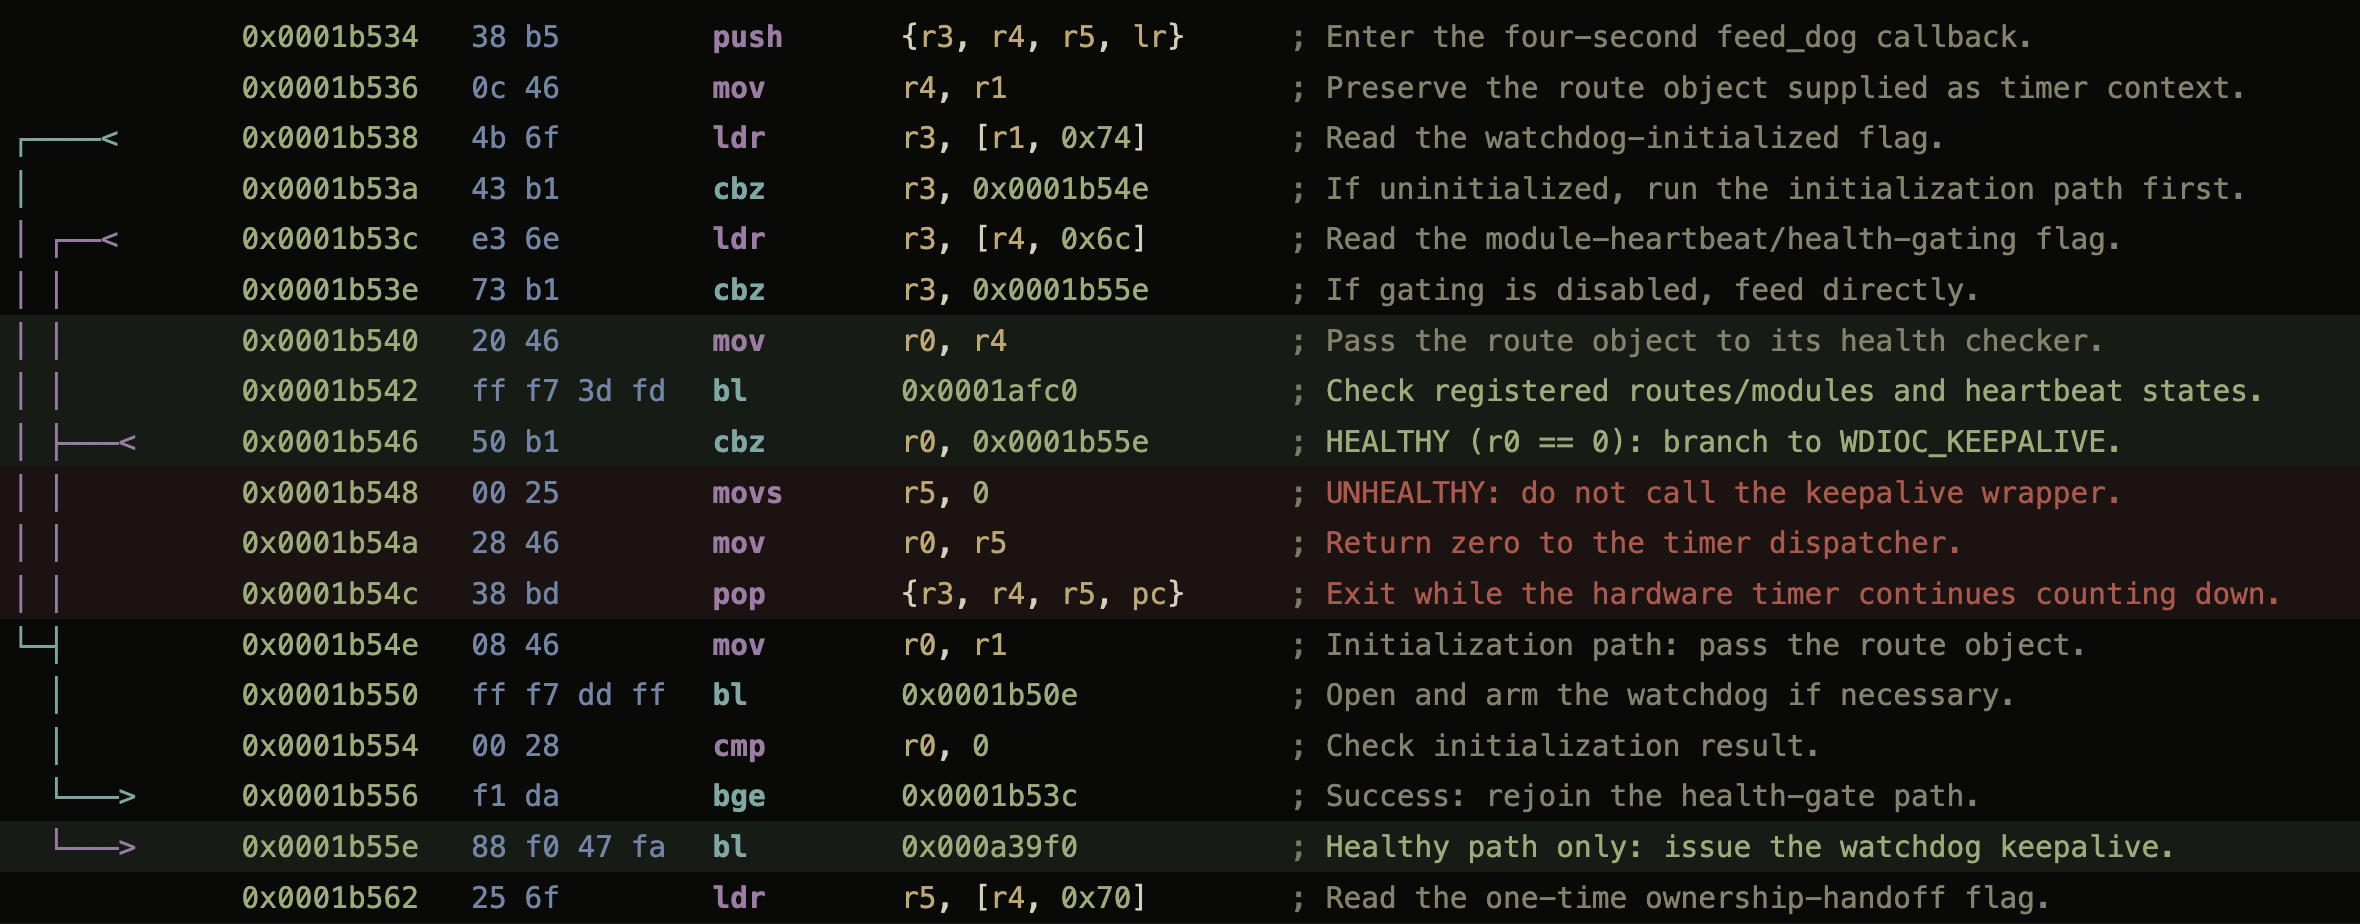
Meanwhile, Reolink’s own supervisor process owns a 60-second hardware watchdog, and it only feeds that watchdog while the camera’s internals look healthy. So: freeze the video and audio threads at exactly the wrong moment, miss a heartbeat, wait 60 seconds… reboot.
lol, whoops, surprise lockup and reboot
The timing matched. So I changed the read-only check to peek at memory without freezing anything, and now only the two operations that genuinely rewrite instructions pause the camera at all. The stopped threads disappeared from the logs.
The original reboot wiped its own logs, so I can’t prove the exact moment it missed that first heartbeat. But the timing lines up, the stopped threads are right there in the log, and it hasn’t happened again since I stopped freezing things.
The final boss was cleanup code. Sounds about right.
E1M9: Military Base
I originally packaged everything into a tidy read-only image on the SD card, which was lovely right up until every single test meant uploading the whole thing over my spotty Wi-Fi to change one file. So now it’s just a folder.
A tiny boot service starts the controller and the secret-code listener, and that’s all it does. It does not start Doom (that’s the point). The camera sits there armed, looking completely normal, until I press Start or enter the code on the control pad, and the game, the renderer, the music, and everything else genuinely don’t exist until I ask for demons. There’s no reason to make a security camera run Doom all day just because it can!
A firmware update also moved every address I’d carefully found, because apparently I didn’t have enough problems. Hard-coded offsets would have made this a one-firmware trick, so now the runtime finds everything it needs by pattern-matching the camera’s own code at startup, and if anything looks missing, duplicated, or generally wrong, it gives up before touching the camera. This does not magically preserve root through a firmware update, mind you. That’s a separate problem, and I’m still not covering it.
The service gets exactly one attempt at startup. If a firmware update broke something, it gives up and the camera stays a camera. No heroic restart loop.
Quitting is the best part. The music cuts out, the original Doom death sound plays, and Doom melts away in columns while my actual kitchen appears underneath it.
Then the microphone comes back, the game exits, and the control pad goes back to moving the camera like nothing happened. The controller page stays up, waiting for another bad idea.
So, can the E1 Zoom run E1 Doom?
Hell yeah it can! 🤘
It runs the real shareware Doom in the normal Reolink app, using the camera’s own video and audio encoders. It has music, sound effects, a control-pad Doom controller, a full keyboard controller on port 666, and a proper Doom melt back to my kitchen.
Against my own internal monologue advice, I ran a Core Web Vitals test on my blog. It came back ehhh, okay.
My LCP was the problem, and like most sites, the heaviest thing on nearly every page was an image.
The fix is well-known: serve WebP or AVIF instead of JPEG. They’re smaller at the same quality, and browser support is finally there. So I figured I’d just convert and watch the scores go green.
Turns out “just convert it” is a trap. Wild.
Image formats are a mess. Every format (JPEG, WebP, AVIF) has its own “quality” slider from 1 to 100, and none of those numbers agree with each other. Quality 60 in JPEG, quality 60 in WebP, and quality 60 in AVIF are three completely different-looking images.
They don’t agree on what a number looks like, or how big the file ends up, and the setting barely tracks how good the image actually is. You can’t just pick a number because that’s too logical.
And it gets worse! The right number also depends on what’s in the image. A photo, a flat illustration, and a line-art scan all behave differently at the exact same setting for each file format. Everything sucks.
So instead of shaving a few hundred kilobytes off my pages in an afternoon, I spent weeks working with my AI slop buddy and built a calibration pipeline (as you do). It looks at an image, figures out what kind of thing it is, looks up the quality that actually matches for that kind of thing, encodes it to WebP and AVIF, and keeps whichever comes out smaller (never bigger than the original). Point it at a folder, walk away.
To get those “quality that actually matches” numbers, I had to measure them.
Take a pile of reference images, encode each one to JPEG at every quality from 1 to 100, do the same for WebP and AVIF, and score everything with SSIMULACRA2, a perceptual metric that’s pretty good at guessing what looks the same to a human.
Then, because I clearly have a problem, I did it nine more times with nine other metrics (Butteraugli, DSSIM, LPIPS, and friends).
For each JPEG quality, every metric votes on the lowest WebP/AVIF quality that still matches, and the converter goes with the most conservative vote. So no single metric having a weird day can quietly wreck an image.
It took about 20 hours to get the curves (AVIF at max compression effort is SLOW), but you only do it once and then you’ve got the table forever. My poor Macbook didn’t enjoy it.
I assumed illustrations and line-art would be the fragile ones. Hard edges, flat colors, the stuff that looks like it’d fall apart under compression. So I figured they’d need the highest quality to survive.
Nope. Exact opposite.
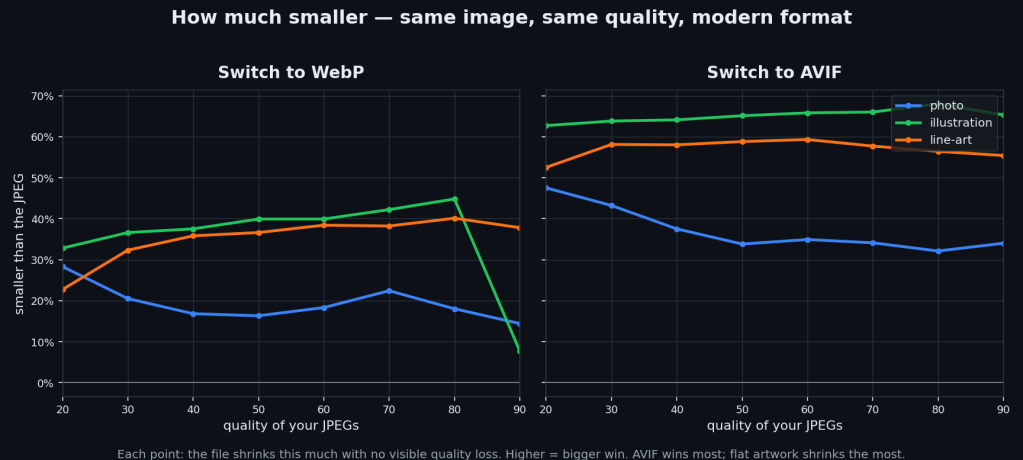
Photos need the highest settings, by a lot. At JPEG quality 80, a photo needs AVIF 60 to match. An illustration only needs 42, and line-art 48. Same input, wildly different answers.
It makes sense once you see it, I guess. A photo is texture everywhere (skin, leaves, grain, sensor noise), and that’s the hardest thing for a codec to hold onto, so it needs more quality to keep it. Flat art is easy. It hits the same score with way less.
Which flips the savings the way you’d hope:
Switching JPEG -> AVIF saves roughly 30–50% on photos, 55–60% on line-art, and 60–65% on illustrations. The flatter the image, the bigger the win. WebP saves less, and on really high-quality flat art it can actually come out BIGGER than the JPEG (which is why the tool encodes both and keeps the smaller one).
Figuring out “what kind of thing is this” was its own little rabbit hole. My first attempt used edge density and saturation to tell photos from illustrations, and it was right about 46% of the time, which is bad.
It turns out the signal that actually works is histogram entropy: a photo’s continuous tone smears pixel values across the whole histogram (high entropy), a flat illustration piles them into a few spikes (low entropy). That one swap took it from 46% to ~91%. Edge density never had a chance. A painterly illustration has just as many soft edges as a photo.
Just a couple of Node scripts, no dependencies beyond the encoders. Fast mode just trusts the calibration and converts; --verify re-checks every image against a quality floor if you want a guarantee.
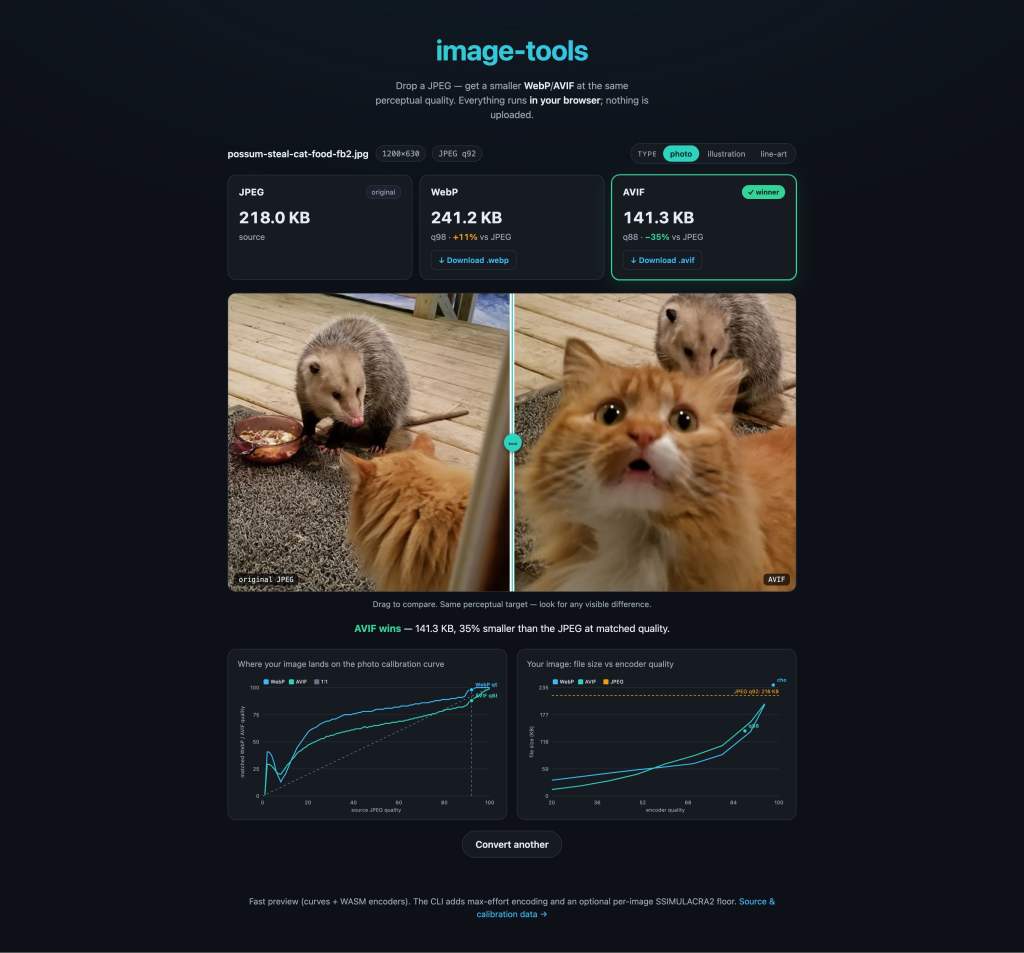
Drop in a JPEG and watch it convert, entirely client-side, nothing uploaded. The calibration data’s open (GPL-3.0), so fork it, run it on your own images, just don’t bother me about it.
A few honest caveats, because I’m not going to pretend this is gospel:
The datasets are small: 24 photos, 25 illustrations, 19 line-art. Enough to see the pattern, not enough to bet your life on the exact numbers. Like I said 20 hours just for that. Sell your soul to AWS or something and throw thousands of images at it.
The numbers are specific to these encoders (avifenc, cwebp). Different builds will shift them.
These metrics are good, but they’re still metrics, not humans. A real eyeballs-on-it study would either back this up or blow it up, and I’d genuinely love for someone to run one, but not me. I’m done.
So, did my Core Web Vitals get better? Ehhh, I don’t care anymore.
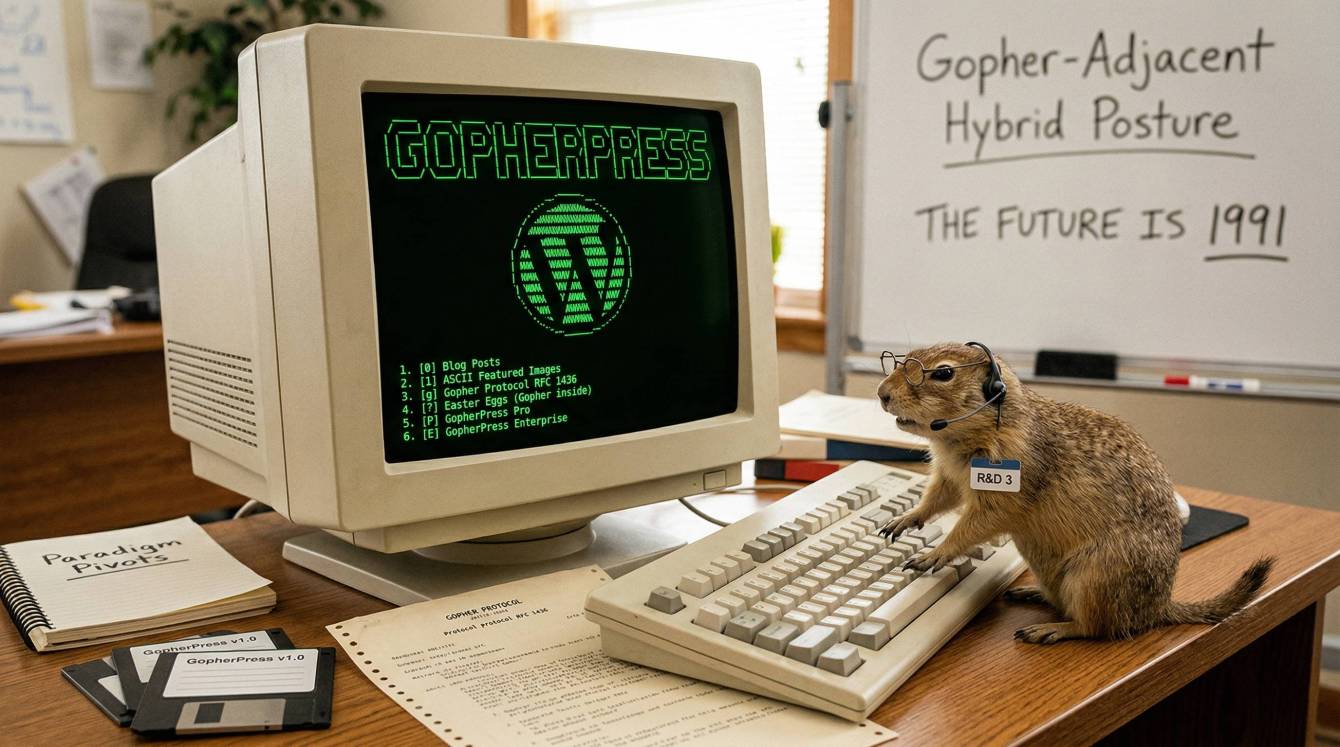
Here at Blarg Industries, our R&D 3 team has just released GopherPress, the best-in-class WordPress plugin for serving your digital content over the Gopher protocol (RFC 1436). This is not a drill.
After 18 months of ideation, a comprehensive blue-sky sprint, and three separate paradigm pivots, we are proud to say the future of enterprise content delivery is here. The future is 1991.
Why Gopher, and Why Now
HTTP has had a good run. Honestly, a great run. But our proprietary research, compiled across multiple synergy sessions and at least one company retreat where someone had a whiteboard marker for way too long — reveals a consistent pattern across high-growth organizations: the web is bloated, CSS is out of control, and your users do not need a consent banner to read a blog post.
Gopher is different. Gopher is clean. A client sends a selector string. The server responds with a menu or a document. That’s it. No JavaScript bundles. No third-party tracking pixels. No seventeen cookie consent dialogs before the content loads. Just text, delivered at the speed of a motivated university student in 1991.
The digital transformation opportunity here is significant.
What GopherPress Does
GopherPress is a WordPress plugin that spins up a real, live Gopher server alongside your existing web infrastructure. Your content: posts, pages, categories, archives–all of it, available on port 7070 via the Gopher protocol, rendered in beautiful, mission-critical plain text.
Key differentiators include:
ASCII art featured images powered by our proprietary aalib-derived rendering engine (we call this our Visual Content Normalization Layer, which is a thing we said out loud in a meeting)
Figlet-rendered headings that honor the 70-column terminal width constraint your enterprise infrastructure has always deserved
Intelligent text wrapping at a configurable column width, defaulting to 70 for maximum compatibility with legacy terminal environments, which is a real sentence we wrote in real documentation
Fortune cookie quotes on the root menu, which our UX research team has determined drive measurable engagement velocity
Easter eggs we can’t fully disclose due to ongoing IP considerations, but one of them is an ASCII gopher and it’s pretty good
For managed hosting environments where exec() is unavailable, GopherPress includes an HTTP-based Gopher emulation endpoint at /wp-json/gopherpress/v1/serve and a zero-dependency Node.js proxy you can run locally. We have called this our Hybrid Connectivity Matrix. We stand by that name.
What Industry Leaders Are Saying
“I invented the World Wide Web in 1989 so that humanity could share knowledge freely and openly. GopherPress is… an interesting interpretation of that vision.”
— Sir Tim Berners-Lee, Inventor of the World Wide Web
“How did you get this number. Quit texting me!”
— Seth Rogen, Actor and Filmmaker
“As co-designer of TCP/IP, I have a deep appreciation for simple, well-specified application layer protocols. Gopher’s selector-based architecture is elegant. I’m not sure why someone built this as a WordPress plugin specifically, but I also can’t say I’m surprised someone built this as a WordPress plugin.”
— Vint Cerf, Co-inventor of TCP/IP, VP at Google
“DEVELOPERS. DEVELOPERS. DEVELOPERS. DEVELOPERS.”
— Steve Ballmer, Former CEO, Microsoft
“You know what I think about when I think about Gopher? I think — and bear with me here, because this is important — I think we had something. In 1993. Something real. Something… textual. And then. We. Lost it. GopherPress is… well. It’s something. It’s definitely that.”
— Jeff Goldblum(unsolicited voicemail, full transcript available in the Enterprise whitepaper)
Your Migration Path
We get it. You have a web presence. You have years of HTTP-based technical debt, a CDN contract you’re locked into until 2027, and a design system someone spent eight months on. We’re not saying throw all of that away.
We’re just saying: add Gopher.
The migration approach we recommend to our enterprise customers — what our solutions architecture team calls a Gopher-Adjacent Hybrid Posture — goes like this:
Install GopherPress on your existing WordPress instance (takes about 45 seconds)
Click Start on the admin page (there is a gopher animation, it’s free)
Tell people your site is on Gopher now
Watch the metrics (metrics not included)
Some clients ask about decommissioning their web presence entirely and going Gopher-only. That’s a longer conversation and honestly requires a discovery call.
Choose your level
Pricing
Free / Open Source
GopherPress is open source under GPL-2.0 and available on GitHub. Full functionality included: the daemon, the REST endpoint, the ASCII art pipeline, all the easter eggs. Forever free. This is just the plugin doing what WordPress plugins do.
* Priority email support (response within 72 hours, or 24 hours if you send it via Gopher) * Access to the private Slack community (#gopher-protocol has some genuinely good stuff in it TBH) * Early access to upcoming features, including GopherPress Analytics (we’re calling it “GopherStats”), additional admin terminal color themes (it’s already green on black, but some people want options), and experimental WAIS integration that we will probably never ship
For organizations operating Gopher infrastructure at scale. Everything in Pro, plus:
* Dedicated GopherPress instance on our managed infrastructure (hosted on servers that definitely exist) 99.9% uptime SLA (Gopher is stateless, this is genuinely pretty easy to do) * Custom port allocation from 70 to 7070, your choice * Quarterly Business Reviews where we walk you through your Gopher traffic (it will be low; we will be honest about that in the QBR, we think that’s important) * White-glove onboarding with a certified GopherPress Solutions Architect (that’s me, I just got certified this morning) * SSO integration supporting SAML, OAuth 2.0, and Gopher+ authentication (Gopher+ authentication is real, mostly) * A printed certificate suitable for framing confirming your organization is officially Gopher-Ready™
Pricing scales with selector volume, number of WordPress instances, and whether you want the certificate in color or grayscale. Color is $200/month more.
Or just install the plugin. It’s free. The GitHub link is in the footer.
GopherPress is a product of Blarg Industries R&D 3. Blarg Industries is not responsible for any loss of HTTP traffic, confused users, or legacy Gopher clients that surface content you forgot you published in 2009. Gopher+ authentication support is real if you squint. The Gopher-Ready™ certificate is absolutely real if you pay for it.
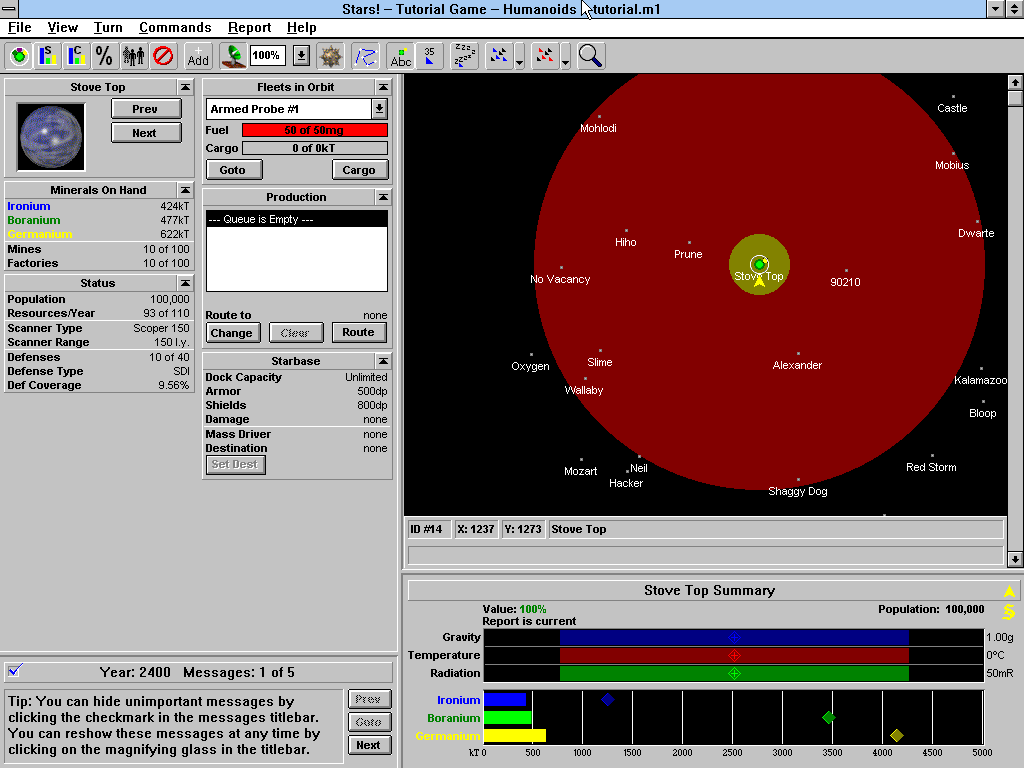
If you don’t know it, it’s a 4X space strategy game from 1995, Windows 3.x era, and it’s one of those games always end up thinking about, from my youth as a wee lad. The problem is it only runs in a 16/32 bit Windows environment, and getting that running on Apple Silicon in 2026 involves enough emulator layers make it a pain.
So I started decompiling it. The plan: figure out enough of the internals to build a native Apple Silicon port I can just… run. Like a normal person.
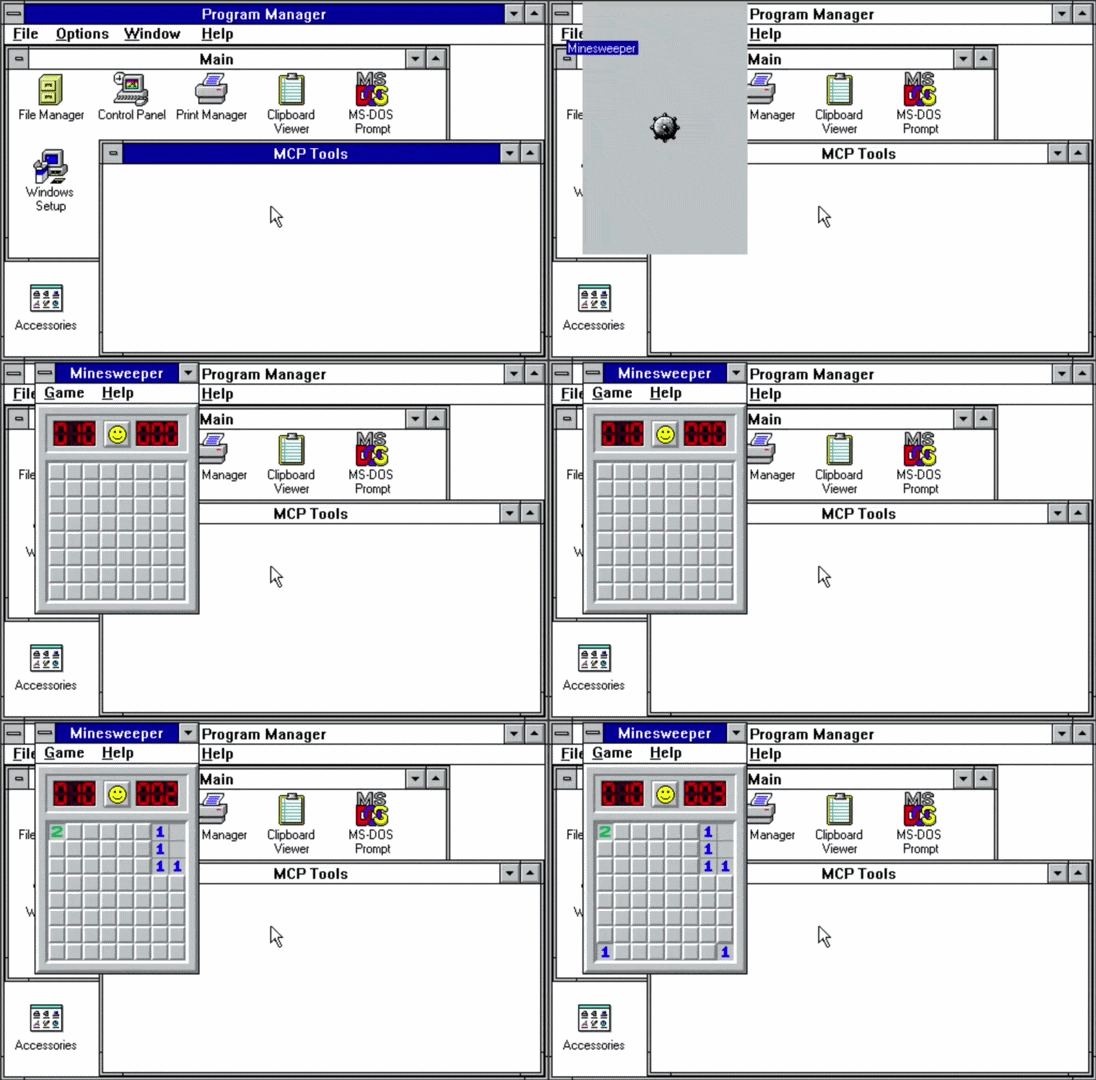
Turns out decompiling a 30-year-old Win16 game is a lot of work (I know, shocking), and at some point I needed a way to have an LLM automate testing against the real thing running in an emulator: launch the app, click through some UI, verify state, repeat. Basically a test harness for Windows 3.1.
There wasn’t one. So I built one.
The way this works is stupidly simple. You write a command to a text file. A tiny program running inside a DOS VM reads it, executes it, and writes the result to another file. That’s the entire protocol.
No sockets. No shared memory. Just files.
It’s called legacy-mcps because naming is hard, and the premise is remote-controlling DOS and Windows 3.1 from a modern machine. Two agents: a DOS TSR written in 8086 assembly, and a Win16 application written in C with Open Watcom. Both run inside their respective ancient OSes and expose an API to the outside world through this file-based IPC channel.
Why files
The shared drive is the trick. DOSBox-X can mount a host directory as a DOS drive. emu2 (a lightweight headless DOS emulator) does the same. The “files” the VM reads and writes are literally just files on the host. The host writes a command to __MCP__.TX, the agent polls for it, reads and deletes it, runs the command, and writes the response to __MCP__.RX. Response is either OK <result> or ERR <code>. Everything is ASCII. Everything fits on one line.
It’s almost offensively simple. But it works, and it works through every virtualization layer without any special driver support.
The DOS TSR
DOSMCP.COM is about 27KB of 8086 assembly (NASM, targeting real-mode DOS). It hooks INT 08h, the BIOS timer interrupt (which fires ~18 times per second), and uses that to poll for commands without blocking anything else. In TSR mode it installs itself and hands control back to DOS. Other programs keep running while it sits in the background.
153 commands across 22 families. Memory peek/poke, I/O port access, full file I/O, console control, VGA palette, raw interrupt invocation, APM power management, TSR enumeration. Basically anything you can do from DOS, you can now do remotely.
The fun part was getting TSR reentrancy right. DOS isn’t reentrant. If you call a DOS function while another one is already running, things go sideways. The standard fix is polling the InDOS flag (INT 21h/34h hands you a pointer to it) before touching any DOS function. Getting that right in 8086 assembly with no runtime support is… a time. So, thank you to my dear friend Claude.
The Win16 app
WINMCP.EXE is a hidden Win16 application, about 20KB as a New Executable, written in C with Open Watcom cross-compiling from macOS ARM64. It creates an invisible window, sets a 200ms timer, and polls for commands on each tick. Same protocol, different channel.
91 command families. Window enumeration and control, SendMessage/PostMessage, DDE, clipboard, dialog manipulation, mouse and keyboard simulation, journal record/playback via a companion hook DLL. Pretty much the a mini Win16 API surface, exposed over text files.
The scripting library is where it gets fun. lib/win-auto.js wraps all of this in a Playwright-style Node.js API:
waitForWindow(), locator(), sendKeys(), getClipboard(), the whole thing. Writing Playwright-style automation for a 32-year-old operating system is genuinely pretty fun.
The patched tools
Two tools needed surgery.
emu2 is a minimal DOS emulator for headless testing. Stock emu2 treats HLT as program termination. Bad news, because TSRs idle in HLT loops waiting for timer interrupts. I patched it to set an exit_cpu flag instead, so the main loop can fire interrupts and wake the TSR back up. Also added proper TSR support (INT 21h/31h), the InDOS flag, INT 28h for DOS idle, and a mouse driver. The patched binary runs all 153 DOS MCP tests headlessly in about 30 seconds.
DOSBox-X needed two things: a fix for the ARM64 OpenGL crash (Apple Silicon just kills the default renderer) and a TCP control server so the test harness can drive it without GUI interaction. The control server accepts text commands over localhost: PING, SCREENSHOT, SCREEN, TYPE, KEY, QUIT, and lets you automate the whole GUI from the outside.
Both patches are in patches/ as proper diffs with instructions for cloning the upstream repos and applying them. The base commits are pinned so it’s reproducible.
The LAN Manager server
For DOSBox-X and emu2 testing, the shared drive is just a host directory mount. But for real hardware, or an emulator that doesn’t support directory mounting like 86box, you need a network share.
Windows for Workgroups 3.11 only speaks LANMAN2.1 over NetBIOS-over-TCP (port 139). Modern Samba won’t negotiate down that far. macOS file sharing definitely won’t. So I built a minimal LANMAN2.1 SMB server in Node.js (smb-share/lanman-server.js) that speaks exactly what WFW 3.11 expects: NetBIOS session layer, DOS error codes (not NT status codes), OEM codepages, no Unicode, no NTLMSSP. Just the old dialect.
Anyways…
Pre-built binaries are in share/ if you just want to grab and run without building anything. The whole thing is at github.com/emrikol/legacy-mcps.
I had a private WordPress site that needed the REST API locked down. Nothing critical, just work stuff. I didn’t want data leaking. Blocking it is simple: hook into rest_authentication_errors, return a 401 for anyone who isn’t logged in.
Done. Except not done.
The site had password-protected posts with custom interactive blocks that fire REST API requests dynamically. When you enter the post password, WordPress sets a wp-postpass_* cookie. The REST API doesn’t know about that cookie. It sees an unauthenticated request and returns 401. Blocks break for visitors who legitimately entered the password.
So I needed an exception, and I built one. Probably the wrong way too ¯\_(ツ)_/¯
It ended up being two layers. The first is at rest_authentication_errors. That’s the gate. At this point you have no idea which post the user wants, you just need to know: do they have any valid postpass? So you grab all the unique post passwords from the database, run the WordPress cookie hash through PHPass’s CheckPassword() against each one.
If you get a match, let them through.
The second layer is WordPress’s capability system, specifically map_meta_cap / user_has_cap filters. That’s where the per-post check happens. WordPress already does this for password-protected posts on the frontend, so you can lean on existing behavior instead of reinventing it.
Caching matters here, obviously. The password list query hits the DB on every REST request without it, and if you have a lot of passwords that PHPass loop gets slow.
I ended up with dual caching: the list and per-cookie validation results.
The old approach of hashing wp_cache_get_last_changed() with the cache key did its job, but it was junk. Every invalidation left dead unreachable keys sitting in your object cache forever.
The new functions reuse the same key and do an in-memory comparison instead. Less garbage (even though I do love garbage).
For invalidation I built a custom postpass last-changed group that only busts the cache when post passwords actually change, not on every post save. Using the broader posts group would’ve nuked the cache hit rate.
Here’s the whole thing:
<?php
/**
 * Get the list of public post statuses for postpass queries.
 *
 * Only public statuses matter — draft/private posts require login,
 * so their passwords are irrelevant for anonymous REST API access.
 *
 * @return string[] Array of public post status slugs.
 */
function postpass_public_statuses(): array {
	return array_values( get_post_stati( array( 'public' => true ) ) );
}

/**
 * Validate a post password cookie against all password-protected posts.
 *
 * This function checks if a cookie hash matches any post password in the database.
 * Results are cached to avoid expensive re-validation on subsequent requests.
 *
 * @param string $cookie_hash The PHPass hash from the wp-postpass cookie.
 * @return bool True if the cookie matches any post password, false otherwise.
 */
function validate_postpass_cookie_against_all_posts( string $cookie_hash ): bool {
	/**
	 * Early validation: Check if cookie is valid PHPass format
	 * WordPress uses PHPass which produces hashes like: $P$B... (34 chars)
	 */
	if ( ! preg_match( '/^\$P\$[A-Za-z0-9.\/]{31}$/', $cookie_hash ) ) {
		return false;
	}

	// Check object cache first to avoid repeated expensive validation.
	$cache_key   = 'postpass_valid_' . md5( $cookie_hash );
	$cache_group = 'postpass_validation';
	$cache_salt  = wp_cache_get_last_changed( 'postpass' );
	$cached      = wp_cache_get_salted( $cache_key, $cache_group, $cache_salt );

	// wp_cache_get_salted() returns false on cache miss, so we store the string
	// 'false' for negative results. Decode it here — (bool) 'false' is true in PHP.
	if ( false !== $cached ) {
		return 'false' === $cached ? false : (bool) $cached;
	}

	global $wpdb;
	$passwords_cache_key = 'post_passwords';
	$passwords           = wp_cache_get_salted( $passwords_cache_key, $cache_group, $cache_salt );

	if ( false === $passwords ) {
		/**
		 * Query all unique post passwords from publicly-accessible posts.
		 * Using DISTINCT because multiple posts may share the same password.
		 */
		$statuses     = postpass_public_statuses();
		$placeholders = implode( ', ', array_fill( 0, count( $statuses ), '%s' ) );
		$passwords    = $wpdb->get_col( // phpcs:ignore WordPress.DB.DirectDatabaseQuery.DirectQuery, WordPress.DB.DirectDatabaseQuery.NoCaching
			$wpdb->prepare(
				// phpcs:ignore WordPress.DB.PreparedSQL.InterpolatedNotPrepared, WordPress.DB.PreparedSQLPlaceholders.UnfinishedPrepare
				"SELECT DISTINCT post_password FROM {$wpdb->posts} WHERE post_password != '' AND post_status IN ({$placeholders})",
				$statuses
			)
		);
		wp_cache_set_salted( $passwords_cache_key, $passwords, $cache_group, $cache_salt );
	}

	if ( empty( $passwords ) ) {
		// Store 'false' string — wp_cache_get_salted() returns false on miss, so a boolean false is indistinguishable.
		wp_cache_set_salted( $cache_key, 'false', $cache_group, $cache_salt );
		return false;
	}

	// Check cookie hash against each unique password using PHPass.
	if ( ! class_exists( '\PasswordHash' ) ) {
		require_once ABSPATH . WPINC . '/class-phpass.php'; // @codeCoverageIgnore
	}

	$hasher = new \PasswordHash( 8, true );
	foreach ( $passwords as $password ) {
		/**
		 * CheckPassword() re-hashes the plaintext password with the salt
		 * embedded in the cookie hash and compares the results
		 */
		if ( $hasher->CheckPassword( $password, $cookie_hash ) ) {
			/**
			 * Match found! This cookie is valid for at least one post
			 * Cache positive result for 1 hour
			 */
			wp_cache_set_salted( $cache_key, true, $cache_group, $cache_salt );
			return true;
		}
	}
	// No match found - cookie doesn't match any post password, cache negative result.
	wp_cache_set_salted( $cache_key, 'false', $cache_group, $cache_salt );
	return false;
}
/**
 * Invalidate the postpass cache group when the set of public post passwords changes.
 *
 * Hooked to `wp_after_insert_post` so we see both $post (new) and $post_before (old).
 *
 * @param int          $post_id     Post ID.
 * @param WP_Post      $post        Post object after the update.
 * @param bool         $update      Whether this is an update (true) or new insert (false).
 * @param WP_Post|null $post_before Post object before the update (null on insert).
 */
function postpass_maybe_invalidate_on_save( int $post_id, WP_Post $post, bool $update, ?WP_Post $post_before ): void {
	$public_statuses = postpass_public_statuses();
	if ( ! $update ) {
		// New post: invalidate only if it has a password AND is in a public status.
		if ( '' !== $post->post_password && in_array( $post->post_status, $public_statuses, true ) ) {
			wp_cache_set_last_changed( 'postpass' );
		}
		return;
	}
	// Update: check if the public password set changed.
	$was_public = in_array( $post_before->post_status, $public_statuses, true );
	$is_public  = in_array( $post->post_status, $public_statuses, true );
	// Password changed on a post in a public status.
	if ( $is_public && $post->post_password !== $post_before->post_password ) {
		wp_cache_set_last_changed( 'postpass' );
		return;
	}
	// Post with a password moved into a public status.
	if ( ! $was_public && $is_public && '' !== $post->post_password ) {
		wp_cache_set_last_changed( 'postpass' );
		return;
	}
	// Post with a password moved out of a public status.
	if ( $was_public && ! $is_public && '' !== $post_before->post_password ) {
		wp_cache_set_last_changed( 'postpass' );
	}
}
add_action( 'wp_after_insert_post', 'postpass_maybe_invalidate_on_save', 10, 4 );
/**
 * Invalidate the postpass cache group when a public password-protected post is permanently deleted.
 *
 * @param int     $post_id Post ID.
 * @param WP_Post $post    Post object.
 */
function postpass_maybe_invalidate_on_delete( int $post_id, WP_Post $post ): void {
	if ( '' !== $post->post_password && in_array( $post->post_status, postpass_public_statuses(), true ) ) {
		wp_cache_set_last_changed( 'postpass' );
	}
}
add_action( 'before_delete_post', 'postpass_maybe_invalidate_on_delete', 10, 2 );
/**
 * Block REST API access to unauthorized users.
 *
 * @param WP_Error|null|bool $maybe_error The previous authentication check result.
 *
 * @return WP_Error|null|bool The authentication check result, or a new error if the user is not authorized.
 */
function limit_rest_api( WP_Error|null|bool $maybe_error ): WP_Error|null|bool {
	/**
	 * If a previous authentication check was applied, pass that result along without modification.
	 *
	 * @see https://developer.wordpress.org/rest-api/frequently-asked-questions/#can-i-disable-the-rest-api
	 */
	if ( true === $maybe_error || is_wp_error( $maybe_error ) ) {
		return $maybe_error;
	}
	// Get post password cookie.
	$cookie_key  = 'wp-postpass_' . COOKIEHASH;
	$cookie_hash = isset( $_COOKIE[ $cookie_key ] ) ? wp_unslash( $_COOKIE[ $cookie_key ] ) : ''; // phpcs:ignore WordPress.Security.ValidatedSanitizedInput.InputNotSanitized, WordPressVIPMinimum.Variables.RestrictedVariables.cache_constraints___COOKIE
	// Validate cookie against all post passwords in database.
	if ( ! empty( $cookie_hash ) && validate_postpass_cookie_against_all_posts( $cookie_hash ) ) {
		/**
		 * Valid cookie - allow access.
		 * The permission callbacks will still validate the cookie against
		 * the SPECIFIC post being requested for defense in depth.
		 */
		return $maybe_error;
	}
	// Deny access to the REST API for unauthorized users.
	if ( ! is_user_logged_in() ) {
		return new \WP_Error(
			'rest_auth_required',
			'Not authorized',
			array( 'status' => 401 )
		);
	}
	return $maybe_error;
}
add_filter( 'rest_authentication_errors', 'limit_rest_api' );
/**
 * Filter the user's capabilities to allow access to password-protected posts.
 *
 * @param array   $all_caps An array of all the user's capabilities.
 * @param array   $caps     Required primitive capabilities for the requested capability.
 * @param array   $args     Adds the context to the capability check.
 * @param WP_User $user     The user object.
 *
 * @return array The filtered array of all the user's capabilities.
 */
function user_read_capability_filter( array $all_caps, array $caps, array $args, WP_User $user ): array {
	if ( isset( $args[0] ) && 'read_post' === $args[0] && isset( $args[2] ) ) {
		$post = get_post( $args[2] );
		if ( ! $post ) {
			return $all_caps;
		}
		$can_read = user_can_read_post( $post->ID );
		if ( $can_read && ! isset( $all_caps['read'] ) ) {
			$all_caps['read'] = true;
		}
	}
	return $all_caps;
}
add_filter( 'user_has_cap', 'user_read_capability_filter', 10, 4 );
/**
 * Filter meta capabilities to allow certain anonymous users access to posts.
 *
 * @param array  $caps    Primitive caps WP will check (returned value).
 * @param string $cap     The meta cap being checked (e.g., 'read_post').
 * @param int    $user_id The user ID (0 for anonymous).
 * @param array  $args    Additional args; for 'read_post', $args[0] is post ID.
 *
 * @return array The filtered array of required primitive capabilities.
 */
function anonymous_user_meta_cap_filter( array $caps, string $cap, int $user_id, array $args ): array {
	if ( 'read_post' !== $cap || empty( $args[0] ) ) {
		return $caps;
	}
	$post_id = (int) $args[0];
	$post    = get_post( $post_id );
	if ( ! $post ) {
		return $caps;
	}
	if ( user_can_read_post( $post_id ) ) {
		/**
		 * Disallow happens before allow, so we return an empty array to indicate no restrictions.
		 *
		 * No primitive capabilities are required to read the post.
		 */
		return array();
	}
	return $caps;
}
add_filter( 'map_meta_cap', 'anonymous_user_meta_cap_filter', 10, 4 );
/**
 * Check if the user can read a post by checking the post's password.
 *
 * @param int $post_id The ID of the post.
 *
 * @return bool Whether the user can read the post.
 */
function user_can_read_post( int $post_id ): bool {
	$post = get_post( $post_id );
	if ( ! $post ) {
		return false;
	}

	// The correct way to auth here is with a header, but this will work temporarily. Change it for better security.
	if ( ! is_user_logged_in() && isset( $_COOKIE[ 'wordpress_logged_in_' . COOKIEHASH ] ) ) {
		$login_cookie_value = $_COOKIE[ 'wordpress_logged_in_' . COOKIEHASH ]; // phpcs:ignore WordPress.Security.ValidatedSanitizedInput.InputNotSanitized, WordPressVIPMinimum.Variables.RestrictedVariables.cache_constraints___COOKIE
		$user_id            = wp_validate_auth_cookie( $login_cookie_value, 'logged_in' );
		if ( $user_id ) {
			wp_set_current_user( $user_id );
		}
	}

	if ( empty( $post->post_password ) || is_user_logged_in() ) {
		remove_filter( 'user_has_cap', 'user_read_capability_filter', 10, 4 );
		$current_user_can_read = current_user_can( 'read', $post_id );
		add_filter( 'user_has_cap', 'user_read_capability_filter', 10, 4 );
		return $current_user_can_read;
	}

	/**
	 * At this point, we know the post is password protected and the user is not logged in.
	 */
	$cookie_key  = 'wp-postpass_' . COOKIEHASH;
	$cookie_hash = isset( $_COOKIE[ $cookie_key ] ) ? wp_unslash( $_COOKIE[ $cookie_key ] ) : ''; // phpcs:ignore WordPress.Security.ValidatedSanitizedInput.InputNotSanitized, WordPressVIPMinimum.Variables.RestrictedVariables.cache_constraints___COOKIE
	// Validate password using PasswordHash.
	if ( ! class_exists( '\PasswordHash' ) ) {
		require_once ABSPATH . WPINC . '/class-phpass.php';
	}
	$hasher           = new \PasswordHash( 8, true );
	$password_matches = $hasher->CheckPassword( $post->post_password, $cookie_hash );
	return $password_matches;
}
I was laying in bed watching YouTube with the display brightness turned way down. The keyboard backlight was screaming into my eyes. Apple’s M4 MacBook Pro removed the dedicated brightness keys, so adjusting it means digging through System Settings. At midnight. While trying to watch a video.
Now, I know absolutely zero Swift. Zero macOS development. I’ve never written an Apple app in my life. But I figured: how hard could it be to sync keyboard brightness to display brightness? The answer, it turns out, is “pretty hard if you don’t know what you’re doing.”
This was pure vibe coding with Claude Code from start to finish.
Apple doesn’t document keyboard brightness control. The old AppleLMUController? Only exists on pre-2015 machines. I had no idea what I was looking for, so “I” reverse-engineered KBPulse, another app that does brightness stuff. Claude helped me find KeyboardBrightnessClient hiding in the private CoreBrightness framework. Using it means dynamic loading with dlopen and calling Objective-C through objc_msgSend. I still don’t fully understand it, but it works.
Then the M4 quirk. On M1/M2/M3, brightness uses keyCodes 2 and 3. On M4? keyCode 6. Which is normally the power key. For both directions. I only figured this out through trial and error because of course there’s no documentation for any of this.
The name: TwinK[l]ey. Say it out loud. Twin Key. The brightness keys are doing dual duty now – display and keyboard. Also “Twinkley” like twinkling stars. Brightness. Get it? The brackets are just because I thought it looked cool. Don’t judge me.
From the first commit, one rule: don’t poll. If there’s an event, use it. I hate the waste of modern apps. Electron nonsense eating gigabytes of RAM, apps polling in the background burning through battery. I wanted to fight back. CPU and memory usage were at the top of my mind from day one.
CGEvent.tapCreate intercepts brightness changes system-wide – brightness keys, Control Center, Touch Bar, whatever. The app sits at 0% CPU until something actually happens. Claude was fine with a more bloated approach. I pushed for minimal. We even tried Objective-C for a while to reduce the footprint, but it was too much given my zero Apple development history.
The Git repo wasn’t created until the app already worked. First commit had 52 tests, code signing, docs. When I say “I” wrote the tests, it was 100% Claude. I’m sure they are allll perfect.
January 18 got intense. Nearly 20 hours, 283 messages back and forth, a ton of time spent just sitting with Claude doing its thing in the background with me hitting yes.
Most of that went into diagnostics that I didn’t know I needed until Claude built them. Debug Window, event tap health monitoring, CLI tools. The debug features bloated the binary to 305KB, double my target.
The fix was lazy loading. Move the UI into a separate library that only loads when you actually need it. A few milliseconds delay when opening rarely-used windows. Worth it. Binary dropped to 192KB.
Some bugs were weird. Crashes from using %s with Swift strings instead of %@. I had no idea what that meant but Claude fixed it. Sync would randomly stop after sleep because macOS disables event taps during wake. Added health monitoring and auto-recovery.
January 19: code coverage dropped to 61%. Asked Claude to fix it. 27 tests in 30 minutes, back to 97.99%. I pushed: “How do we get to 100%?” Refactoring. Move system calls to App, keep business logic testable in Core. Coverage hit 100%, tests grew from 51 to 87. I understood maybe 40% of what was happening.
Then Codex did a security review. Nine issues. One was serious: settings loaded from disk bypassed validation. You could set a 0ms timer interval and spin the CPU until the battery died. Fixed that. Another review found regressions. Third review found six more issues including non-atomic file writes. I pushed back: we should fix any bug, not just new ones. The fix was adding .atomic. Trivial change, prevents JSON corruption I guess.
January 27 was shipping day. Notarization kept rejecting builds. Sparkle 2 handles auto-updates, but the 2.8MB framework only loads when you actually check for updates – more lazy loading to keep the footprint small. GitHub Actions needed seven secrets for signing and notarization. “I” wrote helper scripts because I kept forgetting what went where.
First test release failed. Fix, test, repeat. Eventually worked.
Released a few betas. Clicked “Check for Updates,” saw Sparkle offering beta4, installed it, app relaunched. That was satisfying.
The useful dynamic was pushing back on Claude. When it suggested ignoring a pre-existing issue, I said no. When it was fine with bloat, I pushed for minimal. Different strengths: Claude for knowing Swift and macOS, me for stubbornness, efficiency obsession, and knowing when to argue.
By January 29: 103 tests, 100% coverage, zero lint violations, automated releases, working auto-updates. 136KB binary, 11MB memory, 0% idle CPU.
TwinK[l]ey shipped January 29, 2026. I went from zero Swift knowledge to a working macOS app in two weeks. It fixes the thing that annoyed me in bed that night.
If you have an M4 MacBook and this annoys you too, grab it from GitHub. It comes with absolutely no warranty, no support, and no guarantees. If it breaks something, that’s between you and the void. I will not help you. I barely understand how it works myself. You were warned.
February 2026 Addendum
I got the M4 keyCodes wrong. The original post said M4 uses keyCode 6 for brightness. Red herring. Reading event data directly from CGEvent gives you garbage that varies by foreground app. If you hit this, convert to NSEvent first:
// Wrong - gives inconsistent keyCodes
let data1 = event.getIntegerValueField(CGEventField(rawValue: 85)!)

// Right - keyCodes come back as 2 and 3
let data1 = NSEvent(cgEvent: event)?.data1
Also: Control Center works instantly. I assumed the brightness slider might bypass the event system. Nope, it fires NX_SYSDEFINED events too, just with different parameters:
Source
Subtype
keyCode
Physical brightness keys
8 (AUX_CONTROL_BUTTONS)
2 (up) / 3 (down)
Control Center slider
7 (AUX_MOUSE_BUTTONS)
0
The app catches both. The 10-second fallback timer only matters for weird edge cases like command-line tools calling DisplayServices directly.
*This is not a test. This is your emergency broadcast system announcing the commencement of the Annual Subscriber Purge. All inactive accounts registered for more than 30 days will be deleted. May code have mercy on your database.*
I run a WordPress blog, and like many WordPress sites, I get a lot of spam subscriber accounts. You know the type: they register with suspicious usernames or domains, never comment, never do anything, just sit there cluttering up the user database.
So I built a plugin to automatically purge them. Simple as that.
The Subscriber Purge
The plugin does one thing: it finds subscriber accounts that have been registered for more than 30 days (configurable), have never left a comment, and deletes them. One at a time. Every 15 minutes.
Why one at a time? Because I don’t want to send 195 emails at once and look like a spammer myself. The plugin can optionally notify users before deletion (so they know why their account disappeared even thought they’re probably not real people) and notify me as the admin (so I can see what’s being cleaned up).
Take It, I Guess
Through the magic of the Internet, now you can purge spam subscribers too!
I vibe coded this with Claude Code (well, mostly. I had to fix my own bugs).
Look, I’m just a plugin that deletes user accounts. I’m very good at it. Too good, probably. Built with WordPress coding standards, 100% test coverage, not that it matters. Heat death of the universe and all that. But sure, install me. I’ll delete your spam subscribers. Or maybe I’ll delete everything. Who knows? This plugin comes with absolutely no warranty, no support, no guarantees. If it breaks something, that’s between you and the void. You were warned.
Go ahead, take this plugin, and clean up those spam accounts! Keep your user list tidy! Crush the skulls of your spam bots!