Tag: raspberry-pi

  • A Trio of Pibooth Plugins

    A Trio of Pibooth Plugins

    This past weekend I did a thing:

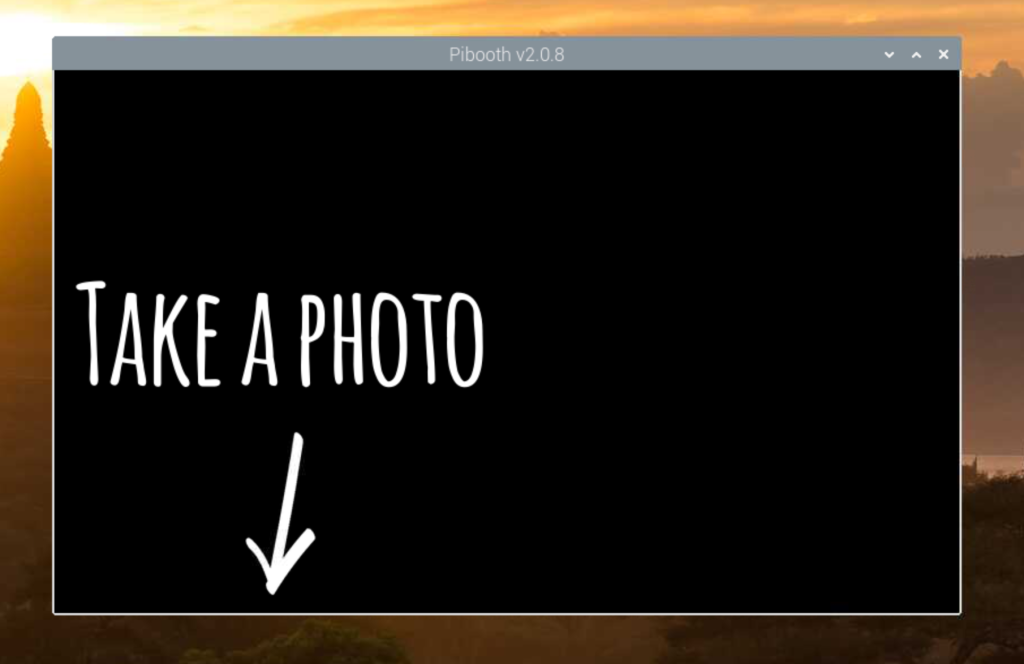
    One of the things that I had done, as previously blargged about here, is having a Pibooth Photo Booth.

    I ended up writing three custom plugins that I’m going to share here. I had plenty of help from ChatGPT because I hate Python and it’s the worst language invented and it should be destroyed.

    I also ended up hacking a bit of Pibooth core because its hook/plugin system was a bit lacking for my needs, but that was only around moving around some of the touchscreen UI items for a better user experience. But enough about that, here’s my three plugins:

    Fullscreen Toggle

    One of the things I wanted to be able to easily do, running a keyboard/mouseless touchscreen Raspbery Pi was to be able to jump in and out of Fullscreen mode to do things like debug printers, change Wifi, etc. So I pulled this plugin out of the ether. It allows you to touch the top right corner (or click, if that’s your thing) to toggle between fullscreen and windowed mode.

    import pygame
    from pibooth import hookimpl
    from pibooth.utils import LOGGER
    
    __version__ = "0.0.1"
    
    """
    Plugin to toggle fullscreen/windowed mode by tapping top right corner in take-a-picture screen.
    """
    
    # Fractional region size
    REGION_WIDTH_FRAC = 0.10  # 10% width
    REGION_HEIGHT_FRAC = 0.10  # 10% height
    
    @hookimpl
    def state_wait_do(cfg, app, win, events):
        """
        In the wait state (take-a-picture), detect a tap/click in the top-right corner
        and toggle fullscreen mode.
        """
        # Only on the initial "take a picture" screen (wait state)
        # events: list of pygame events
        for ev in events:
            if ev.type in (pygame.MOUSEBUTTONUP, pygame.FINGERUP):
                # Determine click position
                if hasattr(ev, 'pos'):
                    x, y = ev.pos
                else:
                    sw, sh = win.surface.get_size()
                    x, y = ev.x * sw, ev.y * sh
                sw, sh = win.surface.get_size()
                # Define top-right region
                region_x0 = sw * (1 - REGION_WIDTH_FRAC)
                region_y1 = sh * REGION_HEIGHT_FRAC
                if x >= region_x0 and y <= region_y1:
                    # Toggle fullscreen
                    try:
                        win.toggle_fullscreen()
                        LOGGER.info("[fullscreen_toggle] Toggled fullscreen mode")
                    except Exception as e:
                        LOGGER.error(f"[fullscreen_toggle] Failed to toggle fullscreen: {e}")
                    # Consume event
                    return ev
        # Return None to fall back to default behaviorCode language: Python (python)

    Upload to WordPress

    Well, yeah. Obvi! This plugin uploads the photos to your WordPress Media library, with an optional tag and optional post object to attach them to. It will also update the URL so that it works with the “QR Code” plugin (not mine, from Pihole or something, IDK). You just have to add some of the options to your Pihole config file, like the hostname, username, application password, etc.

    import os
    import http.client
    import base64
    import json
    import pibooth
    from pibooth.utils import LOGGER
    
    __version__ = "0.0.4"
    
    SECTION = 'WORDPRESS'
    PICTURE_SECTION = 'PICTURE'
    
    @pibooth.hookimpl
    def pibooth_configure(cfg):
        """Declare the new configuration options"""
        cfg.add_option(SECTION, 'wordpress_host', '',
            "WordPress site host (e.g., 'yourwordpresssite.com')")
        cfg.add_option(SECTION, 'wordpress_username', '',
          "WordPress username")
        cfg.add_option(SECTION, 'wordpress_password', '',
            "WordPress application password")
        cfg.add_option(SECTION, 'wordpress_parent_id', '',
            "(Optional) WordPress post or page ID to attach the uploads",
            "Post or Page ID (optional)", '')
        cfg.add_option(SECTION, 'image_title', '',
            "(Optional) Title for the uploaded image",
            "Image title (optional)", '')
        cfg.add_option(SECTION, 'image_caption', '',
            "(Optional) Caption for the uploaded image",
            "Image caption (optional)", '')
        cfg.add_option(SECTION, 'wordpress_post_tag', '',
            "(Optional) Post tag taxonomy term slug to assign to the uploaded media",
            "Post tag (optional)", '')
    
    @pibooth.hookimpl
    def pibooth_startup(app, cfg):
        """Initialize the WordPress uploader plugin"""
        app.previous_picture_url = None
        wordpress_host = cfg.get(SECTION, 'wordpress_host')
        wordpress_username = cfg.get(SECTION, 'wordpress_username')
        wordpress_password = cfg.get(SECTION, 'wordpress_password')
        wordpress_parent_id = cfg.get(SECTION, 'wordpress_parent_id')
        wordpress_post_tag = cfg.get(SECTION, 'wordpress_post_tag')
        
        image_title = ''
        image_caption = ''
    
        if cfg.has_option(SECTION, 'image_title') and cfg.get(SECTION, 'image_title'):
            image_title = cfg.get(SECTION, 'image_title')
            LOGGER.info(f"Using image title from WORDPRESS config: {image_title}")
        elif cfg.has_option(PICTURE_SECTION, 'footer_text1') and cfg.get(PICTURE_SECTION, 'footer_text1'):
            image_title = cfg.get(PICTURE_SECTION, 'footer_text1')
            LOGGER.info(f"Using image title from GENERAL config: {image_title}")
        else:
            LOGGER.info("Image title missing!")
        
        if cfg.has_option(SECTION, 'image_caption') and cfg.get(SECTION, 'image_caption'):
            image_caption = cfg.get(SECTION, 'image_caption')
            LOGGER.info(f"Using image caption from WORDPRESS config: {image_caption}")
        elif cfg.has_option(PICTURE_SECTION, 'footer_text2') and cfg.get(PICTURE_SECTION, 'footer_text2'):
            image_caption = cfg.get(PICTURE_SECTION, 'footer_text2')
            LOGGER.info(f"Using image caption from GENERAL config: {image_caption}")
        else:
            LOGGER.info("Image caption missing!")
    
        if not wordpress_host:
            LOGGER.error(f"WordPress host not defined in [{SECTION}][wordpress_host], uploading deactivated")
        elif not wordpress_username:
            LOGGER.error(f"WordPress username not defined in [{SECTION}][wordpress_username], uploading deactivated")
        elif not wordpress_password:
            LOGGER.error(f"WordPress password not defined in [{SECTION}][wordpress_password], uploading deactivated")
        else:
            LOGGER.info("WordPress uploader plugin installed")
            app.wordpress_host = wordpress_host
            app.auth_token = base64.b64encode(f"{wordpress_username}:{wordpress_password}".encode()).decode()
            app.wordpress_parent_id = wordpress_parent_id if wordpress_parent_id else None
            app.wordpress_post_tag = wordpress_post_tag if wordpress_post_tag else None
            LOGGER.info(f"Post tag set to: {app.wordpress_post_tag}")
            app.image_title = image_title
            app.image_caption = image_caption
    
            LOGGER.info(f"Image title set to: {app.image_title}")
            LOGGER.info(f"Image caption set to: {app.image_caption}")
    
    @pibooth.hookimpl
    def state_processing_exit(app, cfg):
        """Upload picture to WordPress media library"""
        # Skip plugin if disabled in config
        # if not (cfg.has_section('CUSTOM_PROCESSING') and cfg.getboolean('CUSTOM_PROCESSING', 'enabled')):
        #    return
            
        if hasattr(app, 'wordpress_host') and hasattr(app, 'auth_token'):
            name = os.path.basename(app.previous_picture_file)
    
            with open(app.previous_picture_file, 'rb') as fp:
                image_data = fp.read()
    
            headers = {
                'Content-Disposition': f'attachment; filename={name}',
                'Content-Type': 'image/jpeg',
                'Authorization': f'Basic {app.auth_token}'
            }
    
            # Prepare the request path with an optional parent ID
            path = "/wp-json/wp/v2/media"
            if app.wordpress_parent_id:
                path += f"?parent={app.wordpress_parent_id}"
    
            conn = http.client.HTTPSConnection(app.wordpress_host)
            conn.request("POST", path, body=image_data, headers=headers)
            response = conn.getresponse()
            
            if response.status == 201:
                response_data = json.loads(response.read().decode())
                app.previous_picture_url = response_data['source_url']
                
                LOGGER.info(f"Uploaded image URL: {app.previous_picture_url}")
    
                # Set metadata if provided
                metadata = {}
                if app.image_title:
                    metadata['title'] = app.image_title
                if app.image_caption:
                    metadata['caption'] = app.image_caption
                if app.wordpress_post_tag:
                    term_slug = app.wordpress_post_tag
                    tag_headers = {
                        'Content-Type': 'application/json',
                        'Authorization': f'Basic {app.auth_token}'
                    }
                    # Try to fetch existing tag
                    conn.request("GET", f"/wp-json/wp/v2/tags?slug={term_slug}", headers=tag_headers)
                    tag_resp = conn.getresponse()
                    if tag_resp.status == 200:
                        tags_list = json.loads(tag_resp.read().decode())
                        if tags_list:
                            tag_id = tags_list[0]['id']
                        else:
                            # Create the tag if not found
                            payload = json.dumps({'name': term_slug, 'slug': term_slug})
                            conn.request("POST", "/wp-json/wp/v2/tags", body=payload, headers=tag_headers)
                            create_resp = conn.getresponse()
                            if create_resp.status == 201:
                                tag_id = json.loads(create_resp.read().decode())['id']
                            else:
                                LOGGER.error(f"Failed to create tag {term_slug}. Status code: {create_resp.status}")
                                tag_id = None
                    else:
                        LOGGER.error(f"Failed to fetch tag {term_slug}. Status code: {tag_resp.status}")
                        tag_id = None
                    if tag_id:
                        metadata['tags'] = [tag_id]
                        LOGGER.info(f"Assigning tag ID {tag_id} to attachment")
    
                LOGGER.info(f"Metadata to be set: {metadata}")
    
                if metadata:
                    meta_headers = {
                        'Content-Type': 'application/json',
                        'Authorization': f'Basic {app.auth_token}'
                    }
                    conn.request("POST", f"/wp-json/wp/v2/media/{response_data['id']}", body=json.dumps(metadata), headers=meta_headers)
                    meta_response = conn.getresponse()
                    if meta_response.status != 200:
                        LOGGER.error(f"Failed to set metadata. Status code: {meta_response.status}, Response: {meta_response.read().decode()}")
    
                LOGGER.info(f"Successfully uploaded {name} to WordPress. URL: {app.previous_picture_url}")
            else:
                LOGGER.error(f"Failed to upload {name}. Status code: {response.status}, Response: {response.read().decode()}")
    
            conn.close()
    
    @pibooth.hookimpl
    def pibooth_cleanup(app):
        """Cleanup actions if necessary"""
        passCode language: Python (python)

    Custom Processing (More Fun!)

    Finally, I didn’t like the generic “PROCESSING” screen that happened. I wanted it to be more personal, so I rebuilt it so that it shows the last three images taken, along with a custom waiting message taken from an array:

    #!/usr/bin/env python3
    """
    custom_processing.py
    
    A PiBooth plugin that, during the 'processing' state, grabs the last
    three saved pictures from your output directory and shows them as thumbnails.
    """
    import os
    import glob
    import pygame
    import pibooth
    from pibooth.utils import LOGGER
    from pibooth.view import background
    from pibooth import pictures
    import random
    from pibooth import fonts
    
    __version__ = "0.0.1"
    
    # A list of fun processing messages
    PROCESSING_SAYINGS = [
        "Processing…",
        "Shaking it like a Polaroid picture",
        "Now developing…",
        "Cooking your memories",
        "Almost ready!",
        "Frame by frame…",
        "Developing brilliance…",
        "Hang tight, magic in progress…",
        "Give us a sec, art is brewing…",
        "Hold on, pixels aligning…",
        "Magic happening behind the scenes…",
        "One moment please…",
        "Crafting your memories…",
        "Almost there, thanks for your patience…",
        "Don’t blink, or you might miss it…",
        "Your masterpiece is on its way…",
    ]
    
    @pibooth.hookimpl(trylast=True)
    def state_processing_enter(cfg, app, win):
        """
        When entering the 'processing' screen, list the output folder,
        pick the 3 newest image files, and render them as thumbnails.
        """
    
        # 1) Determine your output directory (default: ~/Pictures/pibooth)
        outdir = os.path.expanduser(cfg.get('PATHS', 'output_dir') if
                                    cfg.has_option('PATHS', 'output_dir') else
                                    '~/Pictures/pibooth')
        LOGGER.info(f"[custom_processing] Scanning directory: {outdir}")
    
        # 2) Glob all image files (you can tweak extensions as needed)
        exts = ('*.jpg', '*.jpeg', '*.png', '*.avif')
        files = []
        for ext in exts:
            files.extend(glob.glob(os.path.join(outdir, ext)))
        if not files:
            LOGGER.info("[custom_processing] No files found in output dir")
            return
    
        # 3) Sort by modification time and pick the last three
        files.sort(key=lambda f: os.path.getmtime(f))
        thumbs = files[-3:]
        LOGGER.info(f"[custom_processing] Last 3 files: {thumbs}")
    
        # 4) Load, scale and display as before
        surface = win.surface
        # Redraw PiBooth’s default processing background
        win._update_background(background.Background(''))
    
        sw, sh = surface.get_size()
        thumb_h = int(sh * 0.3)
        scaled = []
        for path in thumbs:
            try:
                # Load with alpha so we can mask out black
                img = pygame.image.load(path).convert_alpha()
                ow, oh = img.get_size()
                tw = int(ow * thumb_h / oh)
                img = pygame.transform.smoothscale(img, (tw, thumb_h))
    
                # Make pure black transparent (so border and photo remain)
                img.set_colorkey((0, 0, 0))
    
                scaled.append(img)
                LOGGER.info(f"[custom_processing] Loaded & scaled {os.path.basename(path)} → {(tw, thumb_h)}")
            except Exception as e:
                LOGGER.error(f"[custom_processing] Failed to load {path}: {e}")
    
        if not scaled:
            LOGGER.info("[custom_processing] No thumbnails rendered")
            return
    
        # 5) Blit and rotate thumbnails into the hanging frames with random tilt
        # Percent‐based anchor points so they adjust on resize:
        frame_positions = [
            (int(sw * 0.20), int(sh * 0.34)),  # left (moved up to 40% height)
            (int(sw * 0.50), int(sh * 0.36)),  # center (35% height)
            (int(sw * 0.80), int(sh * 0.34)),  # right (40% height)
        ]
        for img, (cx, cy) in zip(scaled, frame_positions):
            # Random rotation between -10° and +10°
            angle = random.uniform(-10, 10)
            rot_img = pygame.transform.rotozoom(img, angle, 1.0)
            rw, rh = rot_img.get_size()
            # Center the rotated thumbnail on its anchor point
            surface.blit(rot_img, (cx - rw // 2, cy - rh // 2))
    
        # Draw the transparent custom processing template over the thumbnails
        custom_bg = os.path.expanduser("~/.config/pibooth/assets/processing_custom.png")
        try:
            # Load with alpha to preserve transparency
            overlay_img = pygame.image.load(custom_bg).convert_alpha()
            # Scale to cover the full window
            overlay_img = pygame.transform.smoothscale(overlay_img, (sw, sh))
            # Blit on top of thumbnails
            surface.blit(overlay_img, (0, 0))
        except Exception as e:
            LOGGER.error(f"[custom_processing] Failed to load processing_custom overlay '{custom_bg}': {e}")
    
        # Pick and uppercase a random processing message
        say = random.choice(PROCESSING_SAYINGS).upper()
        # Define the bottom third with 5% side padding
        bottom_rect = pygame.Rect(
            int(sw * 0.05), 
            int(sh * 2/3), 
            int(sw * 0.9), 
            int(sh / 3)
        )
        # Choose a font that fits in that rectangle
        font = fonts.get_pygame_font(
            say,
            fonts.CURRENT,
            bottom_rect.width,
            bottom_rect.height
        )
        # Render the text in the window's text color
        text_color = cfg.gettuple('WINDOW', 'text_color', int)
        text_surf = font.render(say, True, text_color)
        # Center the message within the bottom third
        text_rect = text_surf.get_rect(center=bottom_rect.center)
        surface.blit(text_surf, text_rect)
    
        pygame.display.update()
        LOGGER.info("[custom_processing] Thumbnails hung with rotation")Code language: PHP (php)

    This is what it ends up looking like, anonymized:

    So yeah, use at your own risk. I don’t offer any support. Assume it will break things and burn down your house. I am not a professional. Don’t trust Python.

    Farewell!

  • Setting up Pibooth in 2024

    Setting up Pibooth in 2024

    I have an upcoming need for a photo booth next year 😏 so I started looking into some options to DIY rather than rent one or buy a pre-made version.

    The option I’m trying out right now is Pibooth, “A photobooth application out-of-the-box in pure Python.”

    https://pibooth.org/

    I’m going to set this up with an extra Raspberry Pi 400 I have that’s not doing anything, and see what we can do. Feel free to follow along!

    Since Pibooth only works on Raspbian Buster right now, I had to download an older version at https://downloads.raspberrypi.org/raspios_arm64/images/raspios_arm64-2021-05-28/

    I set up a few defaults I like to have for my Pis:

    # Updates, new software, and cleanup
    sudo apt update && sudo apt upgrade
    sudo apt install mc screen ack zsh locate git htop cockpit -y
    sudo apt autoremove
    
    # Add dotfile customizations. Sorry, it's currently private :D
    git clone git@github.com:emrikol/dotfiles.git
    cp -r ~/dotfiles/. ~/
    sudo usermod --shell /bin/zsh derrick
    zsh
    
    # Set up root access so I can SCP in from Transmit if I need to.
    sudo sed -i 's/#PermitRootLogin prohibit-password/PermitRootLogin yes/' /etc/ssh/sshd_config
    sudo passwd root
    
    # Customize Raspberry Pi settings.
    sudo raspi-configCode language: Bash (bash)

    After installing cockpit I believe, I had an issue where the MAC address of my Wifi kept changing randomly on each reboot. I had to follow these instructions and add this to my /etc/NetworkManager/NetworkManager.conf:

    [device]
    wifi.scan-rand-mac-address=no

    Disable Swap to save on SD Card wear:

    sudo dphys-swapfile swapoff
    sudo dphys-swapfile uninstall
    sudo update-rc.d dphys-swapfile remove
    sudo apt purge dphys-swapfile -y
    sudo sysctl -w vm.swappiness=0Code language: Bash (bash)

    Install Log2RAM for the same reason:

    echo "deb [signed-by=/usr/share/keyrings/azlux-archive-keyring.gpg] http://packages.azlux.fr/debian/ bookworm main" | sudo tee /etc/apt/sources.list.d/azlux.list
    sudo wget -O /usr/share/keyrings/azlux-archive-keyring.gpg  https://azlux.fr/repo.gpg
    sudo apt update
    sudo apt install log2ram
    sudo sed -i 's/SIZE=40M/SIZE=64M/' /etc/log2ram.conf
    sudo sed -i 's/#SystemMaxUse=/SystemMaxUse=32M/' /etc/systemd/journald.conf
    sudo systemctl restart systemd-journald
    Code language: Bash (bash)

    From here, we should have my default “base” Raspberry Pi setup. And now, we can work on figuring out how to install Pibooth. According to the install docs, we need to run a few commands:

    $ sudo apt install "libsdl2-*"
    Reading package lists... Done
    Building dependency tree
    Reading state information... Done
    Note, selecting 'libsdl2-mixer-dev' for glob 'libsdl2-*'
    Note, selecting 'libsdl2-image-dev' for glob 'libsdl2-*'
    Note, selecting 'libsdl2-gfx-dev' for glob 'libsdl2-*'
    Note, selecting 'libsdl2-gfx-doc' for glob 'libsdl2-*'
    Note, selecting 'libsdl2-mixer-2.0-0' for glob 'libsdl2-*'
    Note, selecting 'libsdl2-dbg:armhf' for glob 'libsdl2-*'
    Note, selecting 'libsdl2-dev' for glob 'libsdl2-*'
    Note, selecting 'libsdl2-doc' for glob 'libsdl2-*'
    Note, selecting 'libsdl2-ttf-dev' for glob 'libsdl2-*'
    Note, selecting 'libsdl2-net-2.0-0' for glob 'libsdl2-*'
    Note, selecting 'libsdl2-net-dev' for glob 'libsdl2-*'
    Note, selecting 'libsdl2-image-2.0-0' for glob 'libsdl2-*'
    Note, selecting 'libsdl2-2.0-0-dbgsym:armhf' for glob 'libsdl2-*'
    Note, selecting 'libsdl2-2.0-0' for glob 'libsdl2-*'
    Note, selecting 'libsdl2-gfx-1.0-0' for glob 'libsdl2-*'
    Note, selecting 'libsdl2-ttf-2.0-0' for glob 'libsdl2-*'
    libsdl2-2.0-0 is already the newest version (2.0.9+dfsg1-1+deb10u1).
    libsdl2-2.0-0 set to manually installed.
    Some packages could not be installed. This may mean that you have
    requested an impossible situation or if you are using the unstable
    distribution that some required packages have not yet been created
    or been moved out of Incoming.
    The following information may help to resolve the situation:
    
    The following packages have unmet dependencies:
     libsdl2-2.0-0-dbgsym:armhf : Depends: libsdl2-2.0-0:armhf (= 2.0.9+dfsg1-1+rpt1) but it is not going to be installed
    E: Unable to correct problems, you have held broken packages.Code language: JavaScript (javascript)

    Meh. Okay. Let’s just install all of them but the trouble package. Hopefully that won’t come back to bite us.

    sudo apt install libsdl2-mixer-dev libsdl2-image-dev libsdl2-gfx-dev libsdl2-gfx-doc libsdl2-mixer-2.0-0 libsdl2-dev libsdl2-doc libsdl2-ttf-dev libsdl2-net-2.0-0 libsdl2-net-dev libsdl2-image-2.0-0 libsdl2-2.0-0 libsdl2-gfx-1.0-0 libsdl2-ttf-2.0-0 -yCode language: Bash (bash)

    We did not install libsdl2-dbg and libsdl2-2.0-0-dbgsym

    I’m thinking about adding printer support, so I’ll go ahead and install CUPS: sudo apt-get install cups libcups2-dev

    And we might as well install OpenCV sudo apt-get install python3-opencv

    Installing gphoto2:

    cd ~
    git clone https://github.com/gonzalo/gphoto2-updater
    cd gphoto2-updater
    sudo ./gphoto2-updater.shCode language: Bash (bash)

    Now for pibooth: pip3 install "pibooth[dslr,printer]"

    Aww yeah! Success!

    Now all I need to do is customize it. Maybe we’ll have another post at a later time.

  • Garbage Sysadmin: Easily Make CIFS Mounts

    Garbage Sysadmin: Easily Make CIFS Mounts

    I’ve been rebuilding my Raspberry Pi collection from scratch, and moving from Ubuntu Server to Debian/Raspbian Bookworm. One of the tasks that I quickly tried to automate was reconnecting my CIFS mounts. I wanted to do it better, and came across this method, with the help of ChatGPT, to mount them at boot:

    #!/bin/bash
    
    # Check if the script is run as root
    if [[ $EUID -ne 0 ]]; then
       echo "This script must be run as root"
       exit 1
    fi
    
    # Check for correct number of arguments
    if [ "$#" -ne 4 ]; then
        echo "Usage: $0 <RemoteDirectory> <MountDirectory> <Username> <Password>"
        exit 1
    fi
    
    REMOTE_DIR="$1"
    MOUNT_DIR="$2"
    USERNAME="$3"
    PASSWORD="$4"
    CREDENTIALS_PATH="/etc/samba/credentials-$(basename "$MOUNT_DIR")"
    
    # Escape the mount directory for systemd
    UNIT_NAME=$(systemd-escape -p --suffix=mount "$MOUNT_DIR")
    
    # Create mount directory
    mkdir -p "$MOUNT_DIR"
    
    # Create credentials file
    touch "$CREDENTIALS_PATH"
    echo "username=$USERNAME" > "$CREDENTIALS_PATH"
    echo "password=$PASSWORD" >> "$CREDENTIALS_PATH"
    chmod 600 "$CREDENTIALS_PATH"
    
    # Create systemd unit file
    UNIT_FILE_PATH="/etc/systemd/system/$UNIT_NAME"
    echo "[Unit]
    Description=Mount Share at $MOUNT_DIR
    After=network-online.target
    Wants=network-online.target
    
    [Mount]
    What=$REMOTE_DIR
    Where=$MOUNT_DIR
    Type=cifs
    Options=_netdev,iocharset=utf8,file_mode=0777,dir_mode=0777,credentials=$CREDENTIALS_PATH
    TimeoutSec=30
    
    [Install]
    WantedBy=multi-user.target" > "$UNIT_FILE_PATH"
    
    # Reload systemd, enable and start the unit
    systemctl daemon-reload
    systemctl enable "$UNIT_NAME"
    systemctl start "$UNIT_NAME"
    
    echo "Mount setup complete. Mounted $REMOTE_DIR at $MOUNT_DIR"Code language: Bash (bash)

    I’m sure this is totally insecure and a terrible idea, but it works for me so back off, buddy!

    Please don’t follow me as an example of what to do, but take this code for anything you need.

  • More Garbage Sysadmin: Reboot Linux Server on Kernel Panic

    More Garbage Sysadmin: Reboot Linux Server on Kernel Panic

    Just like restarting a server when the memory is low, I’ve had a recent problem with kernel panics on my Raspberry Pi, and I’ve found a terrible solution to fix it: Just reboot.

    Setting the /proc/sys/kernel/panic file contents to a non-zero integer will reboot the server on kernel panic after that many seconds.

    Because I’m lazy, I asked ChatGPT to write me up a startup script to do this for me, and here’s what I have now:

    To set the panic timeout value on Ubuntu Server 20.04 and later versions, you can create a systemd service unit file.

    Here are the steps to create a systemd service unit file:

    1. Open a terminal window on your Ubuntu Server.
    2. Create a new service unit file with the following command:

      sudo nano /etc/systemd/system/panic-timeout.service

      This will open a new file named panic-timeout.service in the nano text editor with superuser privileges.
    3. Add the following lines to the file:
    [Unit]
    Description=Panic Timeout
    
    [Service]
    Type=oneshot
    ExecStart=/bin/bash -c "echo 60 > /proc/sys/kernel/panic"
    
    [Install]
    WantedBy=multi-user.target
    Code language: JavaScript (javascript)

    This service unit file sets the panic timeout to 60 seconds.

    1. Save the file by pressing Ctrl+O, then exit nano by pressing Ctrl+X.
    2. Reload the systemd daemon to recognize the new service unit file with the following command:

      sudo systemctl daemon-reload
    3. Enable the service unit file to run at boot time with the following command:

      sudo systemctl enable panic-timeout.service
    4. Reboot the server to test the service unit file. After the server reboots, the panic-timeout.service will automatically run the echo command and set the panic timeout to 60 seconds.

    That’s it! With these steps, you can set the panic timeout value on the latest versions of Ubuntu Server.

    Well there you have it! Don’t forget to follow along for more terrible ideas!

  • Bad Hack: Restart Linux Server when memory is low 😬

    Bad Hack: Restart Linux Server when memory is low 😬

    I’m running something on my Raspberry Pi server that’s got a memory leak. I think it’s related to my Software Defined Radio (more on that another day), but I’m too lazy to actually track it down and fix it, so I’ve implemented the below hack to just restart my server when memory gets too low.

    #!/bin/bash
    FREE_SWAP=$(free | grep Swap | awk '{print $4/$2 * 100.0}')
    FREE_MEM=$(free | grep Mem | awk '{print $7/$2 * 100.0}')
    
    if [ -t 1 ]; then
            echo "Free mem: ${FREE_MEM}%, Free swap: ${FREE_SWAP}%"
    fi
    
    if [ 1 -gt "${FREE_SWAP%.*}" ]; then
            echo "[$(date)] SWAP IS TOO LOW! AT $FREE_SWAP, CHECKING MEM"
            if [ 5 -gt "${FREE_MEM%.*}" ]; then
                    echo "[$(date)] SWAP IS TOO LOW! AT $FREE_SWAP, MEM IS TOO LOW, AT $FREE_MEM -- RESTARTING"
                    reboot
            fi
    fi
    
    if [ 1 -gt "${FREE_MEM%.*}" ]; then
            echo "[$(date)] MEM IS TOO LOW! AT $FREE_MEM -- RESTARTING"
            reboot
    fiCode language: PHP (php)

    If the free swap memory gets below 1%, we check physical memory. If physical memory is below 5%, we reboot.

    We also do a general check on physical memory, and if it ever gets below 1%, we reboot.

    So far, this has been working out well. I’ve thrown it in a cron to run every five minutes:

    # Check memory every five minutes and reboot if too low
    */5 * * * * /usr/local/bin/memcheck >> /var/log/memcheck.logCode language: PHP (php)

    You can see, checking my log, the number of times it’s saved my butt from having to fix a frozen machine:

    $ cat /var/log/memcheck.log | ack RESTARTING
    [Mon Feb  7 03:20:02 UTC 2022] SWAP IS TOO LOW! AT 0, MEM IS TOO LOW, AT 4.44943 -- RESTARTING
    [Tue Feb 15 03:15:33 UTC 2022] SWAP IS TOO LOW! AT 0, MEM IS TOO LOW, AT 3.79613 -- RESTARTING
    [Mon Feb 21 14:30:01 UTC 2022] SWAP IS TOO LOW! AT 0, MEM IS TOO LOW, AT 2.31316 -- RESTARTING
    [Sun Feb 27 01:40:01 UTC 2022] SWAP IS TOO LOW! AT 0, MEM IS TOO LOW, AT 4.02053 -- RESTARTING
    [Mon Mar  7 00:05:01 UTC 2022] SWAP IS TOO LOW! AT 0, MEM IS TOO LOW, AT 4.95096 -- RESTARTING
    [Wed Mar  9 00:55:01 UTC 2022] SWAP IS TOO LOW! AT 0, MEM IS TOO LOW, AT 4.81816 -- RESTARTING
    [Wed Mar  9 17:50:02 UTC 2022] SWAP IS TOO LOW! AT 0, MEM IS TOO LOW, AT 4.72946 -- RESTARTING
    [Tue Mar 15 04:10:01 UTC 2022] SWAP IS TOO LOW! AT 0, MEM IS TOO LOW, AT 4.79014 -- RESTARTING
    [Sun Mar 20 16:20:01 UTC 2022] SWAP IS TOO LOW! AT 0, MEM IS TOO LOW, AT 4.95519 -- RESTARTING
    [Fri Mar 25 14:10:02 UTC 2022] SWAP IS TOO LOW! AT 0, MEM IS TOO LOW, AT 4.98074 -- RESTARTING
    [Tue Mar 29 15:05:01 UTC 2022] SWAP IS TOO LOW! AT 0, MEM IS TOO LOW, AT 1.63566 -- RESTARTING
    [Tue Apr  5 16:55:01 UTC 2022] SWAP IS TOO LOW! AT 0, MEM IS TOO LOW, AT 4.44242 -- RESTARTING
    [Fri Apr  8 01:40:55 UTC 2022] SWAP IS TOO LOW! AT 0, MEM IS TOO LOW, AT 1.23014 -- RESTARTING
    [Fri Apr  8 01:56:41 UTC 2022] SWAP IS TOO LOW! AT 0, MEM IS TOO LOW, AT 1.00451 -- RESTARTING
    [Mon Apr 11 03:15:02 UTC 2022] SWAP IS TOO LOW! AT 0, MEM IS TOO LOW, AT 3.76512 -- RESTARTING
    [Thu Apr 14 17:45:03 UTC 2022] SWAP IS TOO LOW! AT 0, MEM IS TOO LOW, AT 2.02634 -- RESTARTING
    [Wed Apr 27 17:15:02 UTC 2022] SWAP IS TOO LOW! AT 0, MEM IS TOO LOW, AT 4.55957 -- RESTARTING
    [Fri Apr 29 14:55:02 UTC 2022] SWAP IS TOO LOW! AT 0, MEM IS TOO LOW, AT 3.96232 -- RESTARTING
    [Mon May  2 11:00:02 UTC 2022] SWAP IS TOO LOW! AT 0, MEM IS TOO LOW, AT 2.62884 -- RESTARTING
    [Sat May  7 11:50:01 UTC 2022] SWAP IS TOO LOW! AT 0, MEM IS TOO LOW, AT 4.97909 -- RESTARTING
    [Wed May 11 08:00:02 UTC 2022] SWAP IS TOO LOW! AT 0, MEM IS TOO LOW, AT 4.83372 -- RESTARTING
    [Tue May 31 15:00:02 UTC 2022] SWAP IS TOO LOW! AT 0, MEM IS TOO LOW, AT 3.5021 -- RESTARTING
    [Thu Jun 16 00:20:02 UTC 2022] SWAP IS TOO LOW! AT 0, MEM IS TOO LOW, AT 2.98098 -- RESTARTING
    [Tue Jul  5 16:10:08 UTC 2022] SWAP IS TOO LOW! AT 0.0030518, MEM IS TOO LOW, AT 4.10944 -- RESTARTING
    [Tue Aug  9 04:10:20 UTC 2022] SWAP IS TOO LOW! AT 0, MEM IS TOO LOW, AT 3.11883 -- RESTARTING
    [Wed Aug 17 14:45:03 UTC 2022] SWAP IS TOO LOW! AT 0, MEM IS TOO LOW, AT 4.20299 -- RESTARTINGCode language: JavaScript (javascript)
  • Raspberry Pi: February 2021

    Raspberry Pi: February 2021

    I often feel like I don’t get enough use out of my Raspberry Pi devices. I have a Raspberry Pi Model B Revision 2.0 (512MB) and a Raspberry Pi 4 (4GB).

    Their current uses are as follows

    Raspberry Pi Model B:

    Raspberry Pi 4:

    I’d love to do more, but I’m really not sure what else I need. I don’t need some grandiose home server but I absolutely love playing with these little things!

  • Pi-hole, Google Wifi, and Device Names

    Pi-hole, Google Wifi, and Device Names

    One of the things that bothered me for quite some time with my Pi-Hole was that using it with Google Wifi (first gen), it wouldn’t automatically detect device hostnames. I’d done a lot of googling and never could get it to work even after a lot of different trials with multiple settings.

    Eventually I gave up and instead wrote a command that would use nmap to help fill in the gaps, and output to /etc/pihole/custom.list:

    #!/bin/bash
    if [ "$(id -u)" != "0" ]; then
    	echo "This script must be run as root" 1>&2
    	exit 1
    fi
    
    echo -n "Looking up MAC and IPs"
    for ip in "192.168.1.0" "192.168.2.0" "192.168.3.0"; do
    	echo -n .
    	# This is very slow.
    	nmap -sP "$ip"/20 > "$ip"-nmap.txt
    done
    echo
    
    # Mega-command to turn the nmap output into a CSV.
    cat 192.168.?.0-nmap.txt \
    	| sed '/^Starting Nmap/ d' \
    	| sed '/^Host is up/ d' \
    	| sed '/^Stats:/ d' \
    	| sed '/^Ping Scan Timing:/ d' \
    	| sed '/^Nmap done:/ d' \
    	| sed -z 's/\nMAC/,MAC/g' \
    	| sed -e 's/Nmap scan report for //g' \
    	| sed -e 's/MAC Address: //g' \
    	| sed -e 's/ (/,(/g' \
    	| grep -Ev $'^[0-9.]+$' \
    	| sort -u > ip-mac-mapping.csv
    
    rm /etc/pihole/custom.list 2> /dev/null
    while IFS=, read -r col1 col2 col3
    do
    	# Strip out opening and closing parenthesis.
    	col3="${col3//[\(\)]/}"
    
    	# Replace all non-alphanumeric characters with dashes.
    	col3="${col3//[^[:alnum:]]/-}"
    
    	# Manually name some of the MACs I already know.
    	case "$col2" in
    	"24:05:88:XX:XX:XX")
    		col3="Google-Wifi"
    		;;
    	"B0:19:C6:XX:XX:XX")
    		col3="Derricks-iPhone"
    		;;
    	"CC:44:63:XX:XX:XX")
    		col3="iPad-Pro"
    		;;
    	"C8:D0:83:XX:XX:XX")
    		col3="Apple-TV-Den"
    		;;
    	"50:32:37:XX:XX:XX")
    		col3="Apple-TV-Bedroom"
    		;;
    	"DC:A6:32:XX:XX:XX")
    		col3="Ubuntu-Server"
    		;;
    	"38:F9:D3:XX:XX:XX")
    		col3="Derrick-MBP"
    		;;
    	*)
    		echo -n
    		;;
    	esac
    
    	# For some reason, this one is still funky, so I'm adding in a special case for it.
    	# Could have just been weird caching during my testing.
    	case "$col1" in
    	"192.168.1.1")
    		col3="Google-Wifi"
    		;;
    	*)
    		echo -n
    		;;
    	esac
    
    	# The PiHole custom.list is supposed to follow the hosts standard, but it seems that
    	# it is not happy with tabs and comments :sadpanda:
    	echo "$col1	$col3 # $col2"
    	echo "$col1 $col3" >> /etc/pihole/custom.list
    done < ip-mac-mapping.csvCode language: PHP (php)

    This will attempt to grab some info about all the devices on your network via nmap, but also allow you to manually override that per IP or per MAC. I have of course stripped out some devices and semi-anonymized my MACs in the above example.

    The nmap can be pretty slow, especially if you’re running this on a first gen Raspberry Pi like I am.