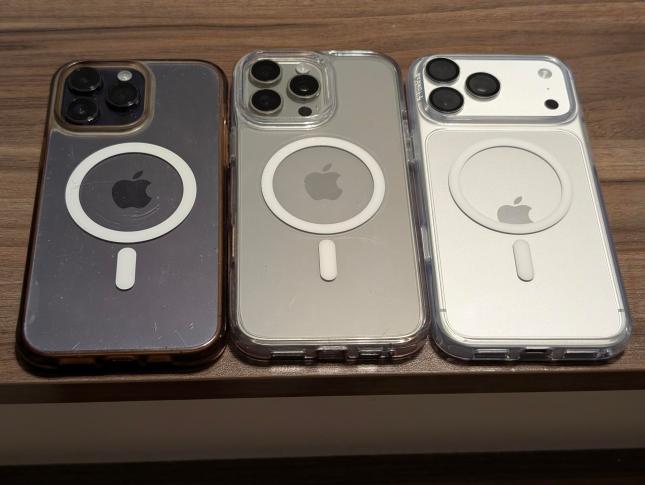
From left to right: iPhone 14 Pro Max, iPhone 16 Pro Max, iPhone 18 Pro Max

…

Zombie Steve Jobs could have designed a better phone, in a cave, with a box of scraps!
(┛◉Д◉)┛彡┻━┻

From left to right: iPhone 14 Pro Max, iPhone 16 Pro Max, iPhone 18 Pro Max
…
Zombie Steve Jobs could have designed a better phone, in a cave, with a box of scraps!
(┛◉Д◉)┛彡┻━┻
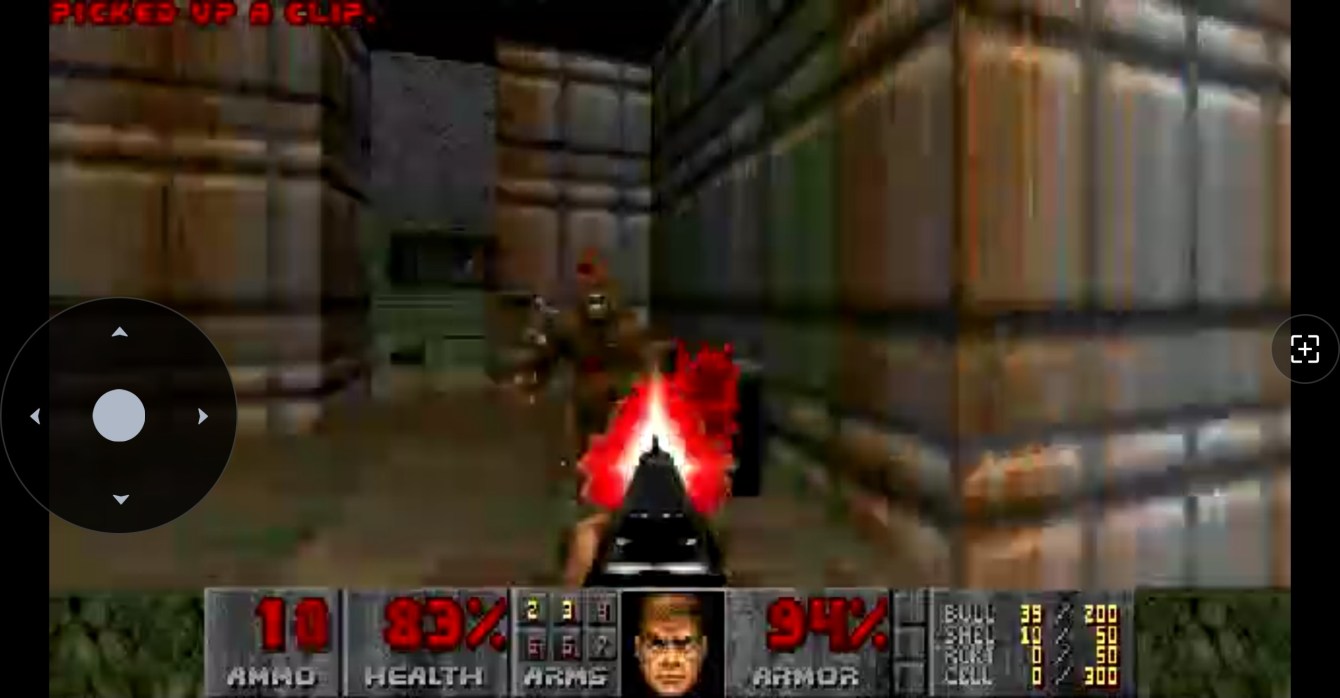
I have a Reolink security camera called the E1 Zoom.
E1 Zoom… E1 Doom?
You see the problem.
Doom’s first episode is E1, the first level is E1M1, and the camera is an E1, so the jokes wrote themselves. And I guess so did the code.
I had four requirements:
I also made up a few rules to keep myself honest, because otherwise I’d have cheated immediately. Doom had to show up in the normal Reolink app as the camera’s normal video stream, which means no running Doom on my machine and pointing the camera at it, and no sneaking in a second video server. The camera had to use its own video and audio encoders, and when I was done it had to go back to being a camera without me pulling the power cable.
Easy peasy pinky squeezy
I say “I built” throughout this post pretty generously. I spent a lot of time working with my AI slop buddies, and they did most of the typing. My main contributions were coming up with bad ideas, testing them on the camera, and repeatedly saying things like “no, not like that” and “okay, but can we cut out the over-engineering?”
It was a healthy working relationship.
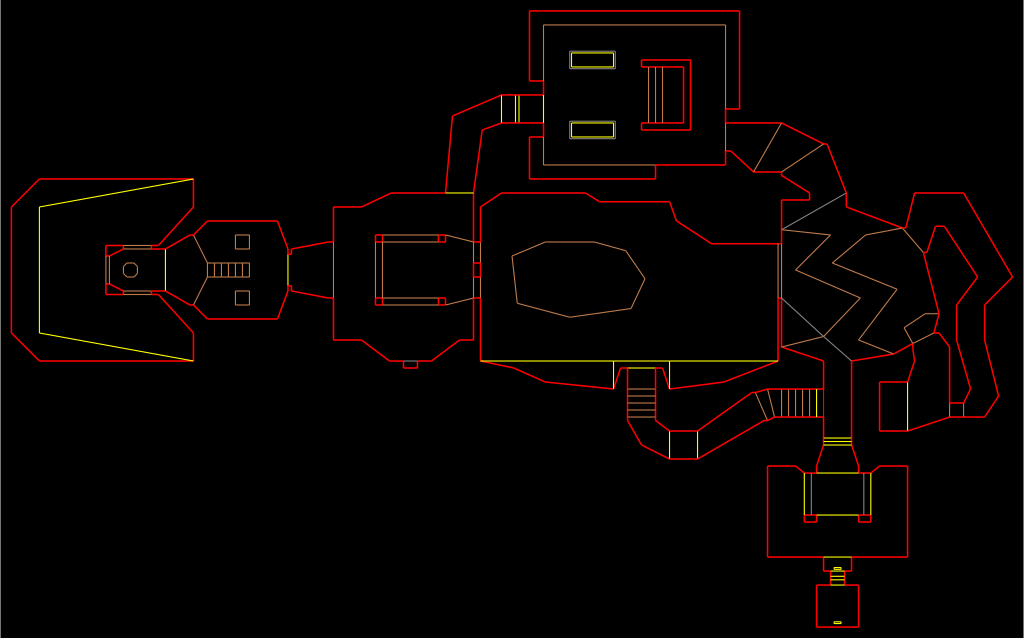
The camera is a Reolink E1 Zoom E340, and it has two little ARM cores, around 130 MB of RAM, a pile of video hardware, and an SD card (a whole computer, basically). That’s a lot more computer than Doom originally needed, but the original Doom computer also wasn’t busy being a security camera at the same time.
Doom needed a 386 with 4 MB of RAM (but anyone who was there knew that would have sucked), we have 32x the RAM. The camera processor is 24x faster: 6.65 BogoMips on a 386 compared to our 24 the processor tells us we have (2,091 BogoMips adjusted for dumbflation)
I’m not covering how I got root on the camera. This story starts after that part already works, and if you want to repeat it, figuring that out is on you.
I used Woof 15.3.0 as the Doom source port, because it already does widescreen and modern resolutions, and gutting a desktop port turned out to be easier than building a tiny embedded one up. Out went everything that assumes you have a monitor, replaced with a small camera-shaped layer instead.
For the actual game I used the official Doom v1.9 shareware WAD, so it’s real E1M1, real sounds, real music, real demons. Accept no substitutes.
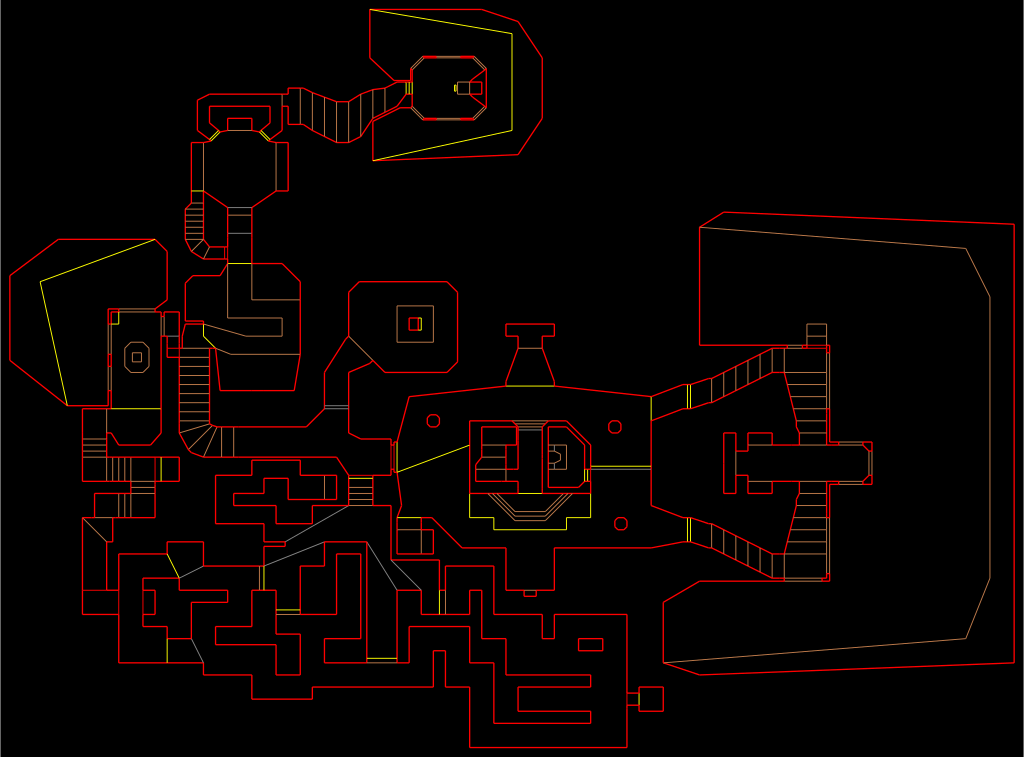
The camera already runs several video encoders, and the Reolink app’s Fluent mode uses a 640×360 stream, so the least bad way to do this was to shove Doom into that pipeline before it reaches the encoder.
Woof renders its frame into shared memory, and a small worker loaded inside Reolink’s own camera process picks that frame up, converts it into the overlay format the camera already understands, and slaps it over the whole video frame.
Then the camera just does camera stuff. Beep boop. Its own hardware encodes the frame, its own buffers carry it, and whatever Reolink normally does to get video to your phone happens exactly as usual.
There’s no special Doom video URL anywhere. I open the Kitchen camera in the Reolink app and my kitchen has been replaced by Phobos.
Perfect.
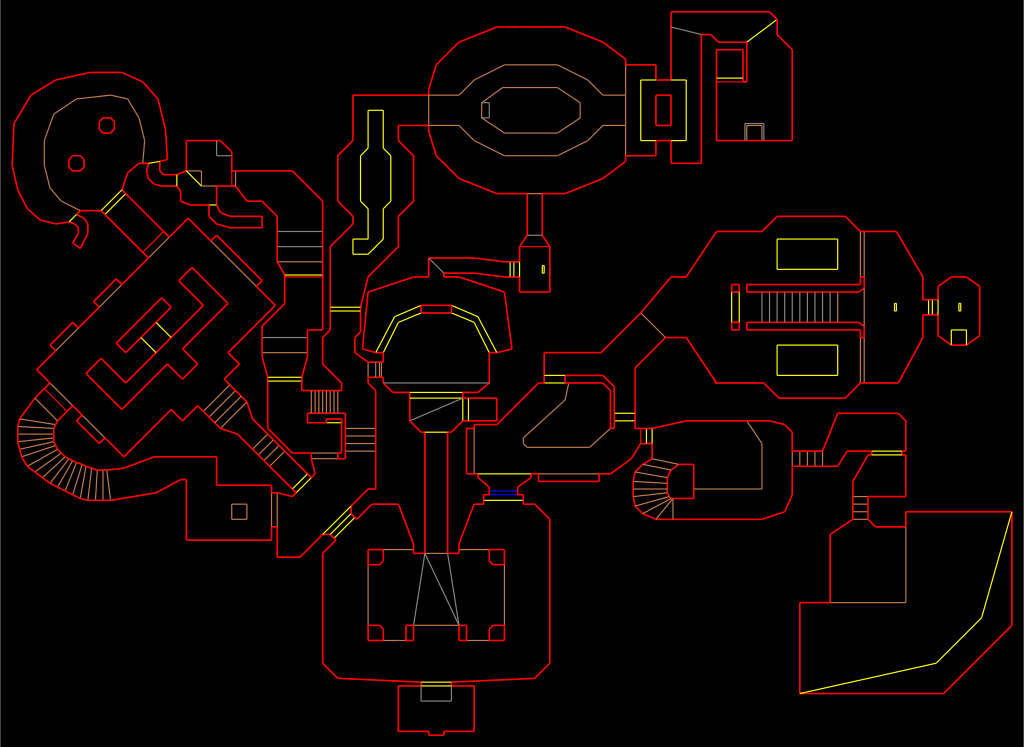
My first working video was technically Doom, but it was a 4:3 image sitting in the middle of the camera feed with black bars around it.
No no, this will not do. The whole camera needed to be Doom.
So the final setup renders a real 426×200 widescreen view and scales it over the entire camera frame. It isn’t a stretched 320×200 image either, so you actually get the wider field of view and the status bar sits where it should.
Then I got this:
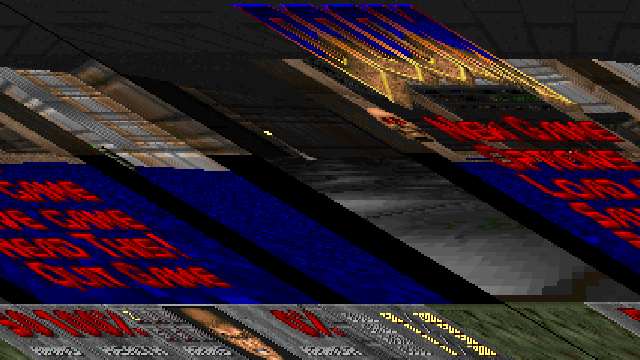
Every row was shifted a little farther sideways than the one above it, and it looked like the camera was falling into a very low-budget dimensional portal.
The image was 426 pixels wide, but each row was aligned to four bytes, so the actual row pitch was 428 bytes. I was advancing 426, which meant every row started two bytes too early.
Changed 426 to 428. Fixed.
The demons were fine. The stride was wrong.
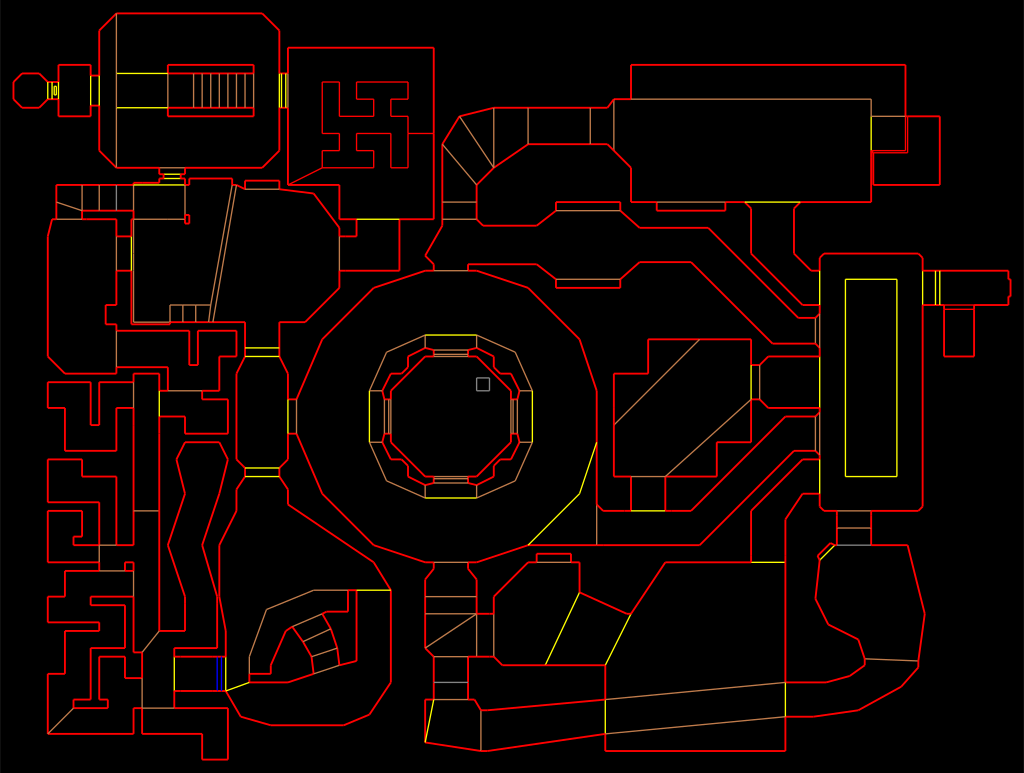
The E1 Zoom has a pan/tilt/zoom control pad in the app, which is obviously a Doom controller. Up, Down, Left, Right, Zoom to fire, maybe Focus to open doors. This was going to be great!
Except the Zoom button doesn’t send anything useful, it just opens another zoom menu, and Focus and presets are buried behind more menus too.
So I had… four buttons.
I hooked the camera’s own command handler, so when Doom is running, direction presses get intercepted before they reach the motors and turned into key presses instead. The motors are, I think, grateful.
The extremely good control scheme is:
Yes, double-tap Up may fire your gun while opening a door, but nobody is speedrunning this over a security camera stream (please don’t try).
To start Doom from the app, I also added a secret code:
Up, Up, Down, Down, Left, Right, Left, Right
Why not go for the full nerd points.
There was one extremely Reolink complication. A normal short tap in the iPhone app doesn’t send the direction you tapped, it sends a directionless stop, and only held buttons send real directions. So the code still works for playing, but the listener watching for my secret code is really just seeing eight timed stop events. On screen I enter Up, Up, Down, Down, Left, Right, Left, Right, and inside the camera it’s technically “tap eight arrows.” I have decided this still counts.
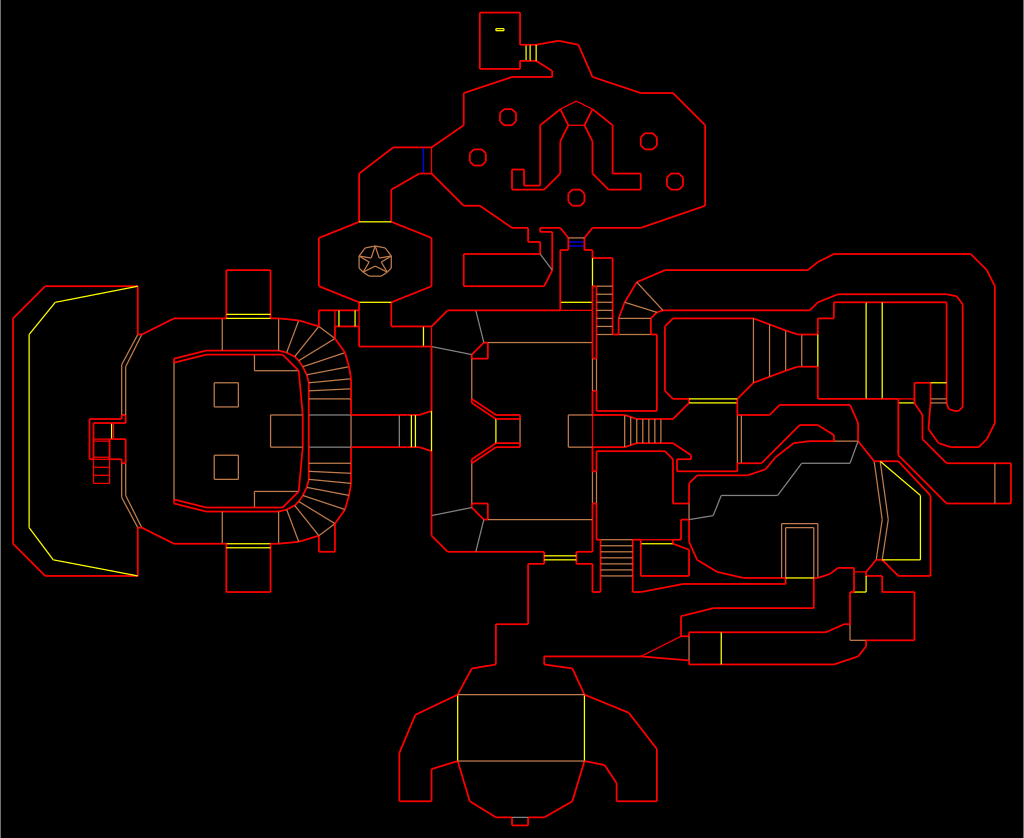
Four buttons proved the point, but playing Doom that way is terrible, and I still needed menus, weapons, run, fire, use, Escape, and everything else.
So I built a tiny web server with a keyboard controller on it. On port 666, obviously.
The page doesn’t carry any video, since I keep the Reolink app open for that. It just captures real key presses and forwards them to Doom, so you get the normal Doom controls, plus buttons to start Doom, return to the camera, and release any stuck keys. I slopped the whole page up to look like a little 1995 deathmatch setup utility.
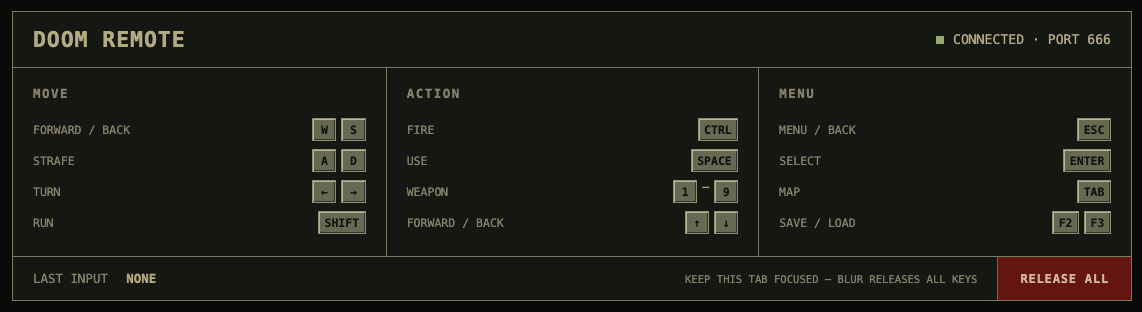
Here are the mockups that I didn’t ship because they were just too much.


Browsers love to lose a key-up event when you switch tabs, so the page releases everything you’re holding the moment it loses focus, and there’s a heartbeat running underneath that. If the heartbeat stops, Doom lets go of everything instead of running face-first into a wall forever.
This is an unauthenticated toy server running as root on my LAN. It is not an enterprise deployment of Doom port 666. Please be serious.
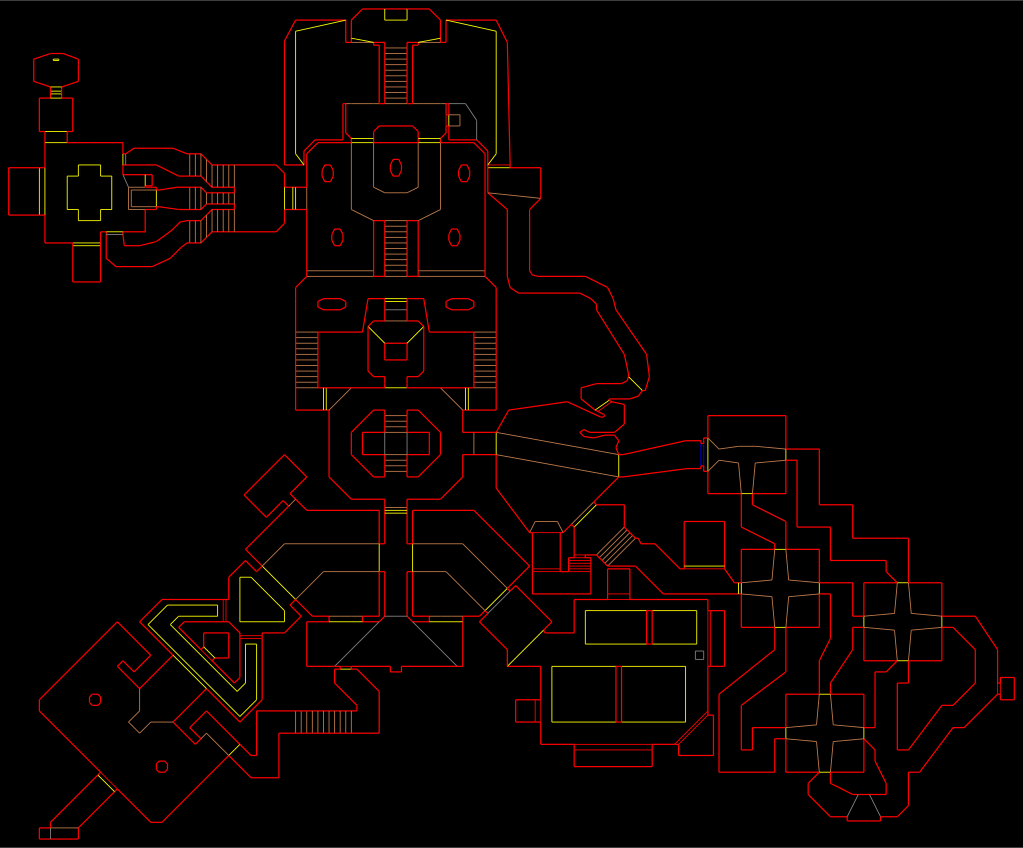
Video and controls worked, so now I needed sound.
The camera microphone already hands off little blocks of raw audio to the camera’s audio encoder, so I added another small hook right before that handoff. When Doom isn’t running the hook does nothing at all and the microphone works normally, and when Doom is running it swaps the microphone audio for Doom audio. The camera’s own encoder and audio stream do the rest.
For sound effects I wrote (“wrote”) a 16-voice mixer for Doom’s original sound lumps, handling volume, pitch, and resampling. Music runs on a stripped-down emulator of the sound chip Doom’s music was written for in the first place, borrowed from the rp2040-doom project, which uses a lot less CPU than the fancier version I started with.
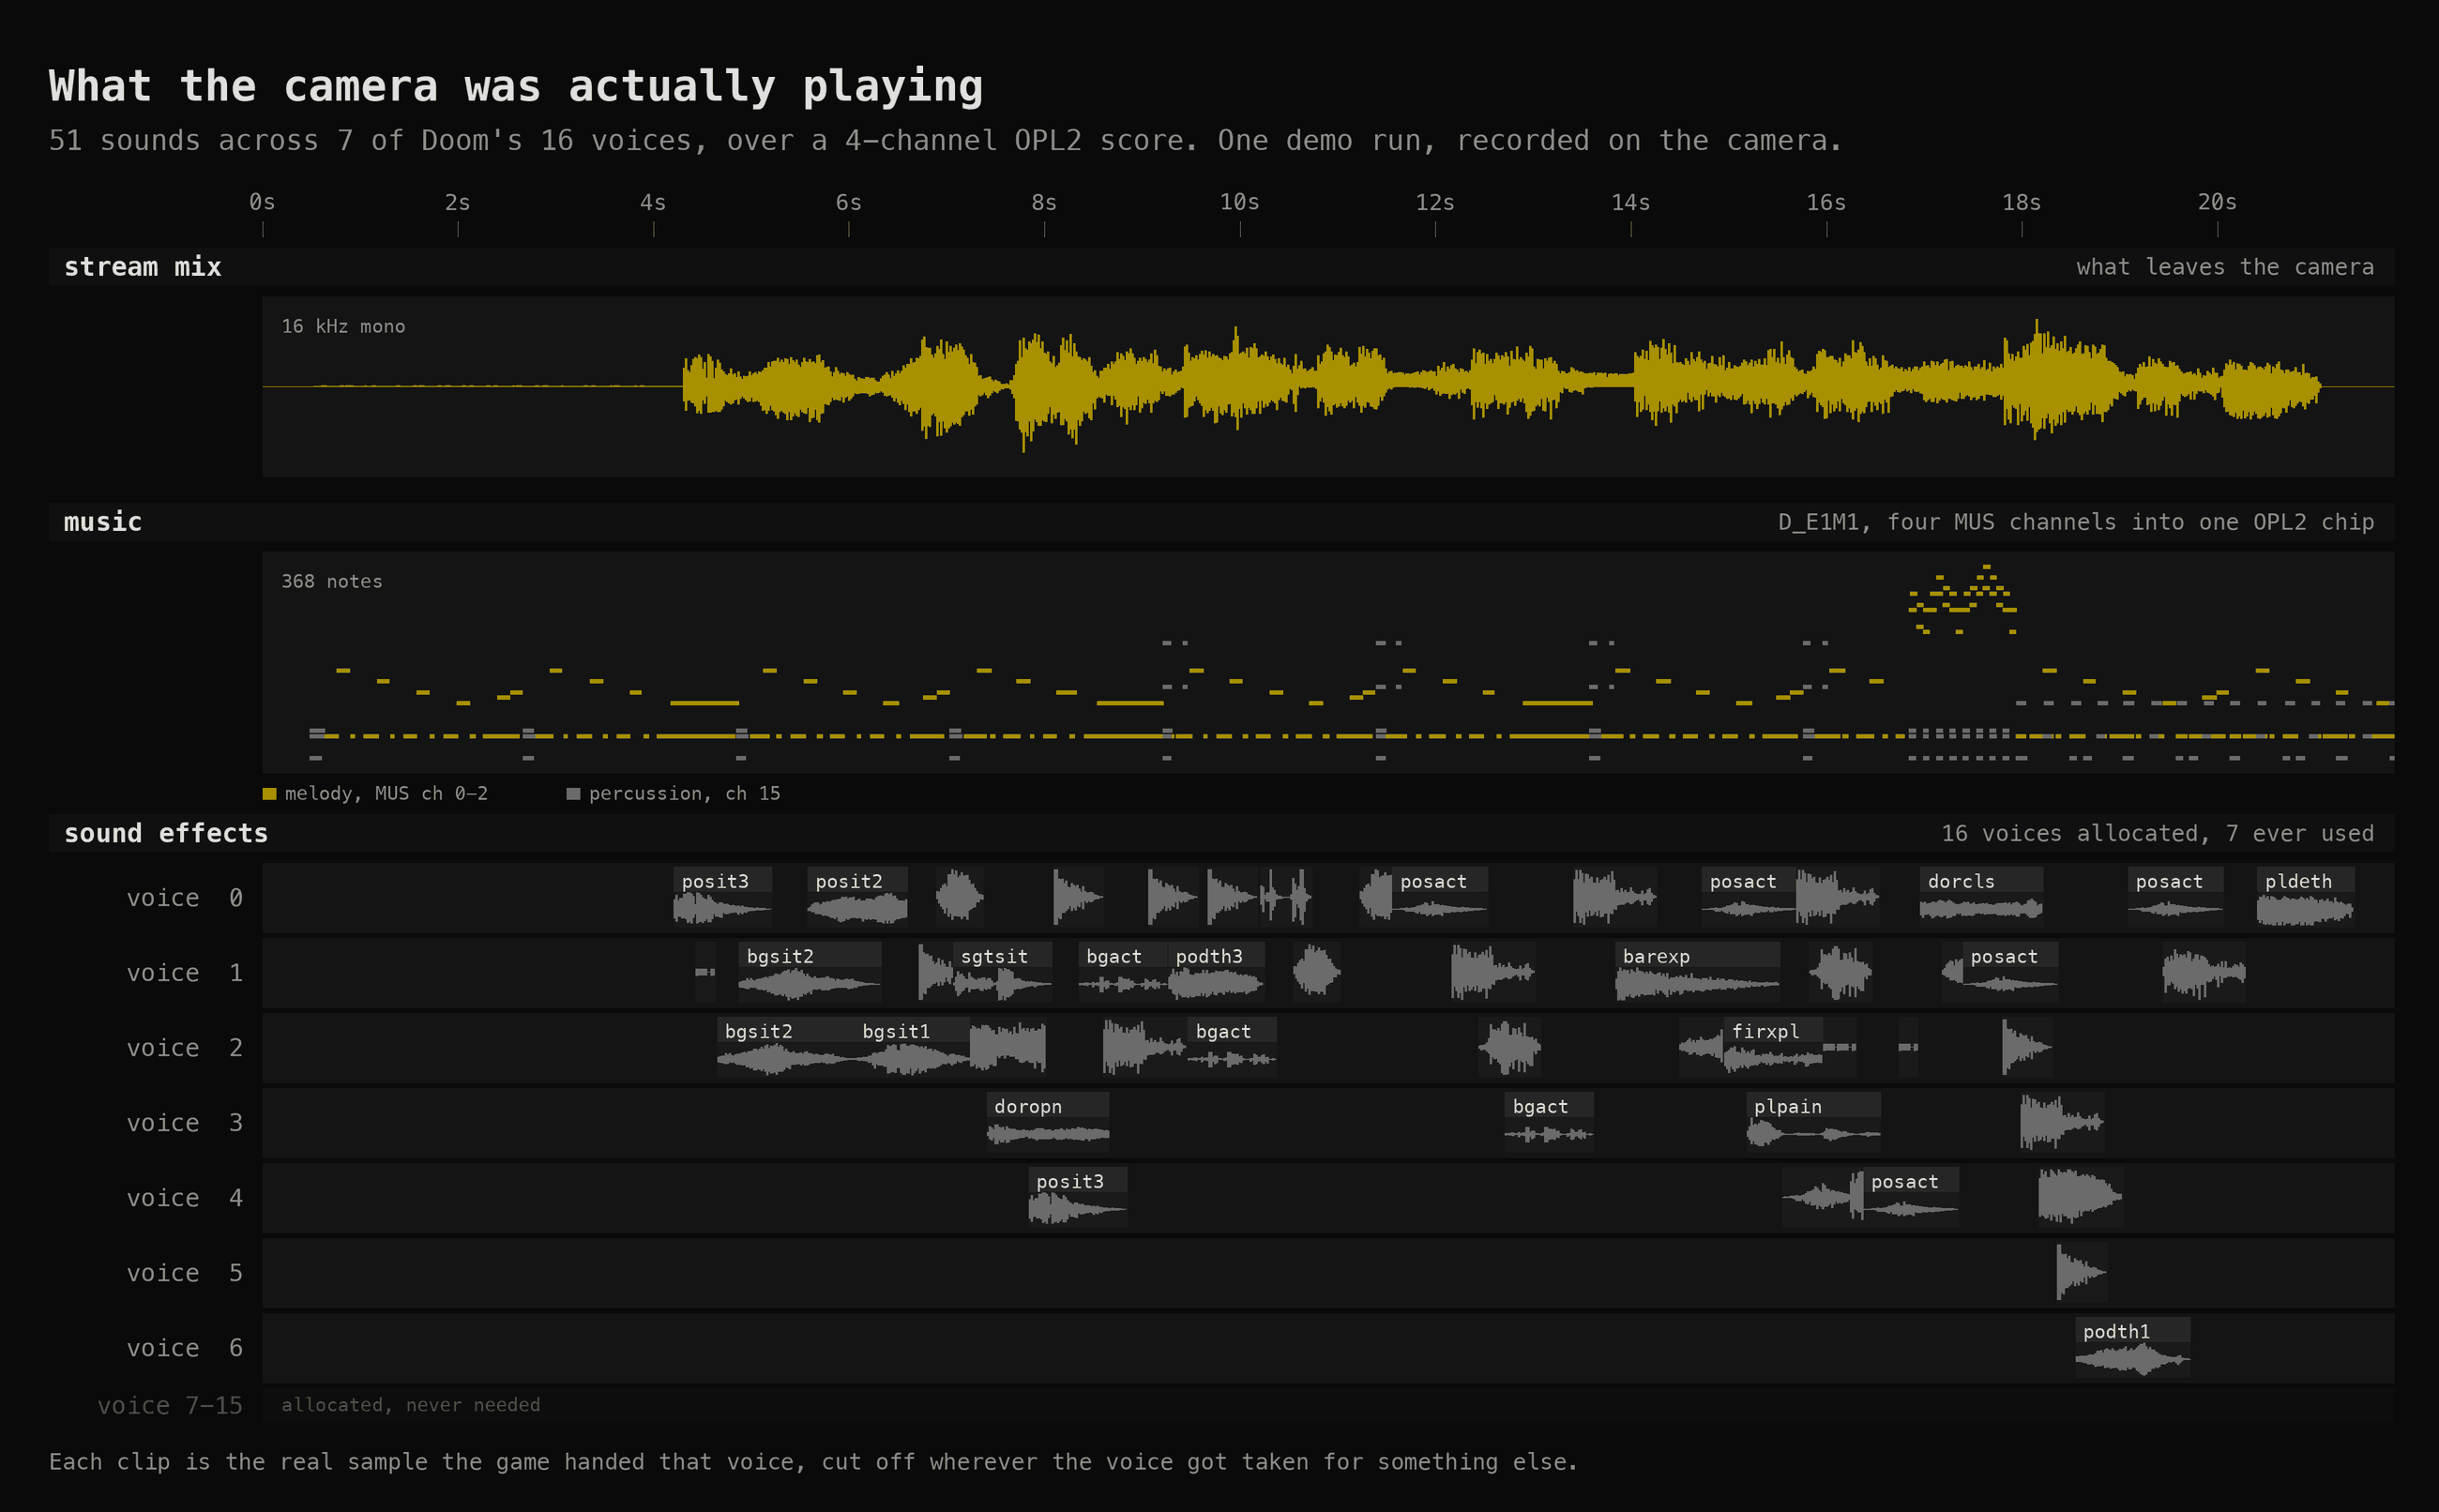
If Doom audio ever runs dry I output silence, because the alternative is accidentally cutting back to the kitchen microphone, and nobody needs hot-mic jump scares in E1M1.
I spent a while convinced none of this worked, because I still couldn’t hear anything in the app. Turns out the Reolink Home Hub mutes camera audio until you enter listening mode, and opening the control pad can mute it again, all while the camera is happily sending perfectly good Doom audio the entire time.
I tapped the speaker button. Audio worked.
Good debugging session.
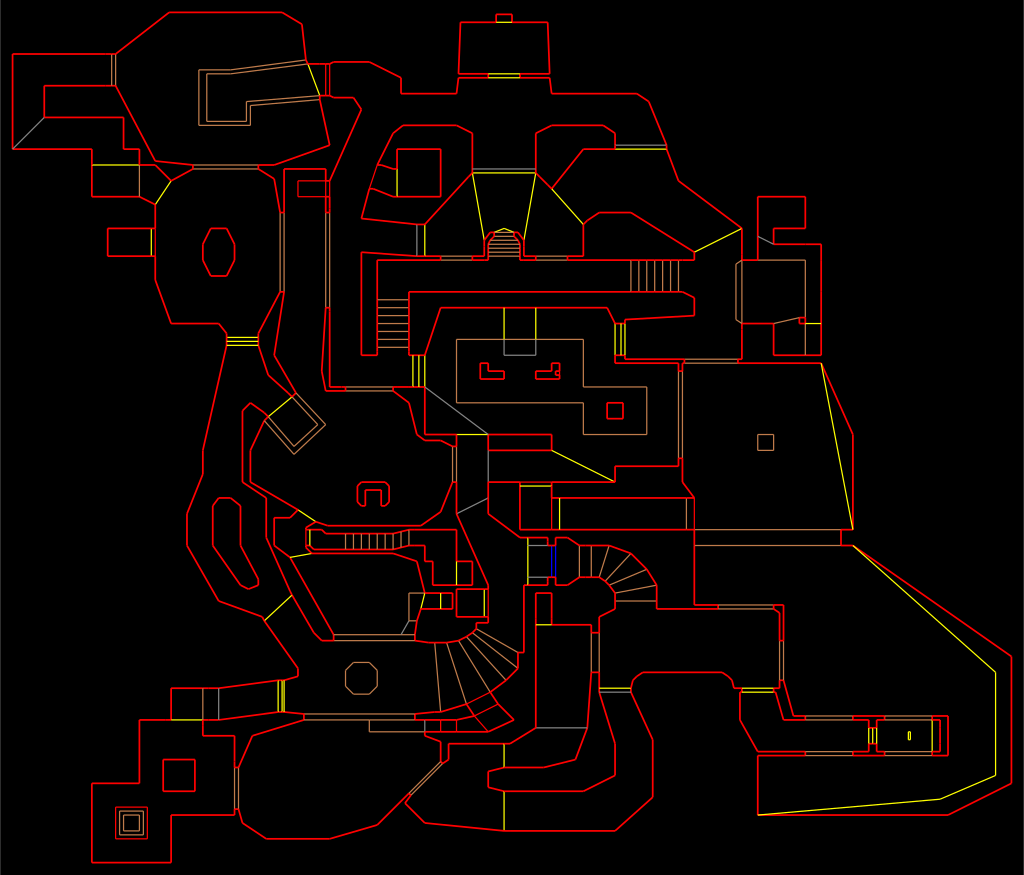
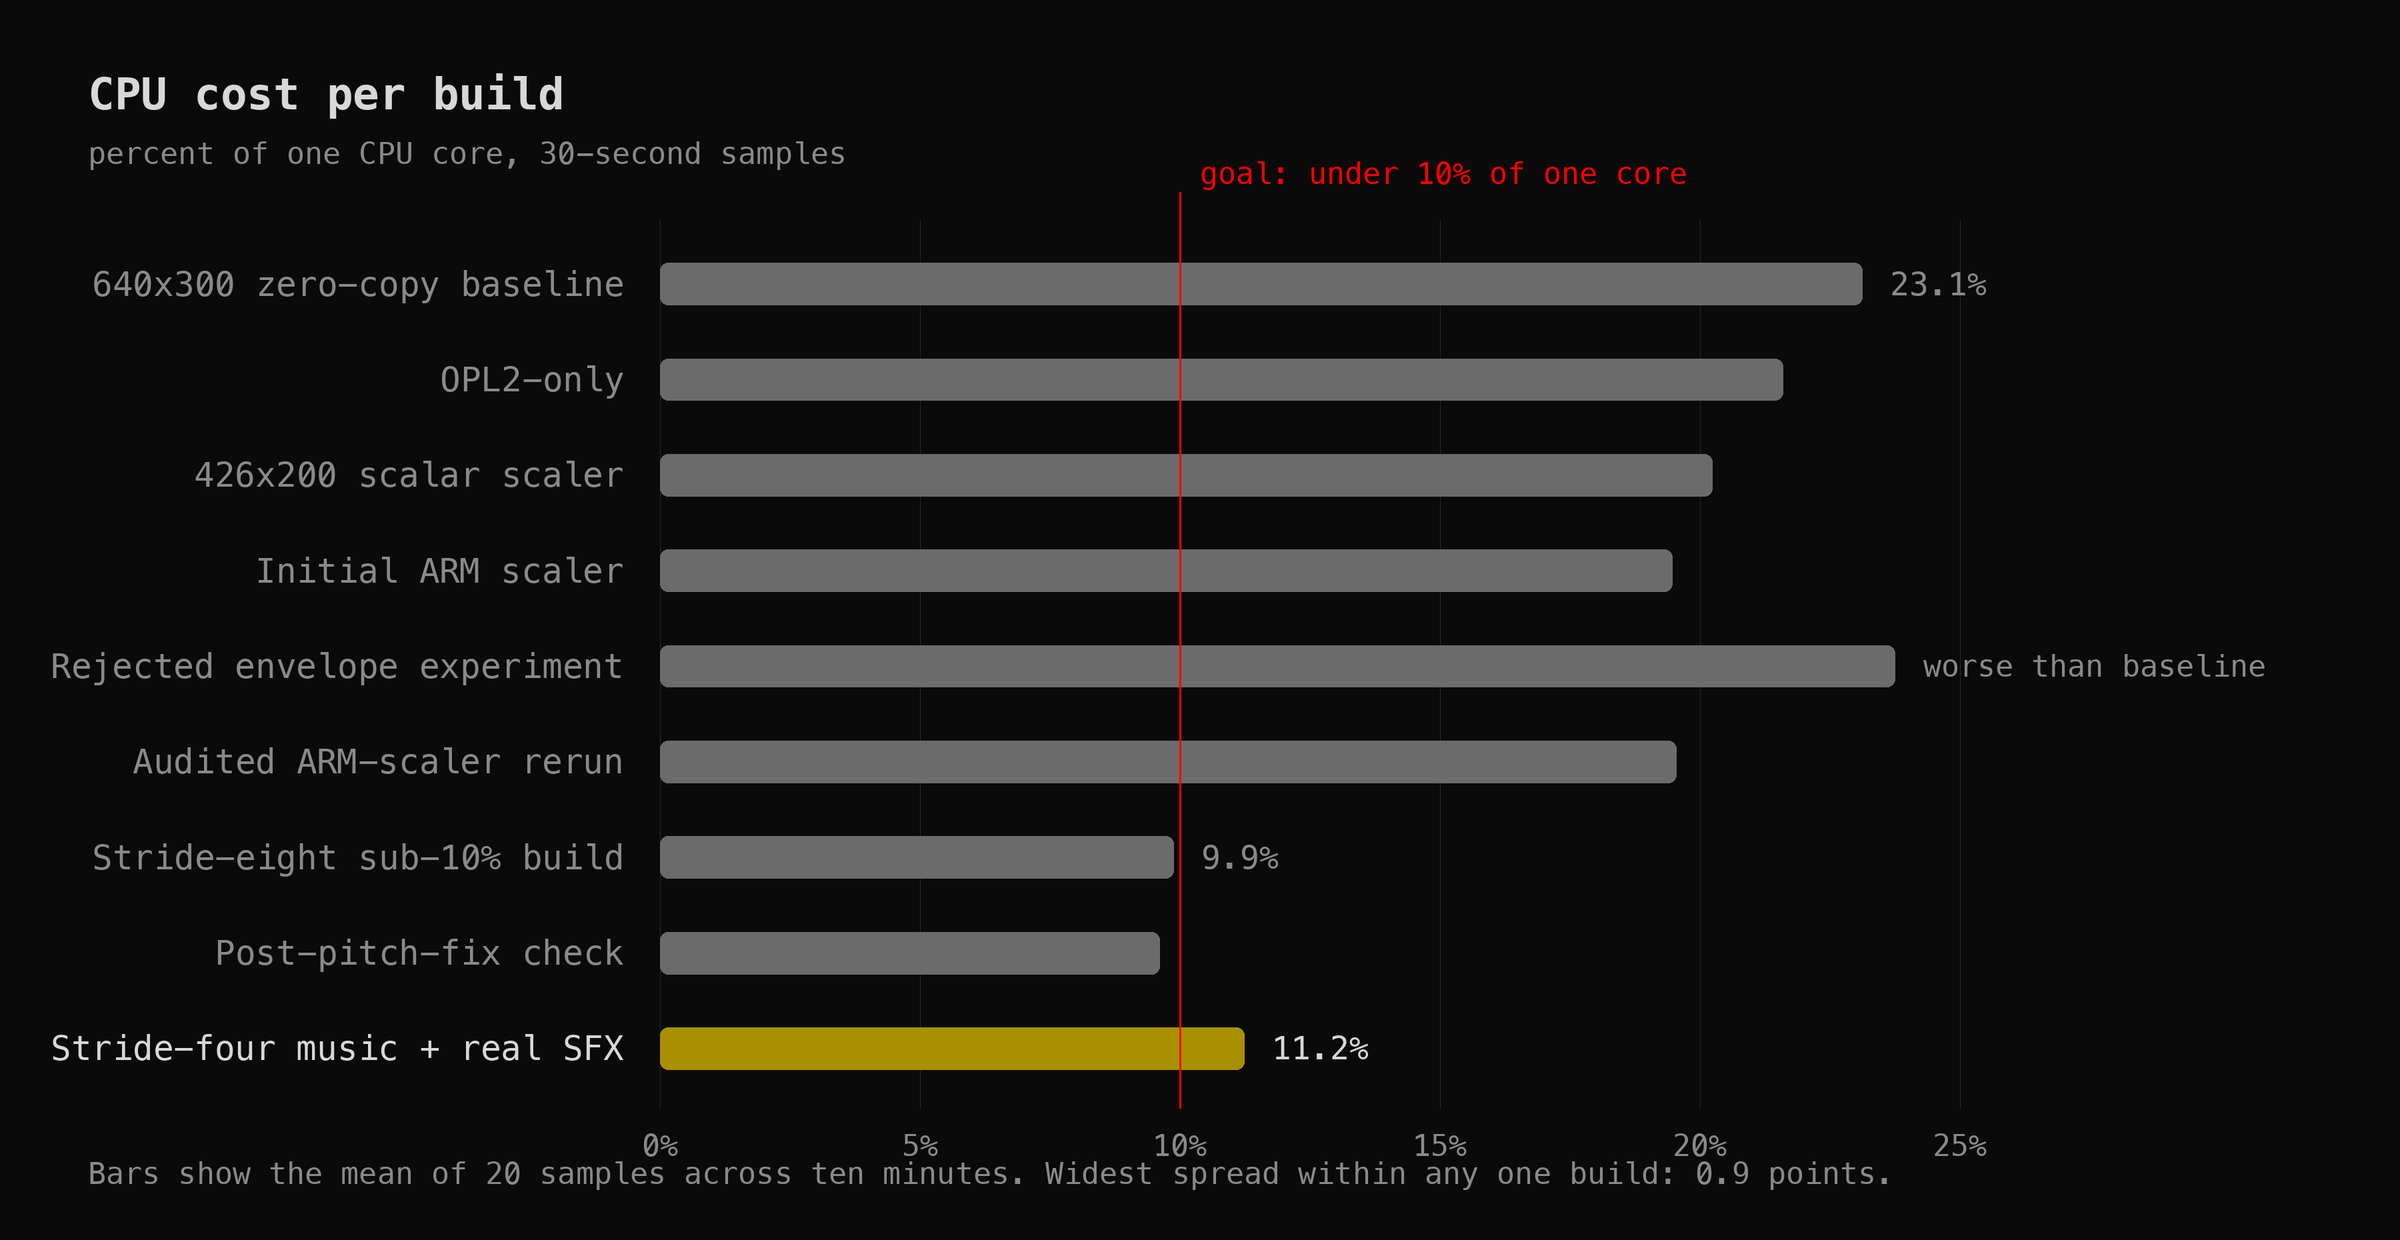
At this point the camera could run Doom, so naturally I decided it was using too much CPU. Why? No idea. It ran fine. But the camera still had to do its actual job at the same time, and I wanted Doom under 10% of one core with nothing dropped.
The biggest fix was embarrassingly obvious. Doom was rendering around 28 frames a second, but the camera stream was only configured for 10, so most of those frames were being thrown away. I had been very carefully optimizing frames that nobody would ever see! Now the runtime reads the camera’s configured frame rate and Doom only renders what the stream can actually use.
I kept asking whether fancy vector instructions would make it faster, but palette conversion is mostly random lookups and this chip doesn’t have a useful gather instruction, so boring regular ARM instructions won. Slightly disappointing, but… faster is faster.
The fastest build I got hit 9.87% of one core, or under 5% of the whole camera, so technically I hit the goal (technically). Then I turned the real sound-effect channels back on and raised the music quality, because it sounded better, and the build I actually kept sits at 11.23% instead. Slightly worse benchmark. Noticeably better Doom. Worth it!
I could probably keep optimizing this forever, but I had already spent an afternoon profiling a once-per-second “is Doom still changing?” check on a security camera running Doom, and at some point you have to stop and think about choices you’ve made in life.
Then the camera froze and rebooted. Sigh.
It happened while I had the controller page open, so keyboard traffic was the obvious suspect. I hammered it for almost two minutes, opening menus, moving, firing, using things, and cycling keys far longer than the original failure had taken, and everything was completely fine (of course it was).
Well then…
The useful clue came from a log on the SD card, where some of the camera’s important threads were showing up stopped during cleanup. I had a tool that double-checked I’d restored the camera’s original instructions correctly, and although it only ever read memory, it did that by freezing all twenty-odd threads in the camera process, peeking, and starting them again. Cleanup ran it several times.
Meanwhile, Reolink’s own supervisor process owns a 60-second hardware watchdog, and it only feeds that watchdog while the camera’s internals look healthy. So: freeze the video and audio threads at exactly the wrong moment, miss a heartbeat, wait 60 seconds… reboot.
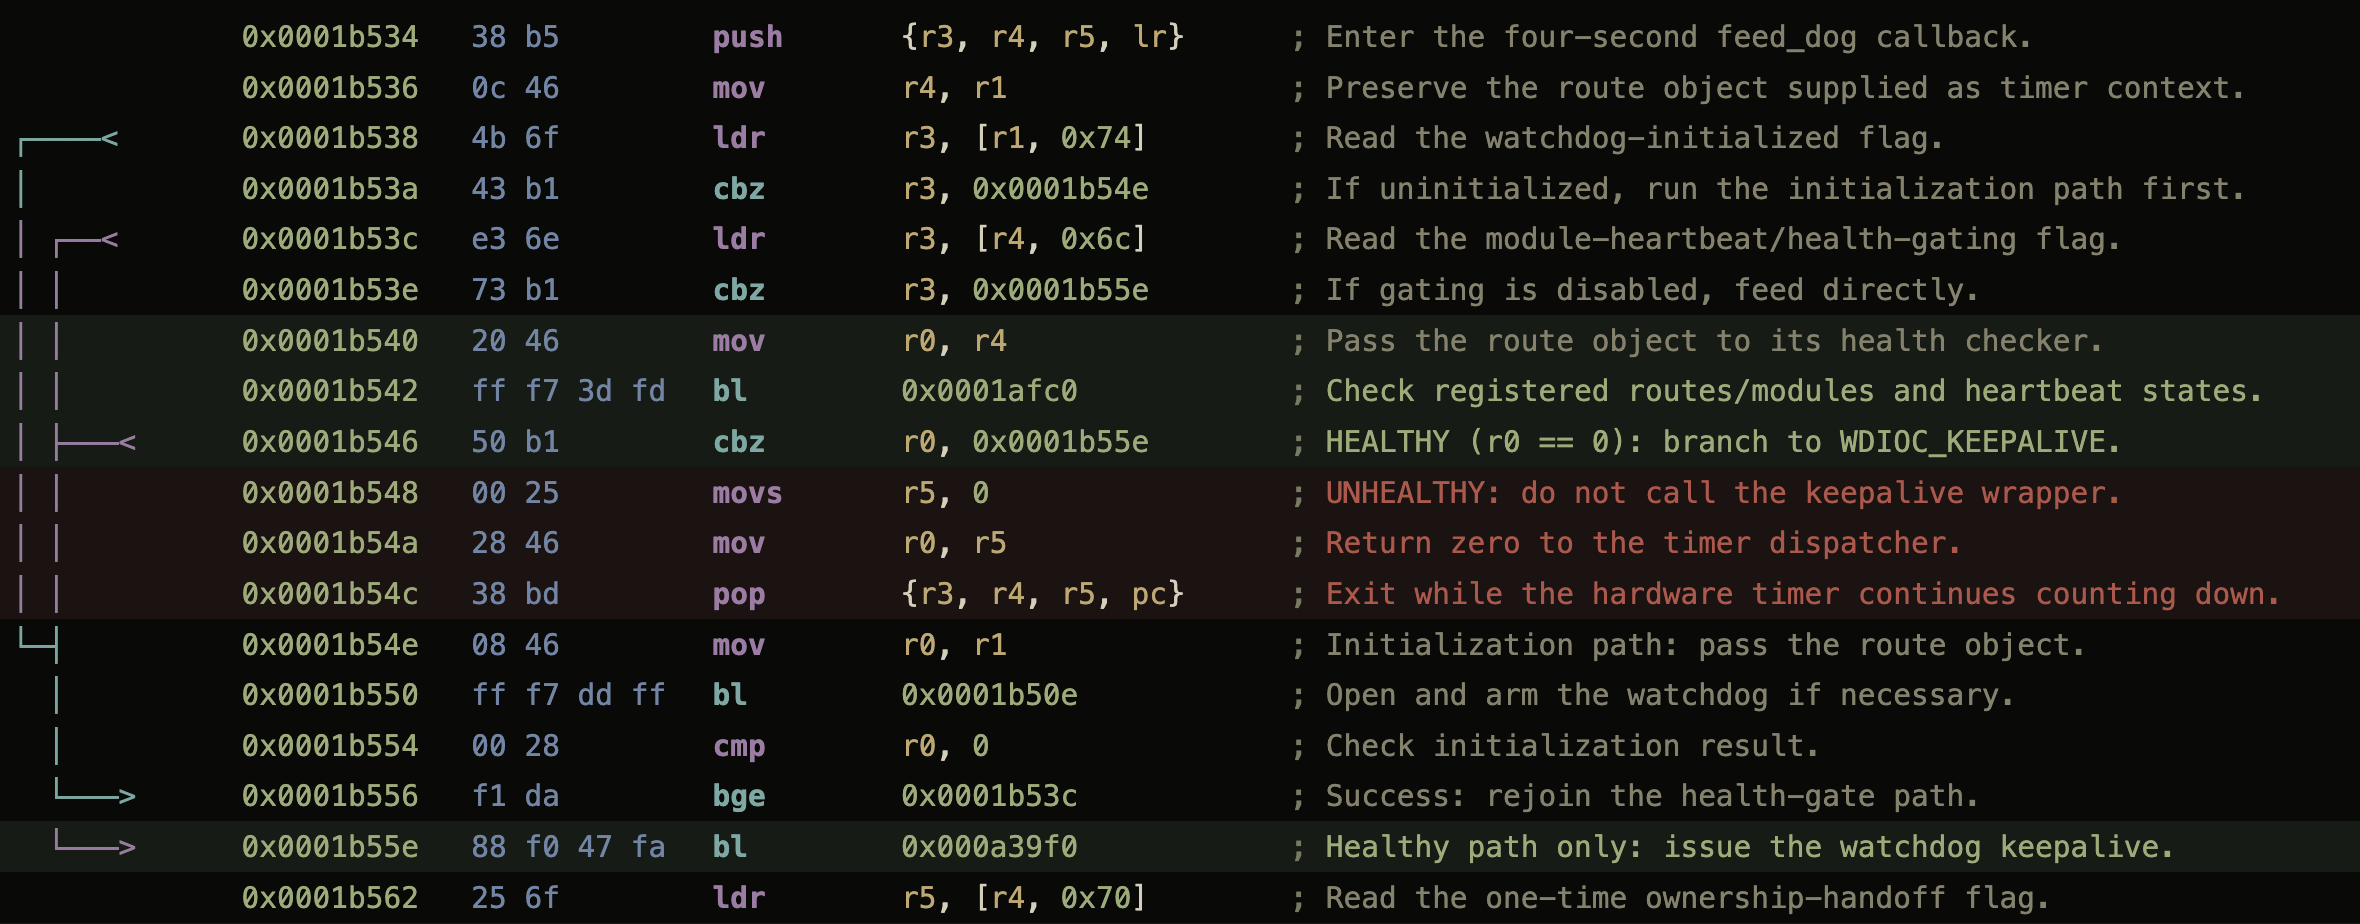
The timing matched. So I changed the read-only check to peek at memory without freezing anything, and now only the two operations that genuinely rewrite instructions pause the camera at all. The stopped threads disappeared from the logs.
The original reboot wiped its own logs, so I can’t prove the exact moment it missed that first heartbeat. But the timing lines up, the stopped threads are right there in the log, and it hasn’t happened again since I stopped freezing things.
The final boss was cleanup code. Sounds about right.
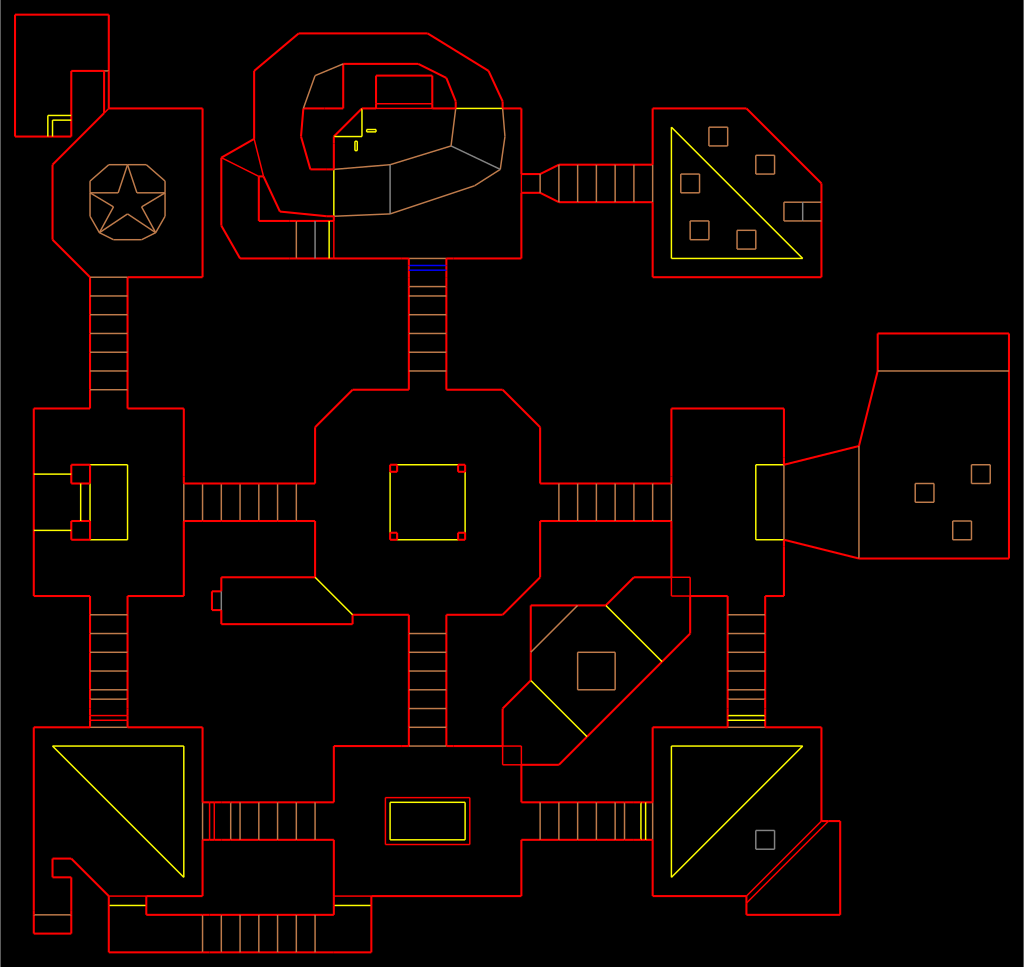
I originally packaged everything into a tidy read-only image on the SD card, which was lovely right up until every single test meant uploading the whole thing over my spotty Wi-Fi to change one file. So now it’s just a folder.
A tiny boot service starts the controller and the secret-code listener, and that’s all it does. It does not start Doom (that’s the point). The camera sits there armed, looking completely normal, until I press Start or enter the code on the control pad, and the game, the renderer, the music, and everything else genuinely don’t exist until I ask for demons. There’s no reason to make a security camera run Doom all day just because it can!
A firmware update also moved every address I’d carefully found, because apparently I didn’t have enough problems. Hard-coded offsets would have made this a one-firmware trick, so now the runtime finds everything it needs by pattern-matching the camera’s own code at startup, and if anything looks missing, duplicated, or generally wrong, it gives up before touching the camera. This does not magically preserve root through a firmware update, mind you. That’s a separate problem, and I’m still not covering it.
The service gets exactly one attempt at startup. If a firmware update broke something, it gives up and the camera stays a camera. No heroic restart loop.
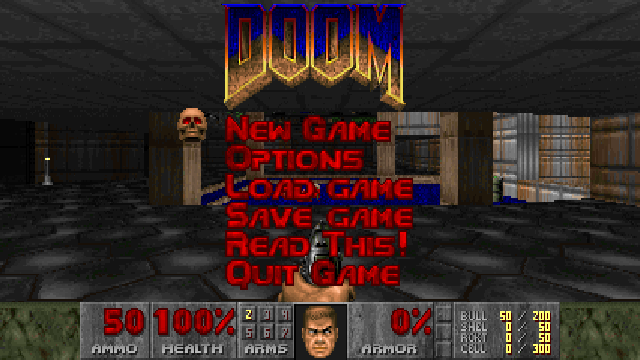
Quitting is the best part. The music cuts out, the original Doom death sound plays, and Doom melts away in columns while my actual kitchen appears underneath it.
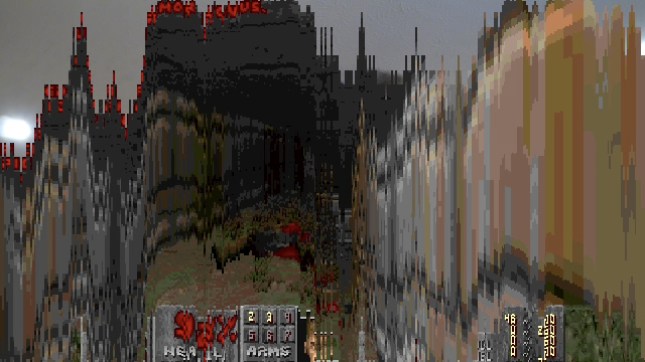
Then the microphone comes back, the game exits, and the control pad goes back to moving the camera like nothing happened. The controller page stays up, waiting for another bad idea.
So, can the E1 Zoom run E1 Doom?
Hell yeah it can! 🤘
It runs the real shareware Doom in the normal Reolink app, using the camera’s own video and audio encoders. It has music, sound effects, a control-pad Doom controller, a full keyboard controller on port 666, and a proper Doom melt back to my kitchen.
Video. Controls. Audio. DEMONS!
The patches are on GitHub: emrikol/e1-doom.
I have no idea what practical purpose any of this serves. Sigh.

This past weekend I did a thing:
One of the things that I had done, as previously blargged about here, is having a Pibooth Photo Booth.
I ended up writing three custom plugins that I’m going to share here. I had plenty of help from ChatGPT because I hate Python and it’s the worst language invented and it should be destroyed.
I also ended up hacking a bit of Pibooth core because its hook/plugin system was a bit lacking for my needs, but that was only around moving around some of the touchscreen UI items for a better user experience. But enough about that, here’s my three plugins:
One of the things I wanted to be able to easily do, running a keyboard/mouseless touchscreen Raspbery Pi was to be able to jump in and out of Fullscreen mode to do things like debug printers, change Wifi, etc. So I pulled this plugin out of the ether. It allows you to touch the top right corner (or click, if that’s your thing) to toggle between fullscreen and windowed mode.
import pygame
from pibooth import hookimpl
from pibooth.utils import LOGGER

__version__ = "0.0.1"

"""
Plugin to toggle fullscreen/windowed mode by tapping top right corner in take-a-picture screen.
"""

# Fractional region size
REGION_WIDTH_FRAC = 0.10  # 10% width
REGION_HEIGHT_FRAC = 0.10  # 10% height

@hookimpl
def state_wait_do(cfg, app, win, events):
    """
    In the wait state (take-a-picture), detect a tap/click in the top-right corner
    and toggle fullscreen mode.
    """
    # Only on the initial "take a picture" screen (wait state)
    # events: list of pygame events
    for ev in events:
        if ev.type in (pygame.MOUSEBUTTONUP, pygame.FINGERUP):
            # Determine click position
            if hasattr(ev, 'pos'):
                x, y = ev.pos
            else:
                sw, sh = win.surface.get_size()
                x, y = ev.x * sw, ev.y * sh
            sw, sh = win.surface.get_size()
            # Define top-right region
            region_x0 = sw * (1 - REGION_WIDTH_FRAC)
            region_y1 = sh * REGION_HEIGHT_FRAC
            if x >= region_x0 and y <= region_y1:
                # Toggle fullscreen
                try:
                    win.toggle_fullscreen()
                    LOGGER.info("[fullscreen_toggle] Toggled fullscreen mode")
                except Exception as e:
                    LOGGER.error(f"[fullscreen_toggle] Failed to toggle fullscreen: {e}")
                # Consume event
                return ev
# Return None to fall back to default behaviorCode language: Python (python)Well, yeah. Obvi! This plugin uploads the photos to your WordPress Media library, with an optional tag and optional post object to attach them to. It will also update the URL so that it works with the “QR Code” plugin (not mine, from Pihole or something, IDK). You just have to add some of the options to your Pihole config file, like the hostname, username, application password, etc.
import os
import http.client
import base64
import json
import pibooth
from pibooth.utils import LOGGER

__version__ = "0.0.4"

SECTION = 'WORDPRESS'
PICTURE_SECTION = 'PICTURE'

@pibooth.hookimpl
def pibooth_configure(cfg):
    """Declare the new configuration options"""
    cfg.add_option(SECTION, 'wordpress_host', '',
        "WordPress site host (e.g., 'yourwordpresssite.com')")
    cfg.add_option(SECTION, 'wordpress_username', '',
      "WordPress username")
    cfg.add_option(SECTION, 'wordpress_password', '',
        "WordPress application password")
    cfg.add_option(SECTION, 'wordpress_parent_id', '',
        "(Optional) WordPress post or page ID to attach the uploads",
        "Post or Page ID (optional)", '')
    cfg.add_option(SECTION, 'image_title', '',
        "(Optional) Title for the uploaded image",
        "Image title (optional)", '')
    cfg.add_option(SECTION, 'image_caption', '',
        "(Optional) Caption for the uploaded image",
        "Image caption (optional)", '')
    cfg.add_option(SECTION, 'wordpress_post_tag', '',
        "(Optional) Post tag taxonomy term slug to assign to the uploaded media",
        "Post tag (optional)", '')

@pibooth.hookimpl
def pibooth_startup(app, cfg):
    """Initialize the WordPress uploader plugin"""
    app.previous_picture_url = None
    wordpress_host = cfg.get(SECTION, 'wordpress_host')
    wordpress_username = cfg.get(SECTION, 'wordpress_username')
    wordpress_password = cfg.get(SECTION, 'wordpress_password')
    wordpress_parent_id = cfg.get(SECTION, 'wordpress_parent_id')
    wordpress_post_tag = cfg.get(SECTION, 'wordpress_post_tag')

    image_title = ''
    image_caption = ''

    if cfg.has_option(SECTION, 'image_title') and cfg.get(SECTION, 'image_title'):
        image_title = cfg.get(SECTION, 'image_title')
        LOGGER.info(f"Using image title from WORDPRESS config: {image_title}")
    elif cfg.has_option(PICTURE_SECTION, 'footer_text1') and cfg.get(PICTURE_SECTION, 'footer_text1'):
        image_title = cfg.get(PICTURE_SECTION, 'footer_text1')
        LOGGER.info(f"Using image title from GENERAL config: {image_title}")
    else:
        LOGGER.info("Image title missing!")

    if cfg.has_option(SECTION, 'image_caption') and cfg.get(SECTION, 'image_caption'):
        image_caption = cfg.get(SECTION, 'image_caption')
        LOGGER.info(f"Using image caption from WORDPRESS config: {image_caption}")
    elif cfg.has_option(PICTURE_SECTION, 'footer_text2') and cfg.get(PICTURE_SECTION, 'footer_text2'):
        image_caption = cfg.get(PICTURE_SECTION, 'footer_text2')
        LOGGER.info(f"Using image caption from GENERAL config: {image_caption}")
    else:
        LOGGER.info("Image caption missing!")

    if not wordpress_host:
        LOGGER.error(f"WordPress host not defined in [{SECTION}][wordpress_host], uploading deactivated")
    elif not wordpress_username:
        LOGGER.error(f"WordPress username not defined in [{SECTION}][wordpress_username], uploading deactivated")
    elif not wordpress_password:
        LOGGER.error(f"WordPress password not defined in [{SECTION}][wordpress_password], uploading deactivated")
    else:
        LOGGER.info("WordPress uploader plugin installed")
        app.wordpress_host = wordpress_host
        app.auth_token = base64.b64encode(f"{wordpress_username}:{wordpress_password}".encode()).decode()
        app.wordpress_parent_id = wordpress_parent_id if wordpress_parent_id else None
        app.wordpress_post_tag = wordpress_post_tag if wordpress_post_tag else None
        LOGGER.info(f"Post tag set to: {app.wordpress_post_tag}")
        app.image_title = image_title
        app.image_caption = image_caption

        LOGGER.info(f"Image title set to: {app.image_title}")
        LOGGER.info(f"Image caption set to: {app.image_caption}")

@pibooth.hookimpl
def state_processing_exit(app, cfg):
    """Upload picture to WordPress media library"""
    # Skip plugin if disabled in config
    # if not (cfg.has_section('CUSTOM_PROCESSING') and cfg.getboolean('CUSTOM_PROCESSING', 'enabled')):
    #    return

    if hasattr(app, 'wordpress_host') and hasattr(app, 'auth_token'):
        name = os.path.basename(app.previous_picture_file)

        with open(app.previous_picture_file, 'rb') as fp:
            image_data = fp.read()

        headers = {
            'Content-Disposition': f'attachment; filename={name}',
            'Content-Type': 'image/jpeg',
            'Authorization': f'Basic {app.auth_token}'
        }

        # Prepare the request path with an optional parent ID
        path = "/wp-json/wp/v2/media"
        if app.wordpress_parent_id:
            path += f"?parent={app.wordpress_parent_id}"

        conn = http.client.HTTPSConnection(app.wordpress_host)
        conn.request("POST", path, body=image_data, headers=headers)
        response = conn.getresponse()

        if response.status == 201:
            response_data = json.loads(response.read().decode())
            app.previous_picture_url = response_data['source_url']

            LOGGER.info(f"Uploaded image URL: {app.previous_picture_url}")

            # Set metadata if provided
            metadata = {}
            if app.image_title:
                metadata['title'] = app.image_title
            if app.image_caption:
                metadata['caption'] = app.image_caption
            if app.wordpress_post_tag:
                term_slug = app.wordpress_post_tag
                tag_headers = {
                    'Content-Type': 'application/json',
                    'Authorization': f'Basic {app.auth_token}'
                }
                # Try to fetch existing tag
                conn.request("GET", f"/wp-json/wp/v2/tags?slug={term_slug}", headers=tag_headers)
                tag_resp = conn.getresponse()
                if tag_resp.status == 200:
                    tags_list = json.loads(tag_resp.read().decode())
                    if tags_list:
                        tag_id = tags_list[0]['id']
                    else:
                        # Create the tag if not found
                        payload = json.dumps({'name': term_slug, 'slug': term_slug})
                        conn.request("POST", "/wp-json/wp/v2/tags", body=payload, headers=tag_headers)
                        create_resp = conn.getresponse()
                        if create_resp.status == 201:
                            tag_id = json.loads(create_resp.read().decode())['id']
                        else:
                            LOGGER.error(f"Failed to create tag {term_slug}. Status code: {create_resp.status}")
                            tag_id = None
                else:
                    LOGGER.error(f"Failed to fetch tag {term_slug}. Status code: {tag_resp.status}")
                    tag_id = None
                if tag_id:
                    metadata['tags'] = [tag_id]
                    LOGGER.info(f"Assigning tag ID {tag_id} to attachment")

            LOGGER.info(f"Metadata to be set: {metadata}")

            if metadata:
                meta_headers = {
                    'Content-Type': 'application/json',
                    'Authorization': f'Basic {app.auth_token}'
                }
                conn.request("POST", f"/wp-json/wp/v2/media/{response_data['id']}", body=json.dumps(metadata), headers=meta_headers)
                meta_response = conn.getresponse()
                if meta_response.status != 200:
                    LOGGER.error(f"Failed to set metadata. Status code: {meta_response.status}, Response: {meta_response.read().decode()}")

            LOGGER.info(f"Successfully uploaded {name} to WordPress. URL: {app.previous_picture_url}")
        else:
            LOGGER.error(f"Failed to upload {name}. Status code: {response.status}, Response: {response.read().decode()}")

        conn.close()

@pibooth.hookimpl
def pibooth_cleanup(app):
    """Cleanup actions if necessary"""
passCode language: Python (python)Finally, I didn’t like the generic “PROCESSING” screen that happened. I wanted it to be more personal, so I rebuilt it so that it shows the last three images taken, along with a custom waiting message taken from an array:
#!/usr/bin/env python3
"""
custom_processing.py

A PiBooth plugin that, during the 'processing' state, grabs the last
three saved pictures from your output directory and shows them as thumbnails.
"""
import os
import glob
import pygame
import pibooth
from pibooth.utils import LOGGER
from pibooth.view import background
from pibooth import pictures
import random
from pibooth import fonts

__version__ = "0.0.1"

# A list of fun processing messages
PROCESSING_SAYINGS = [
    "Processing…",
    "Shaking it like a Polaroid picture",
    "Now developing…",
    "Cooking your memories",
    "Almost ready!",
    "Frame by frame…",
    "Developing brilliance…",
    "Hang tight, magic in progress…",
    "Give us a sec, art is brewing…",
    "Hold on, pixels aligning…",
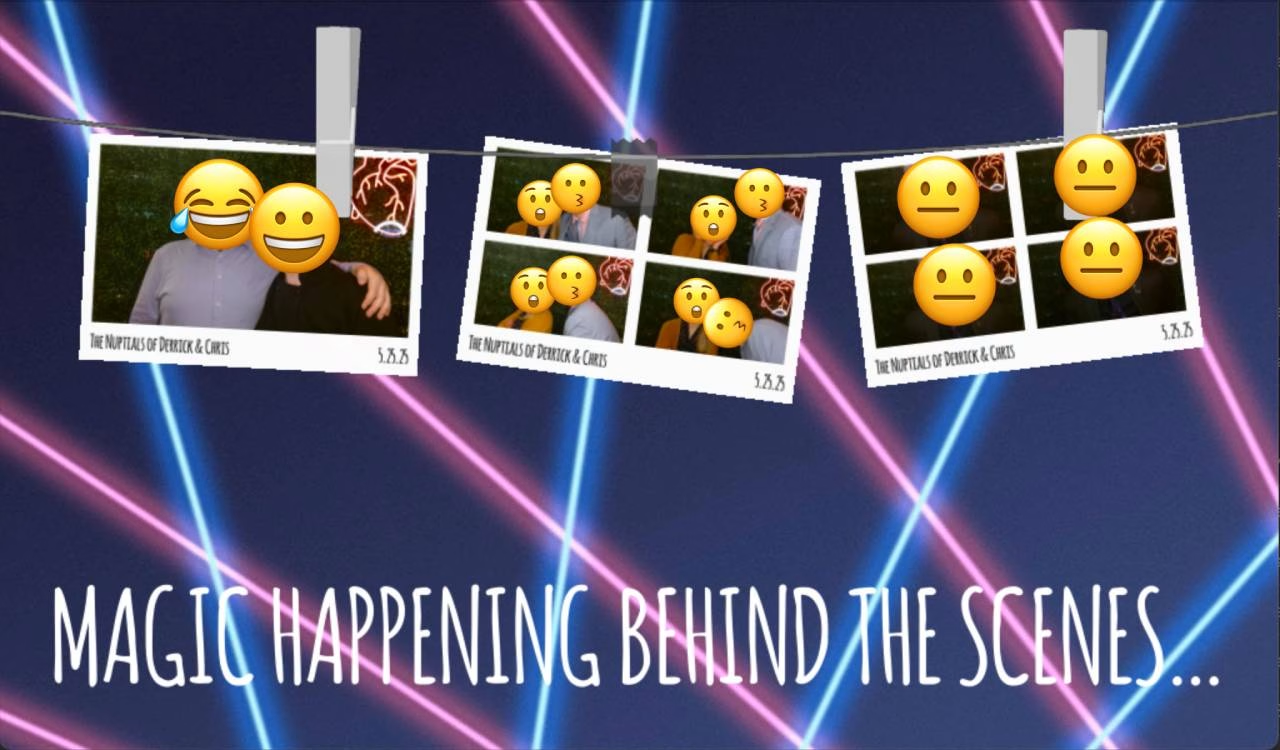
    "Magic happening behind the scenes…",
    "One moment please…",
    "Crafting your memories…",
    "Almost there, thanks for your patience…",
    "Don’t blink, or you might miss it…",
    "Your masterpiece is on its way…",
]

@pibooth.hookimpl(trylast=True)
def state_processing_enter(cfg, app, win):
    """
    When entering the 'processing' screen, list the output folder,
    pick the 3 newest image files, and render them as thumbnails.
    """

    # 1) Determine your output directory (default: ~/Pictures/pibooth)
    outdir = os.path.expanduser(cfg.get('PATHS', 'output_dir') if
                                cfg.has_option('PATHS', 'output_dir') else
                                '~/Pictures/pibooth')
    LOGGER.info(f"[custom_processing] Scanning directory: {outdir}")

    # 2) Glob all image files (you can tweak extensions as needed)
    exts = ('*.jpg', '*.jpeg', '*.png', '*.avif')
    files = []
    for ext in exts:
        files.extend(glob.glob(os.path.join(outdir, ext)))
    if not files:
        LOGGER.info("[custom_processing] No files found in output dir")
        return

    # 3) Sort by modification time and pick the last three
    files.sort(key=lambda f: os.path.getmtime(f))
    thumbs = files[-3:]
    LOGGER.info(f"[custom_processing] Last 3 files: {thumbs}")

    # 4) Load, scale and display as before
    surface = win.surface
    # Redraw PiBooth’s default processing background
    win._update_background(background.Background(''))

    sw, sh = surface.get_size()
    thumb_h = int(sh * 0.3)
    scaled = []
    for path in thumbs:
        try:
            # Load with alpha so we can mask out black
            img = pygame.image.load(path).convert_alpha()
            ow, oh = img.get_size()
            tw = int(ow * thumb_h / oh)
            img = pygame.transform.smoothscale(img, (tw, thumb_h))

            # Make pure black transparent (so border and photo remain)
            img.set_colorkey((0, 0, 0))

            scaled.append(img)
            LOGGER.info(f"[custom_processing] Loaded & scaled {os.path.basename(path)} → {(tw, thumb_h)}")
        except Exception as e:
            LOGGER.error(f"[custom_processing] Failed to load {path}: {e}")

    if not scaled:
        LOGGER.info("[custom_processing] No thumbnails rendered")
        return

    # 5) Blit and rotate thumbnails into the hanging frames with random tilt
    # Percent‐based anchor points so they adjust on resize:
    frame_positions = [
        (int(sw * 0.20), int(sh * 0.34)),  # left (moved up to 40% height)
        (int(sw * 0.50), int(sh * 0.36)),  # center (35% height)
        (int(sw * 0.80), int(sh * 0.34)),  # right (40% height)
    ]
    for img, (cx, cy) in zip(scaled, frame_positions):
        # Random rotation between -10° and +10°
        angle = random.uniform(-10, 10)
        rot_img = pygame.transform.rotozoom(img, angle, 1.0)
        rw, rh = rot_img.get_size()
        # Center the rotated thumbnail on its anchor point
        surface.blit(rot_img, (cx - rw // 2, cy - rh // 2))

    # Draw the transparent custom processing template over the thumbnails
    custom_bg = os.path.expanduser("~/.config/pibooth/assets/processing_custom.png")
    try:
        # Load with alpha to preserve transparency
        overlay_img = pygame.image.load(custom_bg).convert_alpha()
        # Scale to cover the full window
        overlay_img = pygame.transform.smoothscale(overlay_img, (sw, sh))
        # Blit on top of thumbnails
        surface.blit(overlay_img, (0, 0))
    except Exception as e:
        LOGGER.error(f"[custom_processing] Failed to load processing_custom overlay '{custom_bg}': {e}")

    # Pick and uppercase a random processing message
    say = random.choice(PROCESSING_SAYINGS).upper()
    # Define the bottom third with 5% side padding
    bottom_rect = pygame.Rect(
        int(sw * 0.05),
        int(sh * 2/3),
        int(sw * 0.9),
        int(sh / 3)
    )
    # Choose a font that fits in that rectangle
    font = fonts.get_pygame_font(
        say,
        fonts.CURRENT,
        bottom_rect.width,
        bottom_rect.height
    )
    # Render the text in the window's text color
    text_color = cfg.gettuple('WINDOW', 'text_color', int)
    text_surf = font.render(say, True, text_color)
    # Center the message within the bottom third
    text_rect = text_surf.get_rect(center=bottom_rect.center)
    surface.blit(text_surf, text_rect)

    pygame.display.update()
    LOGGER.info("[custom_processing] Thumbnails hung with rotation")Code language: PHP (php)
This is what it ends up looking like, anonymized:
So yeah, use at your own risk. I don’t offer any support. Assume it will break things and burn down your house. I am not a professional. Don’t trust Python.
Farewell!
I have an upcoming need for a photo booth next year 😏 so I started looking into some options to DIY rather than rent one or buy a pre-made version.
The option I’m trying out right now is Pibooth, “A photobooth application out-of-the-box in pure Python.”
I’m going to set this up with an extra Raspberry Pi 400 I have that’s not doing anything, and see what we can do. Feel free to follow along!
Since Pibooth only works on Raspbian Buster right now, I had to download an older version at https://downloads.raspberrypi.org/raspios_arm64/images/raspios_arm64-2021-05-28/
I set up a few defaults I like to have for my Pis:
# Updates, new software, and cleanup
sudo apt update && sudo apt upgrade
sudo apt install mc screen ack zsh locate git htop cockpit -y
sudo apt autoremove

# Add dotfile customizations. Sorry, it's currently private :D
git clone git@github.com:emrikol/dotfiles.git
cp -r ~/dotfiles/. ~/
sudo usermod --shell /bin/zsh derrick
zsh

# Set up root access so I can SCP in from Transmit if I need to.
sudo sed -i 's/#PermitRootLogin prohibit-password/PermitRootLogin yes/' /etc/ssh/sshd_config
sudo passwd root

# Customize Raspberry Pi settings.
sudo raspi-configCode language: Bash (bash)
After installing cockpit I believe, I had an issue where the MAC address of my Wifi kept changing randomly on each reboot. I had to follow these instructions and add this to my /etc/NetworkManager/NetworkManager.conf:
[device]
wifi.scan-rand-mac-address=no
Disable Swap to save on SD Card wear:
sudo dphys-swapfile swapoff
sudo dphys-swapfile uninstall
sudo update-rc.d dphys-swapfile remove
sudo apt purge dphys-swapfile -y
sudo sysctl -w vm.swappiness=0Code language: Bash (bash)
Install Log2RAM for the same reason:
echo "deb [signed-by=/usr/share/keyrings/azlux-archive-keyring.gpg] http://packages.azlux.fr/debian/ bookworm main" | sudo tee /etc/apt/sources.list.d/azlux.list
sudo wget -O /usr/share/keyrings/azlux-archive-keyring.gpg  https://azlux.fr/repo.gpg
sudo apt update
sudo apt install log2ram
sudo sed -i 's/SIZE=40M/SIZE=64M/' /etc/log2ram.conf
sudo sed -i 's/#SystemMaxUse=/SystemMaxUse=32M/' /etc/systemd/journald.conf
sudo systemctl restart systemd-journald
Code language: Bash (bash)
From here, we should have my default “base” Raspberry Pi setup. And now, we can work on figuring out how to install Pibooth. According to the install docs, we need to run a few commands:
$ sudo apt install "libsdl2-*"
Reading package lists... Done
Building dependency tree
Reading state information... Done
Note, selecting 'libsdl2-mixer-dev' for glob 'libsdl2-*'
Note, selecting 'libsdl2-image-dev' for glob 'libsdl2-*'
Note, selecting 'libsdl2-gfx-dev' for glob 'libsdl2-*'
Note, selecting 'libsdl2-gfx-doc' for glob 'libsdl2-*'
Note, selecting 'libsdl2-mixer-2.0-0' for glob 'libsdl2-*'
Note, selecting 'libsdl2-dbg:armhf' for glob 'libsdl2-*'
Note, selecting 'libsdl2-dev' for glob 'libsdl2-*'
Note, selecting 'libsdl2-doc' for glob 'libsdl2-*'
Note, selecting 'libsdl2-ttf-dev' for glob 'libsdl2-*'
Note, selecting 'libsdl2-net-2.0-0' for glob 'libsdl2-*'
Note, selecting 'libsdl2-net-dev' for glob 'libsdl2-*'
Note, selecting 'libsdl2-image-2.0-0' for glob 'libsdl2-*'
Note, selecting 'libsdl2-2.0-0-dbgsym:armhf' for glob 'libsdl2-*'
Note, selecting 'libsdl2-2.0-0' for glob 'libsdl2-*'
Note, selecting 'libsdl2-gfx-1.0-0' for glob 'libsdl2-*'
Note, selecting 'libsdl2-ttf-2.0-0' for glob 'libsdl2-*'
libsdl2-2.0-0 is already the newest version (2.0.9+dfsg1-1+deb10u1).
libsdl2-2.0-0 set to manually installed.
Some packages could not be installed. This may mean that you have
requested an impossible situation or if you are using the unstable
distribution that some required packages have not yet been created
or been moved out of Incoming.
The following information may help to resolve the situation:

The following packages have unmet dependencies:
 libsdl2-2.0-0-dbgsym:armhf : Depends: libsdl2-2.0-0:armhf (= 2.0.9+dfsg1-1+rpt1) but it is not going to be installed
E: Unable to correct problems, you have held broken packages.Code language: JavaScript (javascript)
Meh. Okay. Let’s just install all of them but the trouble package. Hopefully that won’t come back to bite us.
sudo apt install libsdl2-mixer-dev libsdl2-image-dev libsdl2-gfx-dev libsdl2-gfx-doc libsdl2-mixer-2.0-0 libsdl2-dev libsdl2-doc libsdl2-ttf-dev libsdl2-net-2.0-0 libsdl2-net-dev libsdl2-image-2.0-0 libsdl2-2.0-0 libsdl2-gfx-1.0-0 libsdl2-ttf-2.0-0 -yCode language: Bash (bash)We did not install libsdl2-dbg and libsdl2-2.0-0-dbgsym
I’m thinking about adding printer support, so I’ll go ahead and install CUPS: sudo apt-get install cups libcups2-dev
And we might as well install OpenCV sudo apt-get install python3-opencv
Installing gphoto2:
cd ~
git clone https://github.com/gonzalo/gphoto2-updater
cd gphoto2-updater
sudo ./gphoto2-updater.shCode language: Bash (bash)
Now for pibooth: pip3 install "pibooth[dslr,printer]"
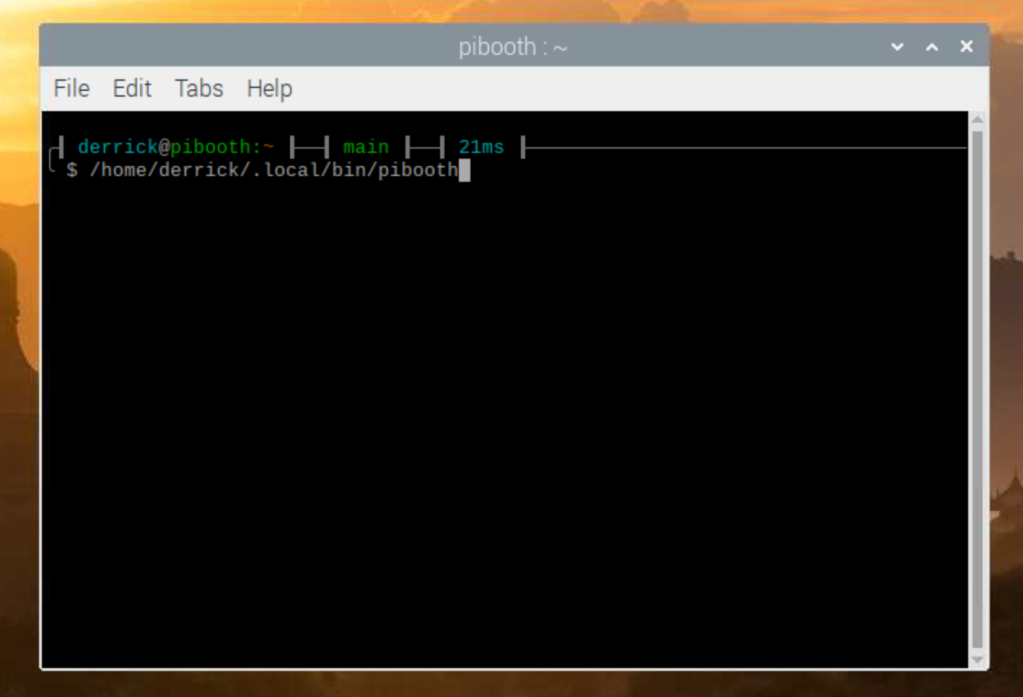
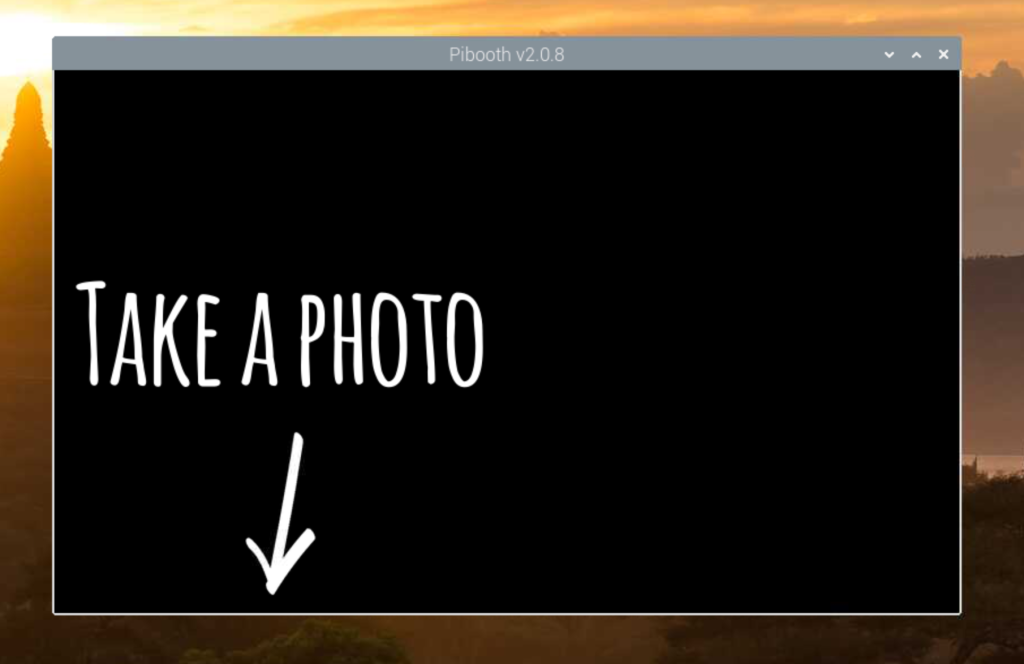
Aww yeah! Success!
Now all I need to do is customize it. Maybe we’ll have another post at a later time.

I have a new favorite WordPress plugin that I’ve just installed on my site:
This plugin, by Stefan Bohacek, adds a notice to your site whenever a visitor comes that does not have an ad blocker installed:

Using an ad blocker isn’t just about security and privacy, it also helps conserve your precious bandwidth. By blocking resource-intensive ads, it improves the loading speed of websites and saves you time.
Additionally, an ad blocker protects your information from being harvested by advertisers, giving some peace of mind while browsing the web.
You’ll also cut your “web carbon footprint” to a fraction of itself! Ugh, what a parasitic industry.
My favorite is uBlock Origin, but I also love Pi-Hole for network-level blocking <3
I’ve had a few snippets in my .zshrc file for a while now that will output how long a command takes to process.
First off, I’d like to say that I did not come up with this idea, and I didn’t really write the code. I’ve snipped it from somewhere and modified it over time, so I am very sorry to the original author for not being able to give full credit. I didn’t save where I got it from–so if anyone comes across this in the future and might know where the idea came from, drop it in the comments.
Now, on to the fun:

The original script only went down to the second, but I wanted more granularity than that, so I went down to the millisecond.
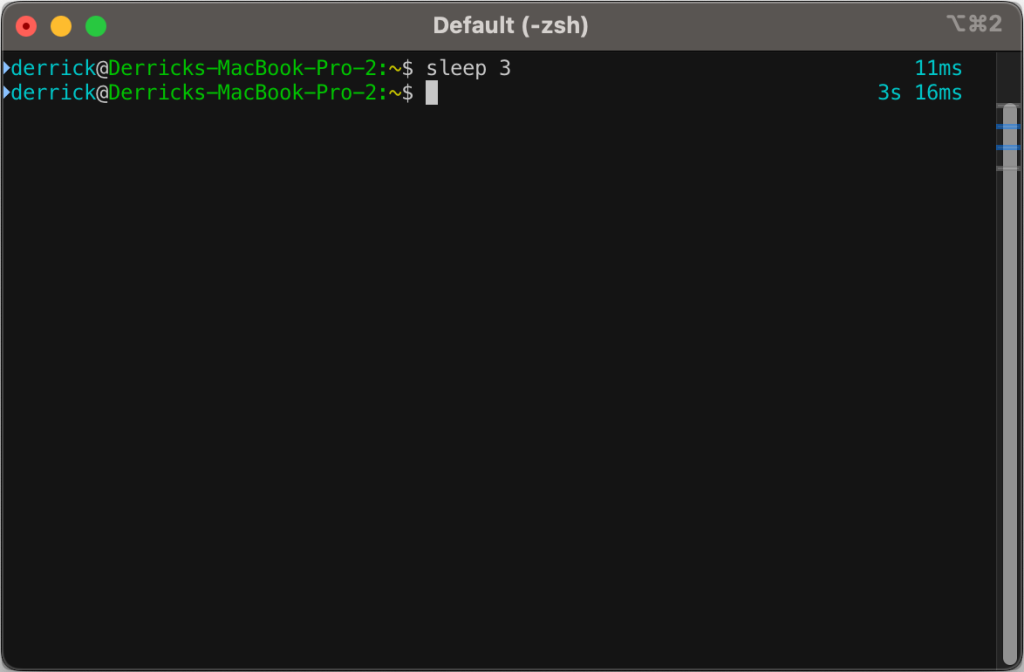
You’ll likely need to install gdate (brew install gdate) for this to work properly.
The code (added to ~/.zshrc):
function preexec() {
	timer=$(($(gdate +%s%0N)/1000000))
}

function precmd() {
	if [ "$timer" ]; then
		now=$(($(gdate +%s%0N)/1000000))
		elapsed=$now-$timer

		reset_color=$'\e[00m'
		RPROMPT="%F{cyan} $(converts "$elapsed") %{$reset_color%}"
		export RPROMPT
		unset timer
	fi
}

converts() {
	local t=$1

	local d=$((t/1000/60/60/24))
	local h=$((t/1000/60/60%24))
	local m=$((t/100/60%60))
	local s=$((t/1000%60))
	local ms=$((t%1000))

	if [[ $d -gt 0 ]]; then
			echo -n " ${d}d"
	fi
	if [[ $h -gt 0 ]]; then
			echo -n " ${h}h"
	fi
	if [[ $m -gt 0 ]]; then
			echo -n " ${m}m"
	fi
	if [[ $s -gt 0 ]]; then
		echo -n " ${s}s"
	fi
	if [[ $ms -gt 0 ]]; then
		echo -n " ${ms}ms"
	fi
	echo
}Code language: PHP (php)
OpenAI recently introduced a new feature called Outpainting to Dall-E 2
This lets you easily expand your image without manual labor intensive hacks.
With this, I decided to do a quick run through to see what’s on the other side of Bliss
Now, I probably could have gotten something a lot better if I’d taken my time and adjusted my prompt, but this is good for a fun experiment:
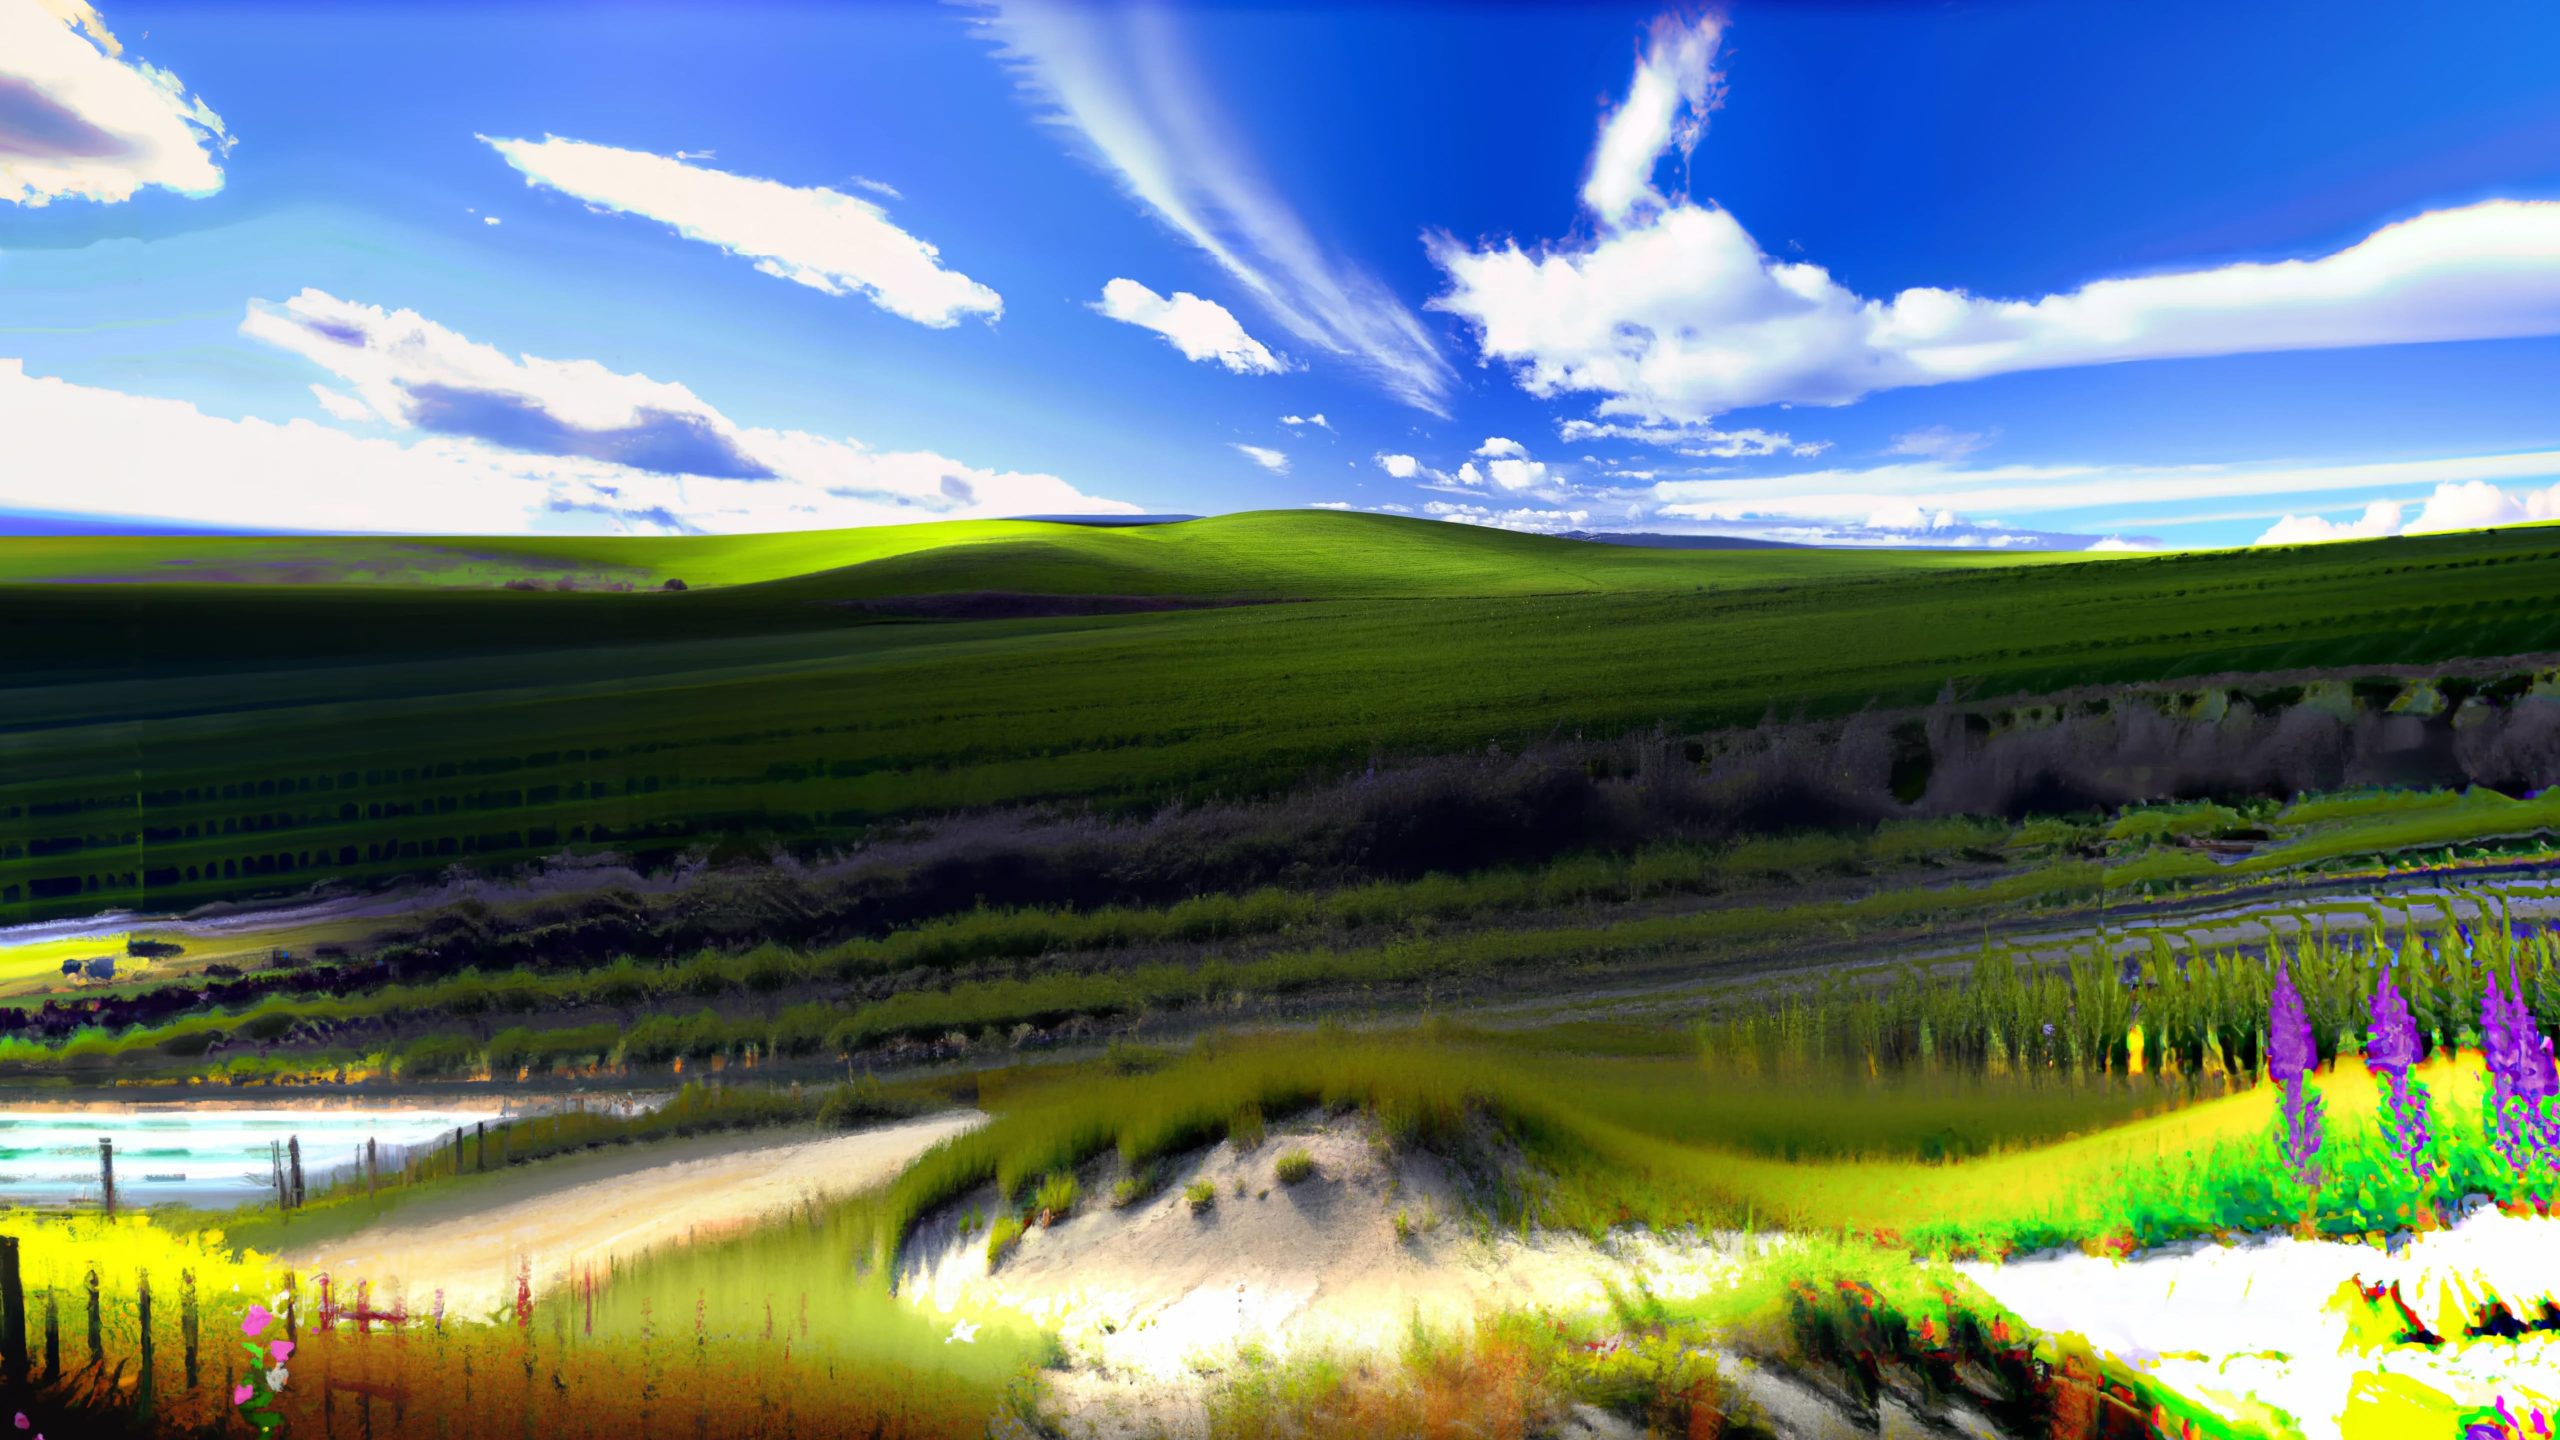
Feel free to download the raw file straight from DALL-E 2 if you’d like to do anything with it:

I’m running something on my Raspberry Pi server that’s got a memory leak. I think it’s related to my Software Defined Radio (more on that another day), but I’m too lazy to actually track it down and fix it, so I’ve implemented the below hack to just restart my server when memory gets too low.
#!/bin/bash
FREE_SWAP=$(free | grep Swap | awk '{print $4/$2 * 100.0}')
FREE_MEM=$(free | grep Mem | awk '{print $7/$2 * 100.0}')

if [ -t 1 ]; then
        echo "Free mem: ${FREE_MEM}%, Free swap: ${FREE_SWAP}%"
fi

if [ 1 -gt "${FREE_SWAP%.*}" ]; then
        echo "[$(date)] SWAP IS TOO LOW! AT $FREE_SWAP, CHECKING MEM"
        if [ 5 -gt "${FREE_MEM%.*}" ]; then
                echo "[$(date)] SWAP IS TOO LOW! AT $FREE_SWAP, MEM IS TOO LOW, AT $FREE_MEM -- RESTARTING"
                reboot
        fi
fi

if [ 1 -gt "${FREE_MEM%.*}" ]; then
        echo "[$(date)] MEM IS TOO LOW! AT $FREE_MEM -- RESTARTING"
        reboot
fiCode language: PHP (php)
If the free swap memory gets below 1%, we check physical memory. If physical memory is below 5%, we reboot.
We also do a general check on physical memory, and if it ever gets below 1%, we reboot.
So far, this has been working out well. I’ve thrown it in a cron to run every five minutes:
# Check memory every five minutes and reboot if too low
*/5 * * * * /usr/local/bin/memcheck >> /var/log/memcheck.logCode language: PHP (php)
You can see, checking my log, the number of times it’s saved my butt from having to fix a frozen machine:
$ cat /var/log/memcheck.log | ack RESTARTING
[Mon Feb  7 03:20:02 UTC 2022] SWAP IS TOO LOW! AT 0, MEM IS TOO LOW, AT 4.44943 -- RESTARTING
[Tue Feb 15 03:15:33 UTC 2022] SWAP IS TOO LOW! AT 0, MEM IS TOO LOW, AT 3.79613 -- RESTARTING
[Mon Feb 21 14:30:01 UTC 2022] SWAP IS TOO LOW! AT 0, MEM IS TOO LOW, AT 2.31316 -- RESTARTING
[Sun Feb 27 01:40:01 UTC 2022] SWAP IS TOO LOW! AT 0, MEM IS TOO LOW, AT 4.02053 -- RESTARTING
[Mon Mar  7 00:05:01 UTC 2022] SWAP IS TOO LOW! AT 0, MEM IS TOO LOW, AT 4.95096 -- RESTARTING
[Wed Mar  9 00:55:01 UTC 2022] SWAP IS TOO LOW! AT 0, MEM IS TOO LOW, AT 4.81816 -- RESTARTING
[Wed Mar  9 17:50:02 UTC 2022] SWAP IS TOO LOW! AT 0, MEM IS TOO LOW, AT 4.72946 -- RESTARTING
[Tue Mar 15 04:10:01 UTC 2022] SWAP IS TOO LOW! AT 0, MEM IS TOO LOW, AT 4.79014 -- RESTARTING
[Sun Mar 20 16:20:01 UTC 2022] SWAP IS TOO LOW! AT 0, MEM IS TOO LOW, AT 4.95519 -- RESTARTING
[Fri Mar 25 14:10:02 UTC 2022] SWAP IS TOO LOW! AT 0, MEM IS TOO LOW, AT 4.98074 -- RESTARTING
[Tue Mar 29 15:05:01 UTC 2022] SWAP IS TOO LOW! AT 0, MEM IS TOO LOW, AT 1.63566 -- RESTARTING
[Tue Apr  5 16:55:01 UTC 2022] SWAP IS TOO LOW! AT 0, MEM IS TOO LOW, AT 4.44242 -- RESTARTING
[Fri Apr  8 01:40:55 UTC 2022] SWAP IS TOO LOW! AT 0, MEM IS TOO LOW, AT 1.23014 -- RESTARTING
[Fri Apr  8 01:56:41 UTC 2022] SWAP IS TOO LOW! AT 0, MEM IS TOO LOW, AT 1.00451 -- RESTARTING
[Mon Apr 11 03:15:02 UTC 2022] SWAP IS TOO LOW! AT 0, MEM IS TOO LOW, AT 3.76512 -- RESTARTING
[Thu Apr 14 17:45:03 UTC 2022] SWAP IS TOO LOW! AT 0, MEM IS TOO LOW, AT 2.02634 -- RESTARTING
[Wed Apr 27 17:15:02 UTC 2022] SWAP IS TOO LOW! AT 0, MEM IS TOO LOW, AT 4.55957 -- RESTARTING
[Fri Apr 29 14:55:02 UTC 2022] SWAP IS TOO LOW! AT 0, MEM IS TOO LOW, AT 3.96232 -- RESTARTING
[Mon May  2 11:00:02 UTC 2022] SWAP IS TOO LOW! AT 0, MEM IS TOO LOW, AT 2.62884 -- RESTARTING
[Sat May  7 11:50:01 UTC 2022] SWAP IS TOO LOW! AT 0, MEM IS TOO LOW, AT 4.97909 -- RESTARTING
[Wed May 11 08:00:02 UTC 2022] SWAP IS TOO LOW! AT 0, MEM IS TOO LOW, AT 4.83372 -- RESTARTING
[Tue May 31 15:00:02 UTC 2022] SWAP IS TOO LOW! AT 0, MEM IS TOO LOW, AT 3.5021 -- RESTARTING
[Thu Jun 16 00:20:02 UTC 2022] SWAP IS TOO LOW! AT 0, MEM IS TOO LOW, AT 2.98098 -- RESTARTING
[Tue Jul  5 16:10:08 UTC 2022] SWAP IS TOO LOW! AT 0.0030518, MEM IS TOO LOW, AT 4.10944 -- RESTARTING
[Tue Aug  9 04:10:20 UTC 2022] SWAP IS TOO LOW! AT 0, MEM IS TOO LOW, AT 3.11883 -- RESTARTING
[Wed Aug 17 14:45:03 UTC 2022] SWAP IS TOO LOW! AT 0, MEM IS TOO LOW, AT 4.20299 -- RESTARTINGCode language: JavaScript (javascript)